
Docker Build and Buildx best practices for optimized builds
There was a time someone asked me why their Docker builds took so long and why the images were so large. It’s a question I still hear often, especially from developers starting with containers.
Docker build is the foundation of creating container images and bundling your application with everything it needs to run. But there’s more to bundling than just running commands. With tools like Buildx and BuildKit, you can speed up the process, reduce image sizes, and make builds much more predictable. Let’s talk about how you can get the most out of your builds.
You can build directly from a custom Dockerfile on Northflank, with:
- BuildKit caching enabled by default
- Option to deploy from Git or a container registry
- Access to logs, build history, and environment variables
- Configuration for CPU, memory, and number of instances
- Support for both managed and BYOC infrastructure
Try it out by starting for free and go from Dockerfile to deployment in minutes.
I remember someone once saying, “I run docker build, but I don’t really know what happens under the hood.” That comes up a lot in conversations about containers.
At its core, the docker build takes a set of instructions from a Dockerfile and turns them into an image. That image is what your container runs. Every time you run docker build, the docker build command reads the Dockerfile, processes each step, and creates a docker build image that includes everything your application needs. This includes your code, dependencies, and system libraries.
This image is not just a single block of data. It is built in layers, with each step in the Dockerfile adding a new layer. These layers help with caching, which speeds up future builds by reusing unchanged parts instead of starting from scratch. Writing a good Dockerfile matters because it affects how fast your builds run and how much space your images take up.
Now that we know what happens when you run docker build, let’s talk about what happens when you need something faster, more flexible, or built for multiple platforms.
At some point, most developers run into the limits of the standard docker build command. Maybe you need to build images for different architectures, or you want faster builds with better caching. Docker buildx and BuildKit make that possible by extending the build process with more advanced features.
The biggest difference between docker build and docker buildx is flexibility. Buildx allows you to create multi-platform images, run parallel builds, and take advantage of BuildKit’s improved caching. If you have ever waited too long for an image to build or struggled with caching, BuildKit changes that by making builds more predictable and reusable.
BuildKit processes layers more intelligently, and caching works better across builds. Instead of repeating the same steps every time, BuildKit skips what has not changed. This means faster builds and smaller images, which is a big deal when working with containers at scale.
Since docker buildx and BuildKit add more flexibility to the build process, let’s look at how to make builds faster, more reliable, and easier to manage.
A slow build or a large image is usually a sign that something can be done differently. The way a Dockerfile is written affects how fast the image builds, how much caching is used, and how much space the final image takes up. A few small changes can change how builds run. Let’s see how:
Each command in a Dockerfile creates a new layer. The order of these layers matters because Docker caches them. If nothing changes in a layer, Docker reuses the cached version instead of rebuilding it. This is why commands that change often, like adding application code, should be placed later in the file. The base layers, which include dependencies and system packages, should come first so they do not get rebuilt every time.
A docker multi-stage build helps remove unnecessary files by splitting the build process into multiple steps. The first stage includes everything needed to compile the application, while the final image only keeps the file required to run it. This reduces the image size without affecting how the application works.
Here is an example for a Go application:
# First stage: Build the application
FROM golang:1.19 AS builder
WORKDIR /app
COPY . .
RUN go build -o myapp

# Second stage: Create a lightweight runtime image
FROM alpine:latest
WORKDIR /root/
COPY --from=builder /app/myapp .
CMD ["./myapp"]
The first stage compiles the application, but the final image only includes the binary, making it much smaller.
Using docker build no cache can force a full rebuild, but in most cases, caching should be used instead. Installing dependencies before copying application code helps keep the cache useful since package installations do not need to be repeated if nothing has changed.
A better way to structure a Node.js Dockerfile looks like this:
FROM node:20
WORKDIR /app

# Install dependencies first
COPY package.json package-lock.json ./
RUN npm install

# Copy the rest of the application
COPY . .
CMD ["node", "server.js"]
Since dependencies are copied first, they will not be reinstalled unless package.json changes. This saves time and keeps builds predictable.
Writing a Dockerfile with docker build best practices helps keep images smaller and builds faster. There are still a few more ways to make Dockerfiles smaller, cleaner, and easier to work with. Let’s go over some practical ways to optimize them.
Some Docker images take longer to build than they should, and some are larger than necessary. A few adjustments in a Dockerfile can fix that while keeping everything easier to maintain. Let’s look at some ways to make builds more predictable and images as small as possible.
The base image affects both build speed and image size. A full OS image like ubuntu comes with extra tools that are rarely needed, while a smaller alternative like alpine keeps things minimal.
Using a smaller base image reduces unnecessary files and makes images easier to work with. For example, instead of using the full Node.js image, switching to an Alpine-based version cuts down on extra system utilities:
# Instead of this
FROM node:20

# Use a smaller base image
FROM node:20-alpine
For other languages, many official images have -slim or -alpine versions that remove files that are not needed for running applications.
Each command in a Dockerfile creates a new layer in the final image. Too many layers slow down builds and take up more space. Instead of writing separate RUN commands for each step, combining them into one keeps the image cleaner.
For example, when installing dependencies, running separate commands creates extra layers:
# Each RUN creates a new layer
RUN apt-get update
RUN apt-get install -y curl
RUN apt-get clean
Combining them into a single command avoids unnecessary layers and removes temporary files that do not need to be stored in the final image:
RUN apt-get update && apt-get install -y curl && rm -rf /var/lib/apt/lists/*Copying an entire project directory into an image is easy, but it often brings in files that are not required. A .dockerignore file prevents this by blocking files that do not need to be in the build.
A typical .dockerignore file might look like this:
**node_modules
.git
.env**A microservice is a self-contained service that handles a specific function within a larger system. Instead of one big application handling everything, microservices break tasks into smaller services that communicate over a network.
In this example, we’ll containerize a User Service, a simple microservice that provides user data through an API. A real-world system might have multiple services, like an Auth Service for logins, a Payments Service for processing transactions, and more.
This microservice will:
- Provide user data through an API.
- Run inside a container.
- Communicate with other services using a Docker network.
To follow along, make sure you have:
- Docker installed: Download it from Docker’s official site.
- Node.js installed: Get it from Node.js official site.
- A terminal or command prompt: Any shell that supports Docker commands will work.
Let’s start by creating the User Service. This service will expose an API that returns a list of users. First, create a new project directory and initialize a Node.js application:
mkdir user-service && cd user-service
npm init -y
Next, install Express to handle API requests:
npm install expressNow, create an index.js file for the microservice:
const express = require('express');
const app = express();

const users = [
    { id: 1, name: "Alice" },
    { id: 2, name: "Bob" }
];

app.get('/users', (req, res) => {
    res.json(users);
});

const PORT = process.env.PORT || 3001;
app.listen(PORT, () => {
    console.log(`User service running on port ${PORT}`);
});
This service listens on port 3001 and responds with a list of users when accessed at /users.
Now that the microservice is ready, the next step is to containerize it by writing a Dockerfile. A Dockerfile is a plain text file (without an extension) that contains a set of instructions for building a Docker image. Each instruction adds a layer to the final image, making it possible to reuse parts of the build for faster rebuilds.
Create a new file named Dockerfile in the user-service directory (make sure there is no file extension).
touch DockerfileNow, open the file and add the following instructions:
FROM node:20-alpine

WORKDIR /app

COPY package.json package-lock.json ./
RUN npm install

COPY . .

EXPOSE 3001

CMD ["node", "index.js"]
Each line in the Dockerfile tells Docker how to build the image. Every command creates a layer, and layers that do not change can be cached to speed up future builds. Let’s go through each instruction step by step:
FROM node:20-alpine: This sets the base image, which is the foundation for the container. Instead of using a full Node.js image, we usenode:20-alpine, a smaller version based on Alpine Linux. This keeps the final image lightweight and removes unnecessary system files.WORKDIR /app: This sets the working directory inside the container. Any subsequent commands in the Dockerfile will run inside this director. Setting a working directory prevents issues with relative paths when running commands inside the container.COPY package.json package-lock.json ./: This copies only the package.json and package-lock.json files into the container before copying the rest of the code. Why does this matter? Because Docker caches layers. By copying these files first, Docker can reuse the cached version ofnpm installunless dependencies change, making builds much faster.RUN npm install: This installs all dependencies listed in package.json. Since we copied the package files first, Docker only runs this step if dependencies have changed.COPY . .: This copies all remaining files from the project directory into the container. Since dependencies are already installed, this step does not trigger a reinstall, keeping the cache intact.EXPOSE 3001: This documents that the container listens on port 3001. It does not actually publish the port; it just lets other containers know which port to use when communicating internally. To access this service from the host machine, we need to explicitly map the port when running the container.CMD ["node", "index.js"]: This sets the default command to run when the container starts. The service will run using Node.js and execute index.js. If another command is provided when running the container, it will override this default.
Once the Dockerfile is ready, we need to build a Docker image. A Docker image is an immutable snapshot of the application, including everything it needs to run. Each step in the Dockerfile becomes a layer in the image, allowing Docker to cache and reuse parts of it in future builds.
To build an image, run:
docker build -t user-service .Let’s break it down:
docker build→ This tells Docker to create a new image.t user-service→ This assigns the name user-service to the image so we can reference it easily..→ This tells it to use the current directory (where Dockerfile is located) as the build context.
So, to show the command was successful, you should see something like this in your terminal:
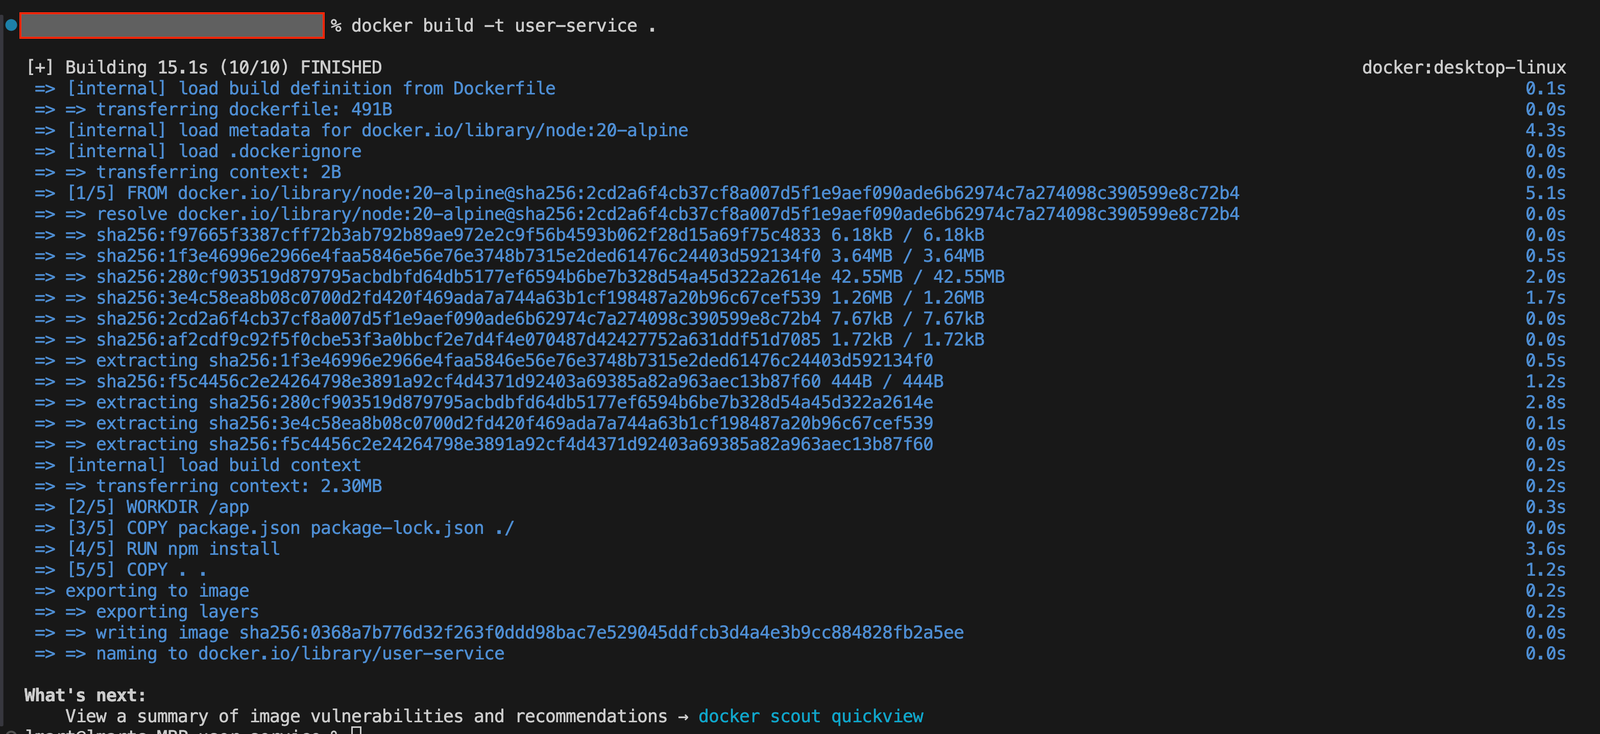
Showing the result of running the docker build command
Once the build is complete, we can run the container:
docker run -p 3001:3001 user-serviceWhat happens here?
*docker run**→ This starts a new container from the user-service image.*-p 3001:3001**→ This maps port 3001 on the host machine to port 3001 inside the container, allowing external access.*user-service**→ This is the name of the image we built earlier.
Now, the microservice is running inside a container and accessible at:
<http://localhost:3001/users>If you open this URL in a browser or use a tool like curl or Postman, you will see the JSON response from the microservice:
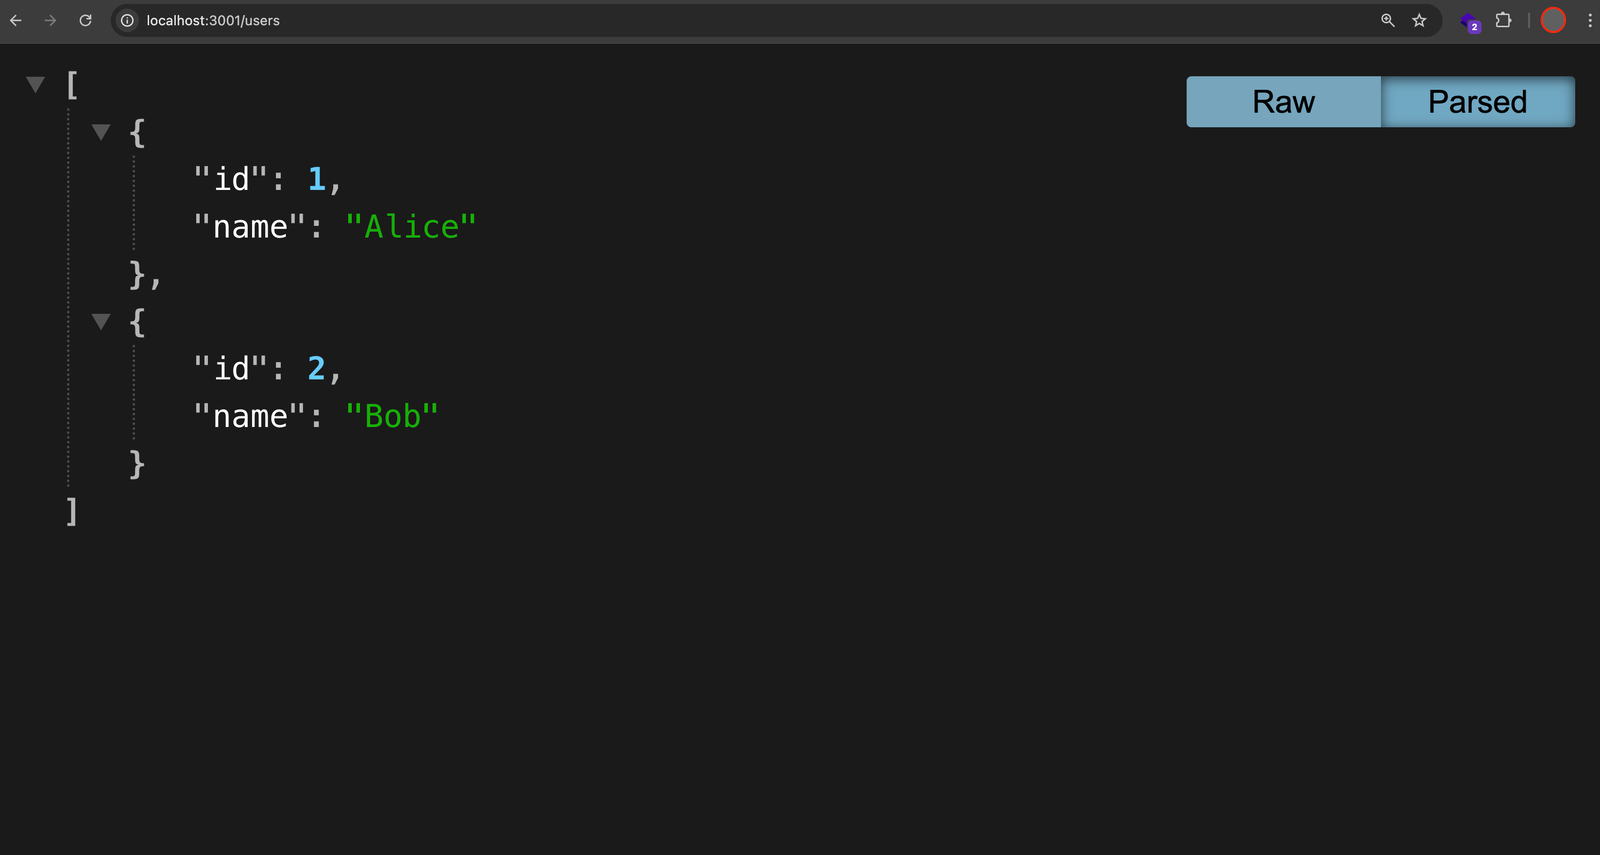
Showing the JSON response from the microservice in the browser
A Docker image is made up of multiple layers, each representing a step from the Dockerfile. These layers allow Docker to reuse unchanged parts of an image, making builds faster and reducing storage usage.
We can check all available images with:
docker imagesAnd see which containers are running with:
docker psOnce you run the command, you will see the following:

Showing the container that is running
If we need to stop a running container:
docker stop <container-id>To remove a container that is no longer needed:
docker rm <container-id>In real-world microservices, services do not run in isolation. They communicate with other containers using Docker networks instead of localhost.
To allow services to talk to each other, create a network:
docker network create my-networkNow, run the User Service inside the network:
docker run -p 3001:3001 --network my-network --name user-service user-serviceSince this container is now in my-network, any other service in the same network can communicate with it using the container’s name instead of localhost.
For example, if another microservice needs to request user data, it would send a request to:
<http://user-service:3001/users>instead of
<http://localhost:3001/users>This makes sure that even if the service is running inside a container, it remains accessible to other microservices.
When running multiple microservices, managing them manually with docker run becomes repetitive. Docker Compose simplifies this by letting us define multiple services in a single file and start them with a single command.
Create a new file named docker-compose.yml in the user-service directory and add the following content:
version: '3'

services:
  user-service:
    build: .
    ports:
      - "3001:3001"
    networks:
      - my-network

networks:
  my-network:
Breaking down the Docker Compose file:
version: '3’: → Specifies the Docker Compose file format version. Version 3 is widely supported.services→ Defines the services (containers) that should be created.user-service→ The name of the service. This will run as a container.build: .→ Tells Docker Compose to build the image using the Dockerfile in the current directory.ports→ Maps port 3001 on the host to 3001 inside the container, making it accessible from the outside.networks→ Assigns the service to a Docker network so it can communicate with other services.my-network→ Defines a custom network named my-network, which other services can join.
Now start the service using:
docker compose upThis will:
- Build the
user-serviceimage if it doesn't exist. - Create a container and run the service
- Connect it to the
my-networkDocker network.
To stop all running services, press Ctrl + C to run:
docker compose downThis shuts down all containers and removes the network, making cleanup easier.
Docker caches layers to speed up builds, but over time, unused data takes up space. To remove unnecessary cached layers, use:
docker builder pruneThis removes old build cache while keeping active containers and images intact. To free up even more space by removing stopped containers, unused networks, and dangling images, use:
docker system pruneYou’ve seen how small changes in a Dockerfile, smarter caching, and tools like Buildx make builds faster and images smaller. If you’re working with microservices, running them in a Docker network and managing them with Docker Compose keeps everything simple and scalable.
If you don’t want to spend time managing builds and deployments yourself, platforms like Northflank handle the setup for you. That way, you don’t have to worry about infrastructure and can focus on writing code and shipping features while everything runs in the background. You can get started for free and see how it fits into your workflow.
If you want to go deeper into microservices and containerized deployments, these articles might help:
- How to build a scalable software architecture part 1: Monolith vs. Microservices - A breakdown of monolithic and microservice architectures, how they compare, and when to use each approach.
- ECS (Elastic Container Service): deep dive and alternatives - A closer look at ECS, how it works, and other options for running containers at scale.
These cover different ways to structure and run services, from working with Docker to managing production-ready microservices.
How to build a Docker image?
To build a Docker image, use:
docker build -t my-image .This command reads the Dockerfile in the current directory (.) and creates an image tagged as my-image.
How to build a Docker image from a Dockerfile?
A Dockerfile is a script that defines how to build an image. Run:
docker build -t my-app .Make sure your Dockerfile includes the necessary instructions, such as installing dependencies and copying application files.
How to build a Docker image from scratch?
To build a minimal image with no base OS, use scratch:
FROM scratch
COPY my-binary /my-binary
CMD ["/my-binary"]
This works best for compiled applications like Go. The image only includes the necessary executable.
How to build a Docker image locally?
To build an image without pushing it to a registry:
docker build -t my-local-image .To verify the image:
docker imagesYou can then run it with:
docker run -p 8080:8080 my-local-imageWhat is a Docker build?
A Docker build is the process of creating a Docker image using a Dockerfile. The image includes all necessary dependencies, libraries, and code to run an application.
What is the command for Docker build?
The main command is:
docker build -t image-name .This tells Docker to create an image using the Dockerfile in the current directory.
What is the difference between docker run and docker build?
docker build→ Creates a Docker image.docker run→ Starts a container from an image.
Think of docker build as preparing a dish, and docker run as serving it.
What is the difference between docker build and docker up?
docker build→ Builds an image.docker-compose up→ Starts containers based on a docker-compose.yml file, handling multiple services together.
If using Docker Compose, docker-compose up automatically builds images if they don’t exist.