
How to self-host n8n: Setup, architecture, and pricing guide (2026)
Many teams want to run n8n self-hosted instead of relying on the cloud version.
Self-hosting n8n gives you full control over data, lets you scale the way you want, and avoids vendor lock-in. In this guide, we’ll show you how to self-host n8n on Northflank, step by step.
You’ll learn the basic architecture, deployment options, and how to connect PostgreSQL and Redis for persistence and scalability.
We’ll also cover n8n self-hosted pricing so you know what to expect when running it in production.
Self-hosting n8n means running it on your own infrastructure instead of using the cloud-hosted SaaS. Teams choose n8n self-hosted for data security, lower cost at scale, and the ability to run custom integrations. With Northflank, you can deploy n8n in minutes without managing Kubernetes, Docker Compose, or VMs manually.
n8n is a popular workflow automation platform that offers various integrations with different tools and frameworks allowing for a wide range of automation use-cases, including AI agents. n8n can benefit different teams in an organization, from IT teams automating technical workflows, marketing teams automating processes for marketing campaigns, or HR teams analyzing employee turnover risk, n8n can make life easier by automating their required workflow tasks using a visual drag-and-drop interface.
In this guide, we will explain how to deploy n8n on Northflank. First we'll look at the architecture of self-hosted n8n, then we’ll create a deployment service utilizing the n8n container image and a PostgreSQL add-on as an external database to persist data. We'll then expand our deployment by adding Redis and a worker for even better scalability.
If you want to get started straight away, you can instead use the one-click deployment options for n8n.
n8n self-hosted means running n8n on your own infrastructure instead of relying on n8n Cloud. You download and deploy the open-source n8n Community Edition, then run it on your own servers, containers, or cloud environment.
With Northflank, you don’t need to manage Kubernetes clusters, Docker Compose files, or VM networking by hand. You deploy the official n8n container image, attach a database (PostgreSQL), and optionally add Redis for scaling.
n8n can be deployed in different ways for scalability. The simplest deployment would be a single n8n service with a persistent volume, however for scalability we'll look at two different options for this guide:
- A single deployment with a PostgreSQL database
- A deployment for the UI/API and a separate worker deployment, with PostgreSQL and Redis
Before going through the steps in this guide, you need to have already completed the following:
- Login to your existing Northflank account, or create a new account if you don’t have one already.
You can deploy n8n with Postgres, or n8n with a worker using the respective Northflank stack templates:
- Customise your project name, colour, and region, if desired
- Click
Deploy stackto save and run the n8n template - Once the template run has finished deploying all components, open the project and select the
n8nservice - When the
n8nservice shows as running, open thecode.rundomain underPorts & DNSin the service header to access your n8n instance and begin configuration
The simplest way to host n8n on Northflank is by using a deployment service. Northflank's deployment services let you deploy a container instance (or multiple instances for scalability) from a container image. This image can be built on Northflank itself using a build service, or pulled from any other registry as a ready image.
Using a deployment service is straightforward, you can just point Northflank to the location of your image, provide any additional configuration you want for your deployed instance, and then Northflank takes it from there to get your application running.
- Under the project, create a new service and choose its type as a deployment service.
- Provide a name for the service, and choose the deployment source as external image.
- In the image path, use
docker.n8n.io/n8nio/n8n:latest, this is the official n8n image from the repository. - In the networking section edit port 5678 and choose the protocol type as HTTP. Check the option to publicly expose this port to the internet. This will allow you to connect to the n8n service publicly from anywhere using the domain name provided by Northflank. You can also use your own domain by expanding the option for custom domains.
- In the resources section, choose a compute plan that fits your needs for the CPU and memory requirements. Without a worker deployed, this deployment will also execute workflows and code.
- Click on create service, and you should see a running instance of your n8n self-hosted deployment
- To access your n8n instance you can simply use the Northflank-generated URL in the top right corner of the service overview page

Any changes we make in this deployment will be lost if it restarts, however, as it's only using ephemeral storage. Containers use ephemeral disks, meaning that any data written to the filesystem will be wiped out once the container is restarted. We could mount a volume to /home/node/.n8n as n8n uses an SQLite database saved to the local disk by default, but this will become an obstacle to scaling n8n in future. Instead, we can use a PostgreSQL database and environment variables to persist data outside of the ephemeral containers.
We’ll first need to provision our PostgreSQL instance and then pass the required environment variables to n8n.
A simple way to provision a PostgreSQL instance is by using Northflank addons, which integrate common infrastructure components like databases, caches, message queues with your application. The addons are provided as managed services, meaning that the Northflank platform takes care of the heavy lifting for provisioning and setting up these components, allowing you to focus more on your application.
We can create a PostgreSQL database addon with the following steps:
- Click on create new > addon under your project. Then choose PostgreSQL and provide a name for the Addon.
- Disable deploy with TLS
- Specify the compute plan for your addon, the size of disk, and the number of replicas. You can scale both these up later.
- Click on create addon and Northflank will start provisioning your database

After the database instance is provisioned, you’ll find the database connection details under the overview section.
To enable n8n to use the new PostgreSQL database, we’ll need to provide the connection details as environment variables for our deployment instance. We can link the Postgres addon to the sevice by using a secret group, which will automatically provide the relevant connection details even if they are changed by updating the addon's configuration. As we're not using a persistent volume, we'll also add the neccessary secrets and configuration values as environment variables.
-
Click on create new > secret group under your project and give it a name
-
Edit secrets and add the following variables. You can use the key button in the secret editor to generate a value for the encryption key, which should be at least 32 characters long in hex mode (256-bits).
# Tells n8n to use our Postgres addon
DB_TYPE="postgresdb"
# Encrypts sensitive data in the database, saves the key outside the ephemeral container
N8N_ENCRYPTION_KEY="<some-random-string>"
# Tell n8n it's behind the Northflank load balancer
N8N_PROXY_HOPS="1"
# Enable code execution in workflows
N8N_RUNNERS_ENABLED=true
-
Next, expand show addons and click configure on the Postgres addon. Select USERNAME, PASSWORD, DATABASE, HOST, and PORT, and give them the following aliases:
Key Alias USERNAMEDB_POSTGRESDB_USERPASSWORDDB_POSTGRESDB_PASSWORDDATABASEDB_POSTGRESDB_DATABASEHOSTDB_POSTGRESDB_HOSTPORTDB_POSTGRESDB_PORT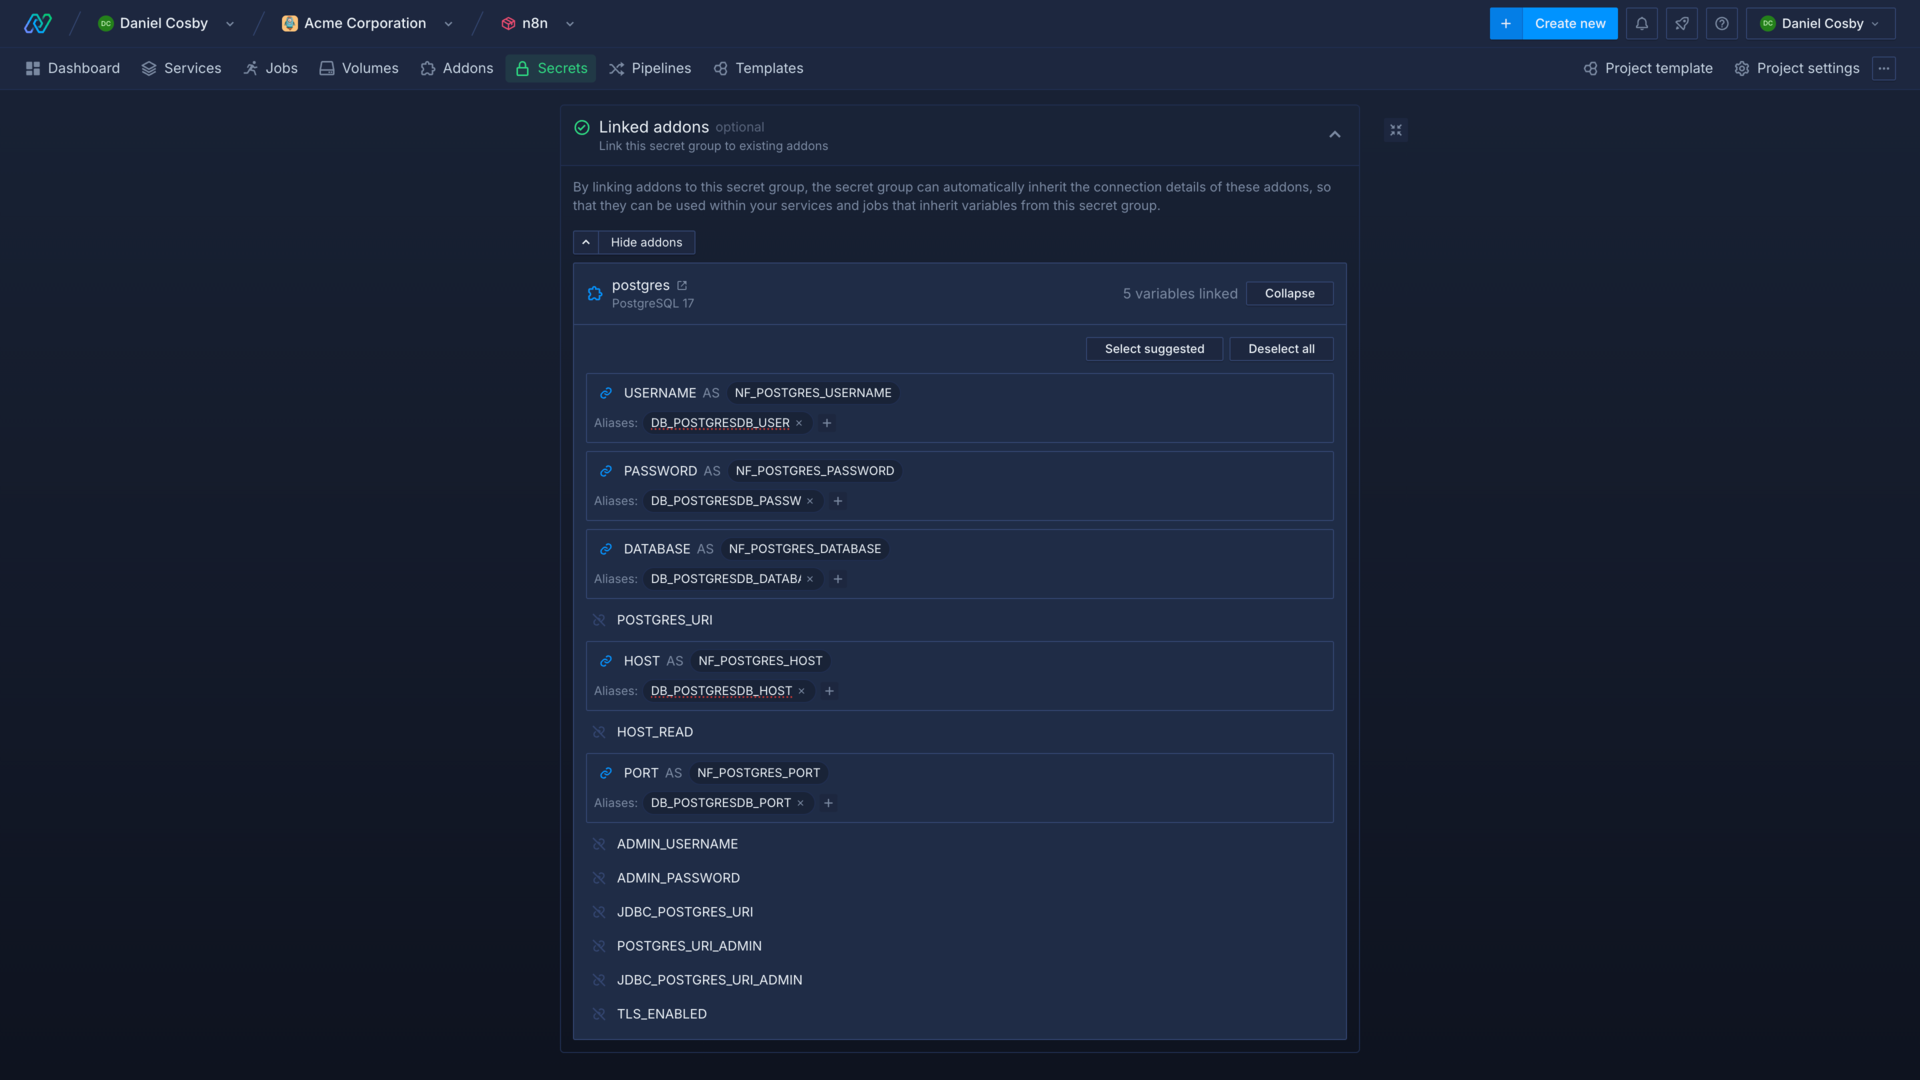
-
Create the secret group
You can now return to your n8n self-hosted deployment service and restart it, and the container will be deployed with the environment variables from the secret group, configuring it to store data in the PostgreSQL database.

If you're just testing n8n, or don't need to scale it up to handle heavy usage yet, you can skip to the section on configuring and using n8n. Otherwise, you can follow the rest of the guide to deploy Redis and a n8n worker in addition, and scale up your n8n self-hosted deployment to handle heavy usage.
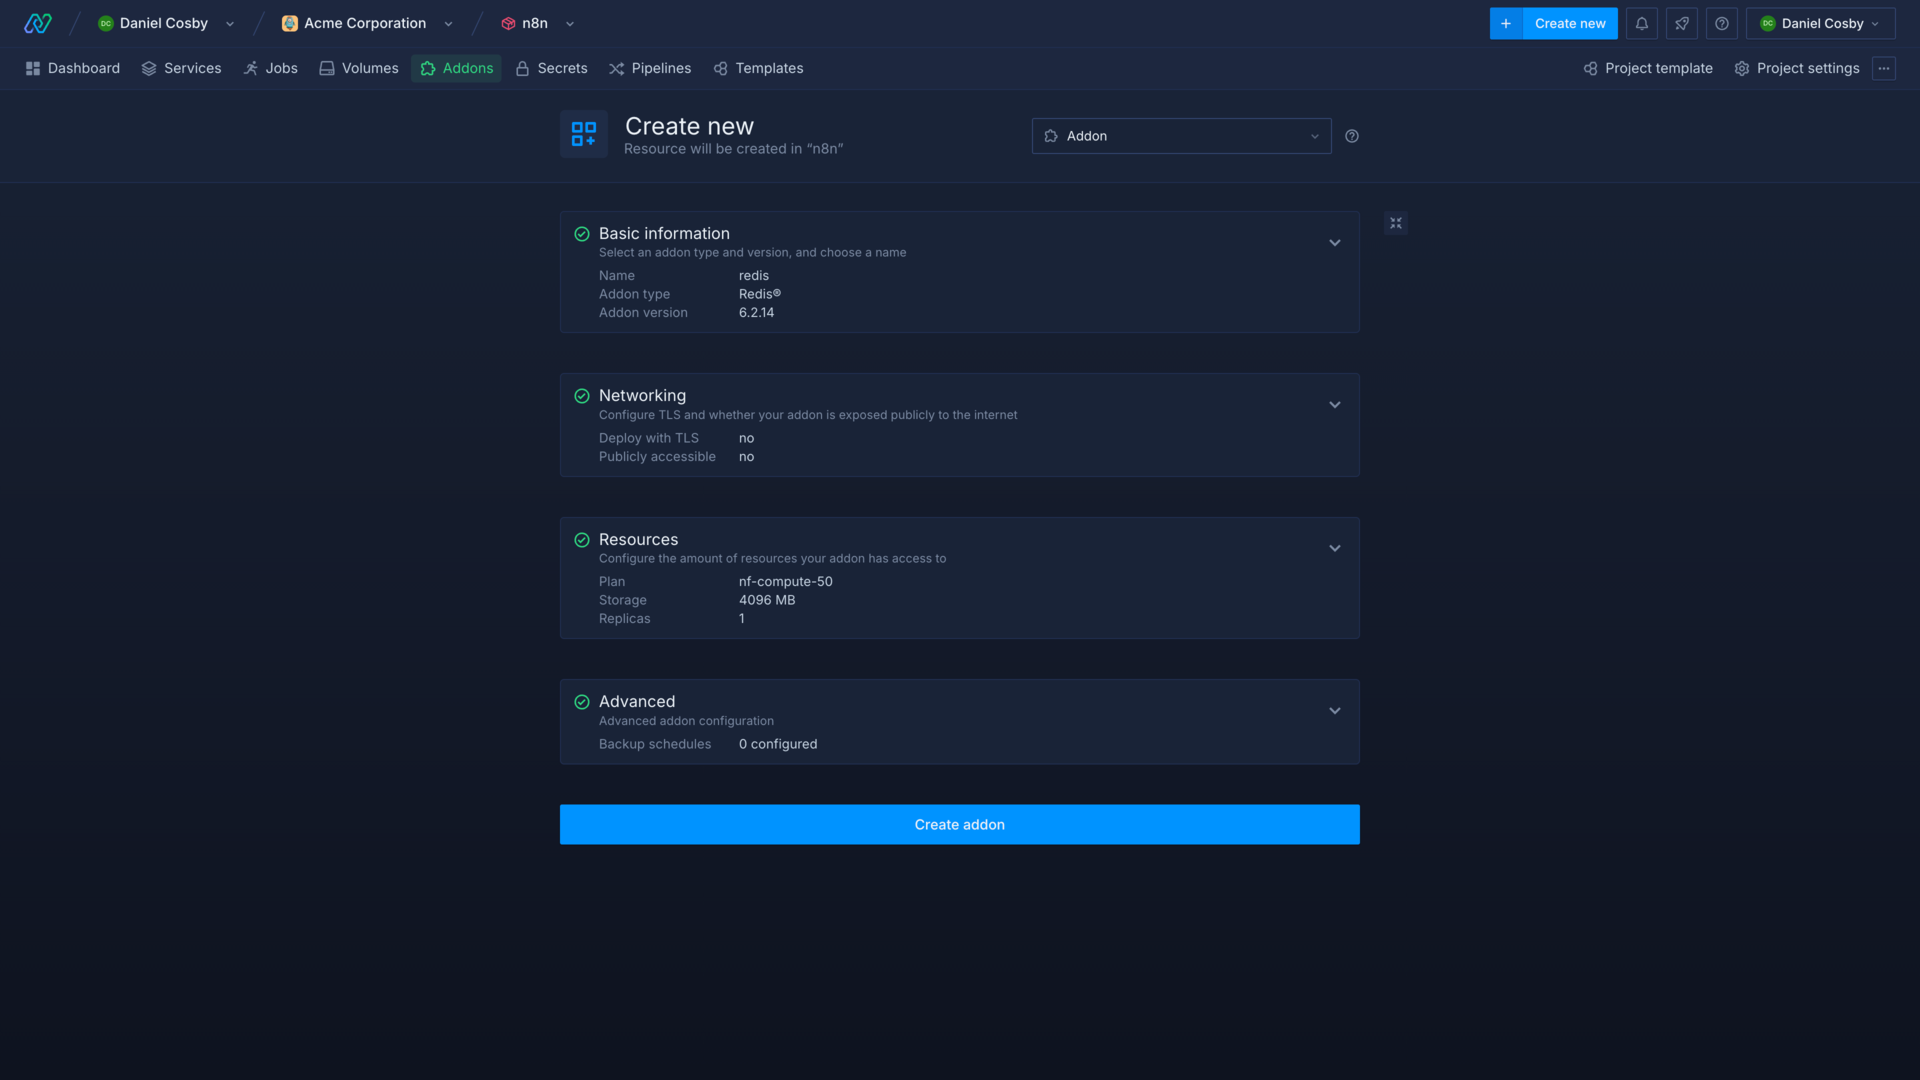
- Click on create new > addon under your project, then choose Redis and provide a name for the addon
- Disable deploy with TLS
- Specify the compute plan for your addon, the size of disk, and the number of replicas. You can scale both these up later.
- Click on create addon and Northflank will start provisioning your database
Create a new deployment service following the same steps as we did to create the main n8n self-hosted deployment. However, this time:
- do not expose the
5678HTTP port to the public internet - select custom command for the Docker runtime mode in the advanced section and enter the command
worker. This will start this n8n deployment in worker mode.

To configure the n8n main deployment to use the n8n worker, add the following enviornment variables to your existing secret group:
EXECUTIONS_MODE="queue"
QUEUE_HEALTH_CHECK_ACTIVE=true
OFFLOAD_MANUAL_EXECUTIONS_TO_WORKERS=true
Next, expand linked addons and configure the Redis addon, linking the following values with the corresponding aliases:
| Key | Alias |
|---|---|
PASSWORD | QUEUE_BULL_REDIS_PASSWORD |
HOST | QUEUE_BULL_REDIS_HOST |
PORT | QUEUE_BULL_REDIS_PORT |

You can now restart your n8n and worker deployments and begin executing workflows. You can check the logs for the n8n worker to confirm it's recieving and executing tasks.
You can now scale the worker component of your self-hosted n8n deployment independently of the main n8n application and API.
Congratulations! You now have your n8n self-hosted instance running. No YAML files needed, no Helm charts, and no Kubernetes cluster complexities. Northflank allows you to focus on your workloads instead of worrying about the underlying infrastructure, this abstraction offers a seamless and efficient deployment experience for any containerized workload.
Open the domain in the n8n service header, and follow the steps to create an account and set up your n8n self-hosted deployment.


You can now begin designing and executing workflows!

You can add health checks to your services to handle redeployments gracefully, scale your n8n deployment up to meet demand, and add custom domains.
Check the n8n docs for more configuration options for n8n.
The n8n Community Edition is free to self-host under the Fair Code license. You can run unlimited workflows, steps, executions, and users without paying for the software itself.
Your only costs are infrastructure. On Northflank, that means the compute plan you choose for your n8n self-hosted deployment plus any addons like PostgreSQL and Redis. For small workloads, this can start from around $5–10/month. For larger, production-scale deployments, costs scale with CPU, memory, and storage.
If you need advanced features such as SSO, Git version control, or multiple environments, n8n also offers a Self-Hosted Business Plan. At the Enterprise tier, pricing is based on the number of executions rather than workflow count.
Compared to n8n Cloud (starting at $24/month for 2.5K executions), n8n self-hosted on Northflank can be more cost-effective and gives you full control over your data and scaling.
n8n is a workflow automation platform that supports a wide range of automation use cases and offers various integrations. It simplifies the process of creating workflows by using a visual editor instead of writing code for the workflow steps.
Northflank simplifies the deployment of n8n by removing the need for provisioning and configuring infrastructure resources to self-host the n8n instance. You can simply use a deployment service and point it to the n8n container image, and Northflank will take care of the underlying infrastructure for the deployment.
You can also make use of Northflank templates to host your n8n instance. Instead of manually creating the project, deployment service, database addon, and other components, templates act as a package that groups all these related resources in a single deployable object. This enables a consistent and seamless one-click deployment that can be replicated across different locations.
You can explore other guides for deploying different applications on Northflank.
Northflank allows you to deploy your code and databases within minutes. Sign up for a Northflank account and create a free project to get started.
- Build, deploy, scale, and release from development to production
- Observe & monitor with real-time metrics & logs
- Deploy managed databases and storage
- Manage infrastructure as code
- Deploy clusters in your own cloud accounts
- Run GPU workloads