
How to deploy DocuSeal: step-by-step deployment guide
DocuSeal is an open source document signing and workflow platform that helps teams create, send, sign, and manage documents securely. It’s widely used for contract signing, internal approvals, and document automation without relying on proprietary SaaS tools.
With Northflank, you can host DocuSeal in minutes using the DocuSeal stack template or configure everything manually. Northflank handles scaling, networking, databases, and security, so you can focus on document workflows instead of infrastructure.
If you’re new to the platform and wondering what is DocuSeal, it’s a self-hosted, open source alternative to tools like DocuSign and PandaDoc.
DocuSeal lets you:
- Create document templates
- Collect legally binding signatures
- Track document status and audit logs
- Integrate signing workflows into your applications
Most teams deploy DocuSeal with PostgreSQL for persistence and run it as a web service behind HTTPS, making it ideal for organizations that require data ownership and compliance.
Before getting started, create a Northflank account.
- Deploying DocuSeal with a one-click template on Northflank
- Deploying DocuSeal manually on Northflank
What is Northflank?
Northflank is a platform that allows developers to build, deploy, and scale applications, services, databases, jobs, and GPU workloads on any cloud through a self-service approach. For DevOps and platform teams, Northflank provides a powerful abstraction layer over Kubernetes, enabling templated, standardized production releases with intelligent defaults while maintaining the configurability you need.
The easiest way to run DocuSeal on Northflank is by using the DocuSeal one-click stack template. It provisions everything required to run DocuSeal in production, with best-practice defaults already configured.
This option is ideal if you want to get up and running quickly without manually wiring databases, secrets, and services.
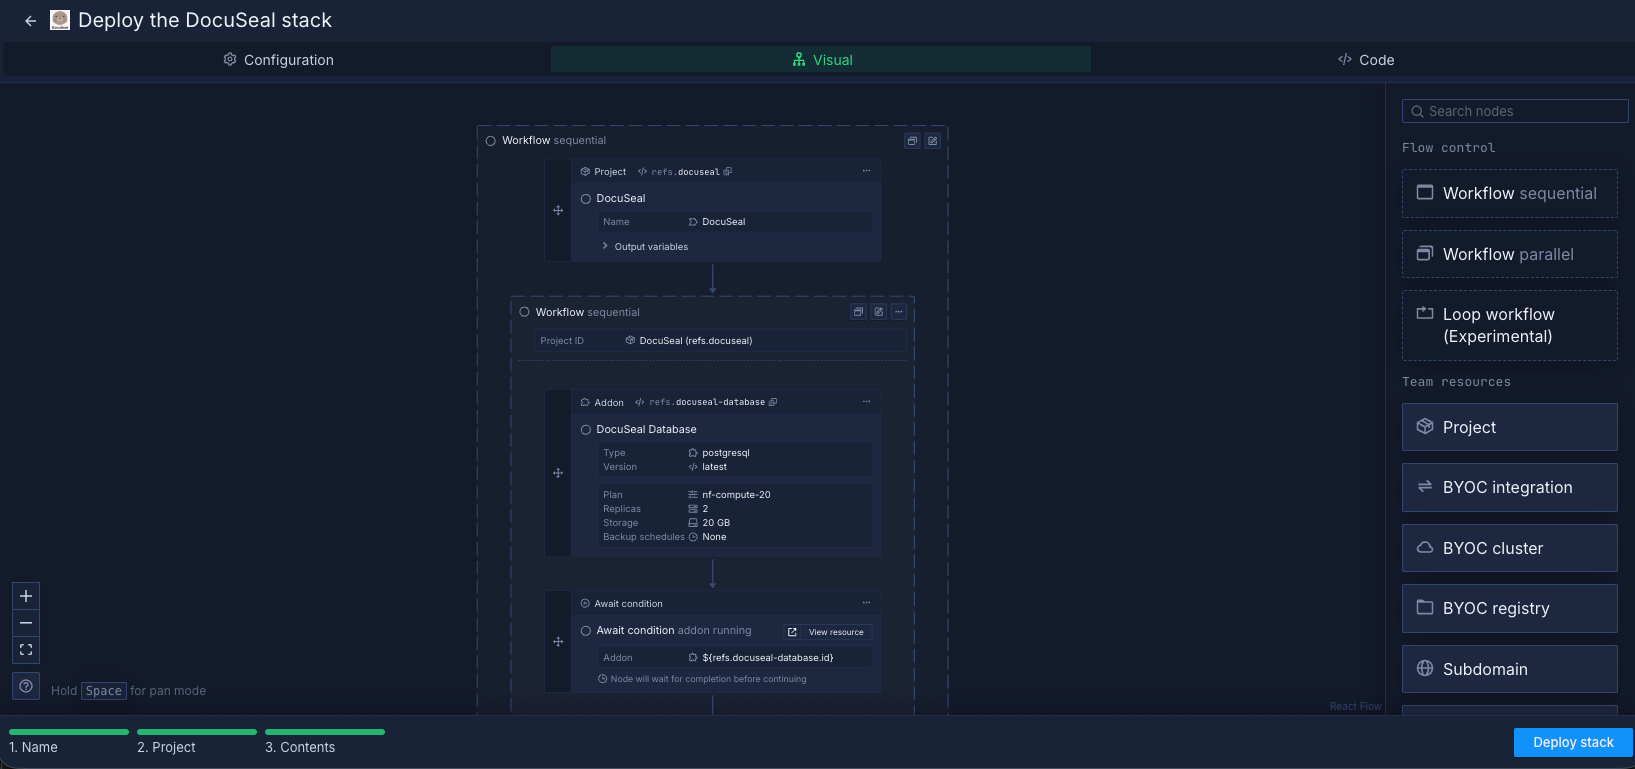
The DocuSeal stack template includes:
- A PostgreSQL addon for storing documents, users, and signing metadata
- A secret group for application secrets and database credentials
- A deployment service built directly from the official DocuSeal GitHub repository
This setup gives you a fully functional, self-hosted DocuSeal instance ready for real-world usage.
- Create an account on Northflank
- Open the DocuSeal stack template
- Click Deploy stack to provision the project, database, secrets, and service
- Wait for the DocuSeal service to build and deploy
- Open the DocuSeal service from your Northflank dashboard
- Access the generated public domain to reach the DocuSeal UI
- (Optional) Add a custom domain for production or branded access
Once deployed, you can start creating templates and sending documents immediately.
If you prefer configuring everything yourself or want to customize compute plans, networking, or storage, you can deploy DocuSeal manually.
You can also modify the one-click template if you want to extend or customize the default deployment.
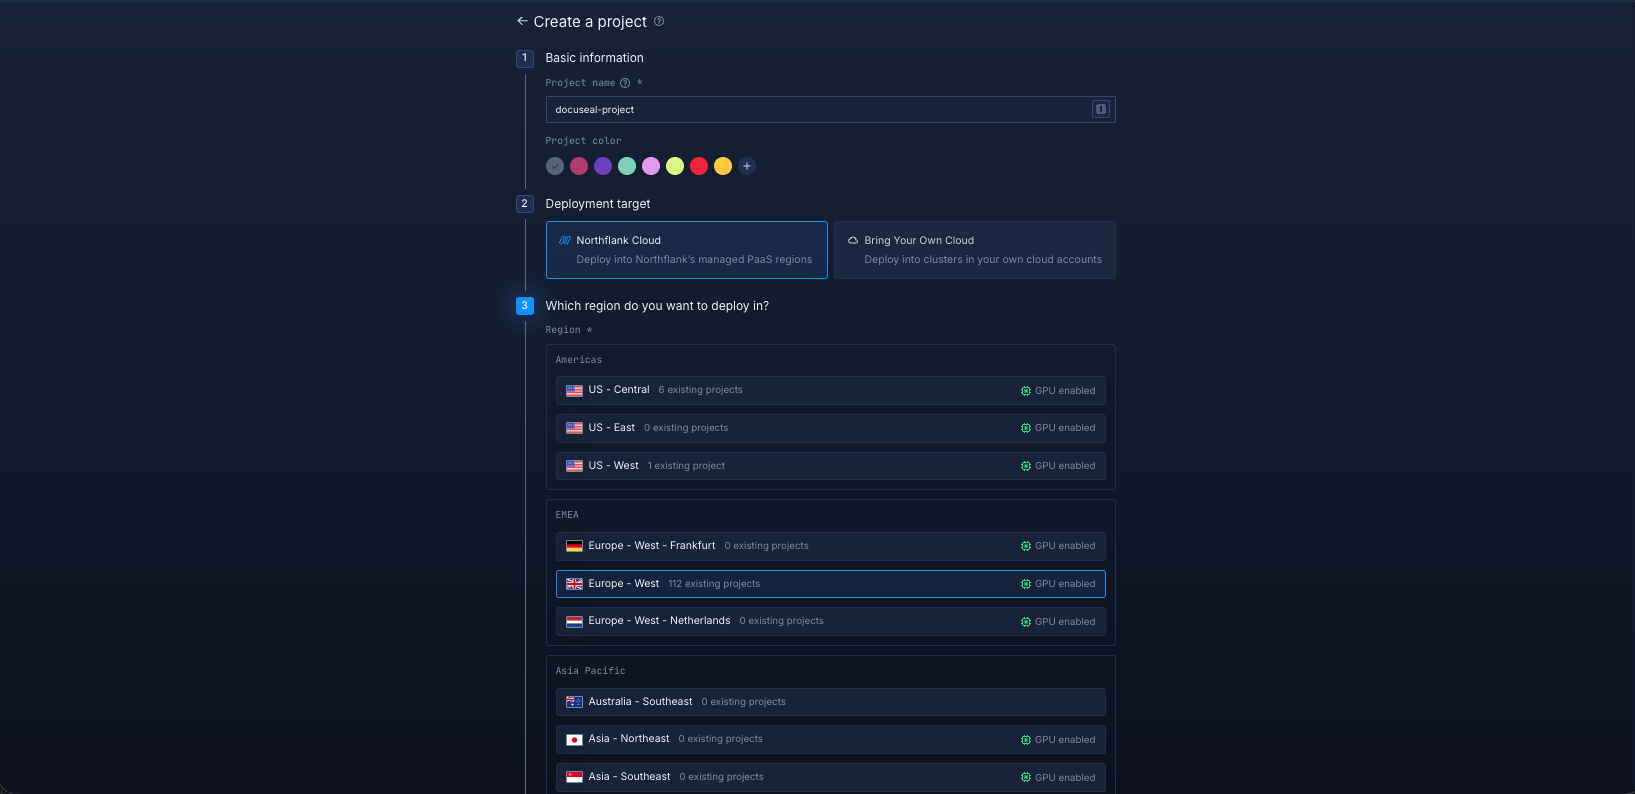
Log in to your Northflank dashboard, then click the “Create new” button (+ icon) in the top-right corner. Then, select “Project” from the dropdown.

Projects serve as workspaces that group together related services, making it easier to manage multiple workloads and their associated resources.
You’ll need to fill out a few details before moving forward.
-
Enter a project name, such as
docuseal-projectand optionally pick a colour for quick identification in your dashboard. -
Select Northflank Cloud as the deployment target. This uses Northflank’s fully managed infrastructure, so you do not need to worry about Kubernetes setup or scaling.
(Optional) If you prefer to run on your own infrastructure, you can select Bring Your Own Cloud and connect AWS, GCP, Azure, or on-prem resources.
-
Choose a region closest to your users to minimise latency.
-
Click Create project to finalise the setup.
Inside your project, go to the Addons tab at the top menu and click "Create new addon". Then, select PostgreSQL as the Addon type, give it a descriptive name such as docuseal-db . Select your preferred version, and choose a compute plan size.
- If you’re testing or experimenting, the smallest option is cost-effective and sufficient.
- For production, we recommend starting with
nf-compute-50. This provides more resources and stability, ensuring DocuSeal runs reliably under real workloads.
Once you’ve configured the settings, click Create addon to provision your database.

Next, open the Secrets tab and click Create Secret Group. Give it a clear name such as docuseal-secrets. This secret group will store all environment variables required for DocuSeal to run.
For a complete list of supported variables, refer to the DocuSeal documentation. To get started quickly, you can use the following preconfigured variables:
SECRET_KEY_BASE="<randomly-generated-secret>"
DATABASE_URL="postgres://${PGUSER}:${PGPASSWORD}@${PGHOST}:${PGPORT}/${PGDATABASE}"
Link the PostgreSQL addon to your secret group
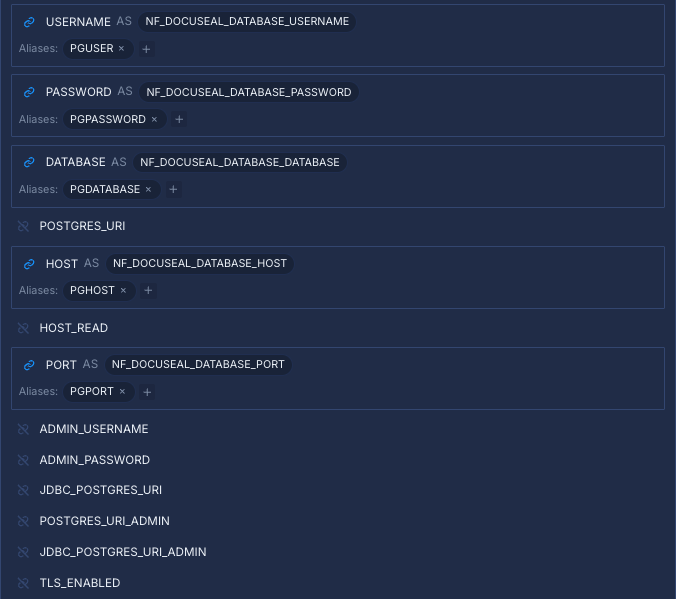
Northflank addons like PostgreSQL automatically expose connection details such as the username, password, host, and port. Instead of manually copying these values, you can link the PostgreSQL addon directly to your secret group.
This ensures your application always receives up-to-date credentials, even if the addon rotates them automatically.
Map the addon fields as follows:
- USERNAME →
PGUSER - PASSWORD →
PGPASSWORD - HOST →
PGHOST - PORT →
PGPORT - DATABASE →
PGDATABASE
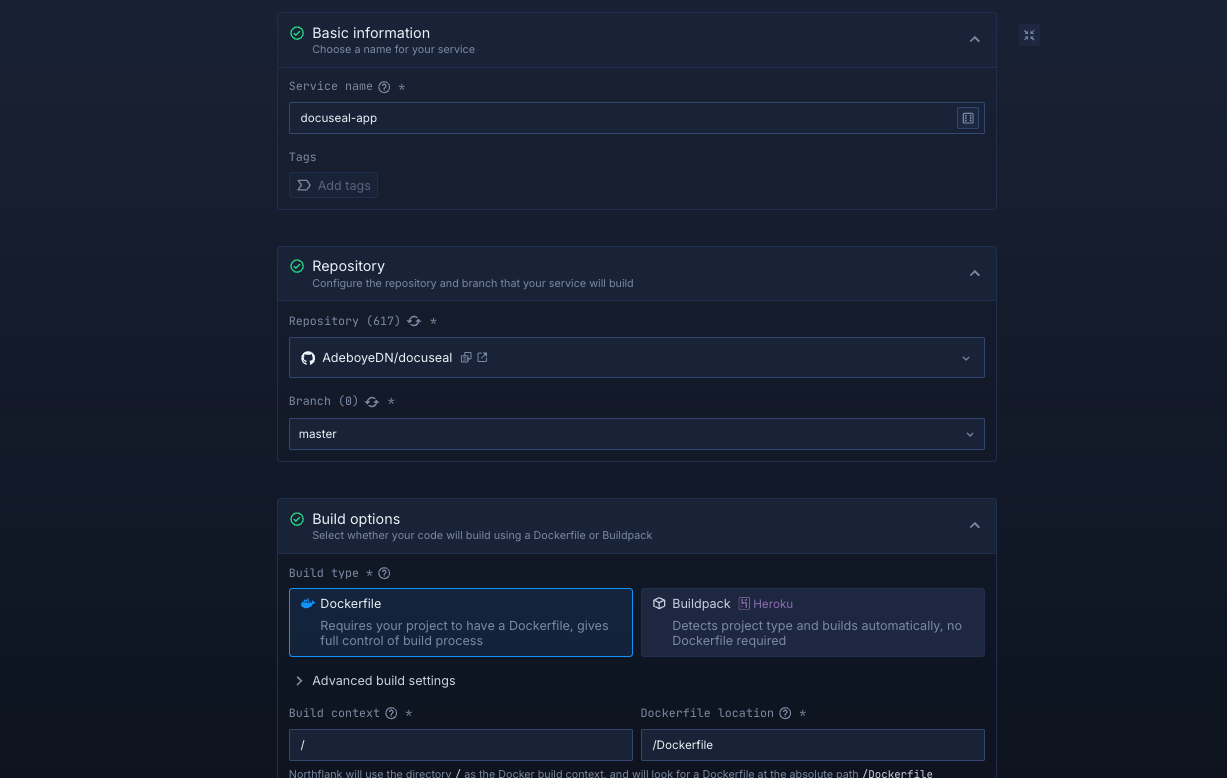
Within your project, navigate to the Services tab in the top menu and click Create new service. Select Combined as the service type and give your service a name such as docuseal-app.
Next, select the DocuSeal repository and the branch you want to deploy from.
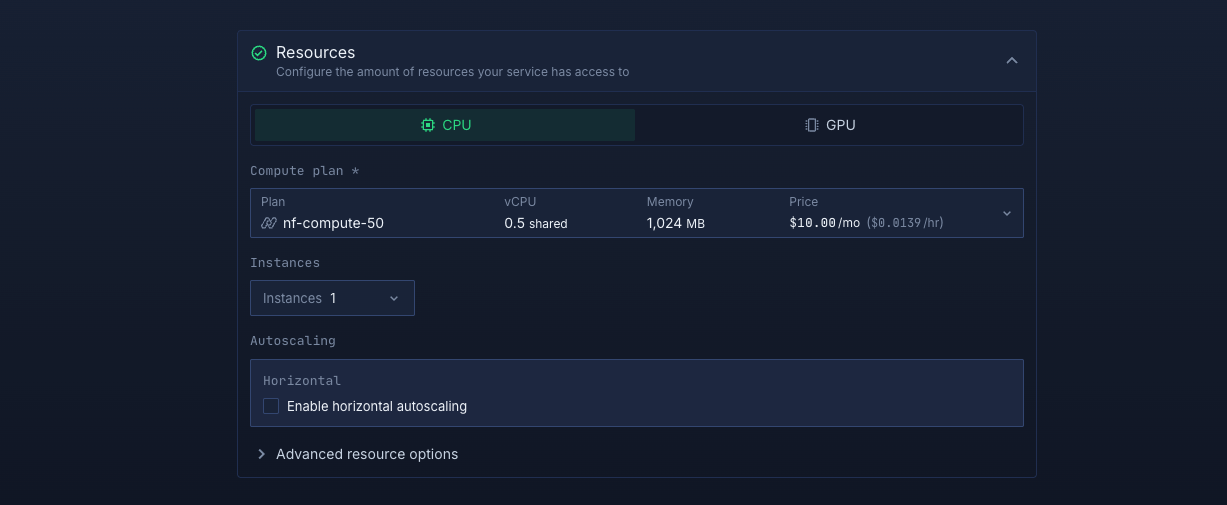
Select compute resources
Choose the compute size that best matches your workload:
- Small plans are fine for testing or lightweight usage.
- Larger plans are recommended for production, as DocuSeal can be resource-intensive under real-world traffic.
The flexibility to adjust resources later means you can start small and scale up as your scheduling needs grow.
Set up a port so your app is accessible:
- Port:
3000 - Protocol:
HTTP - Public access: enable this to let people access your DocuSeal instance from the internet
Northflank will automatically generate a secure, unique public URL for your service. This saves you from having to manage DNS or SSL certificates manually.

Deploy your service
When you’re satisfied with your settings, click "Create service." Northflank will build your repository, provision resources, and deploy DocuSeal.
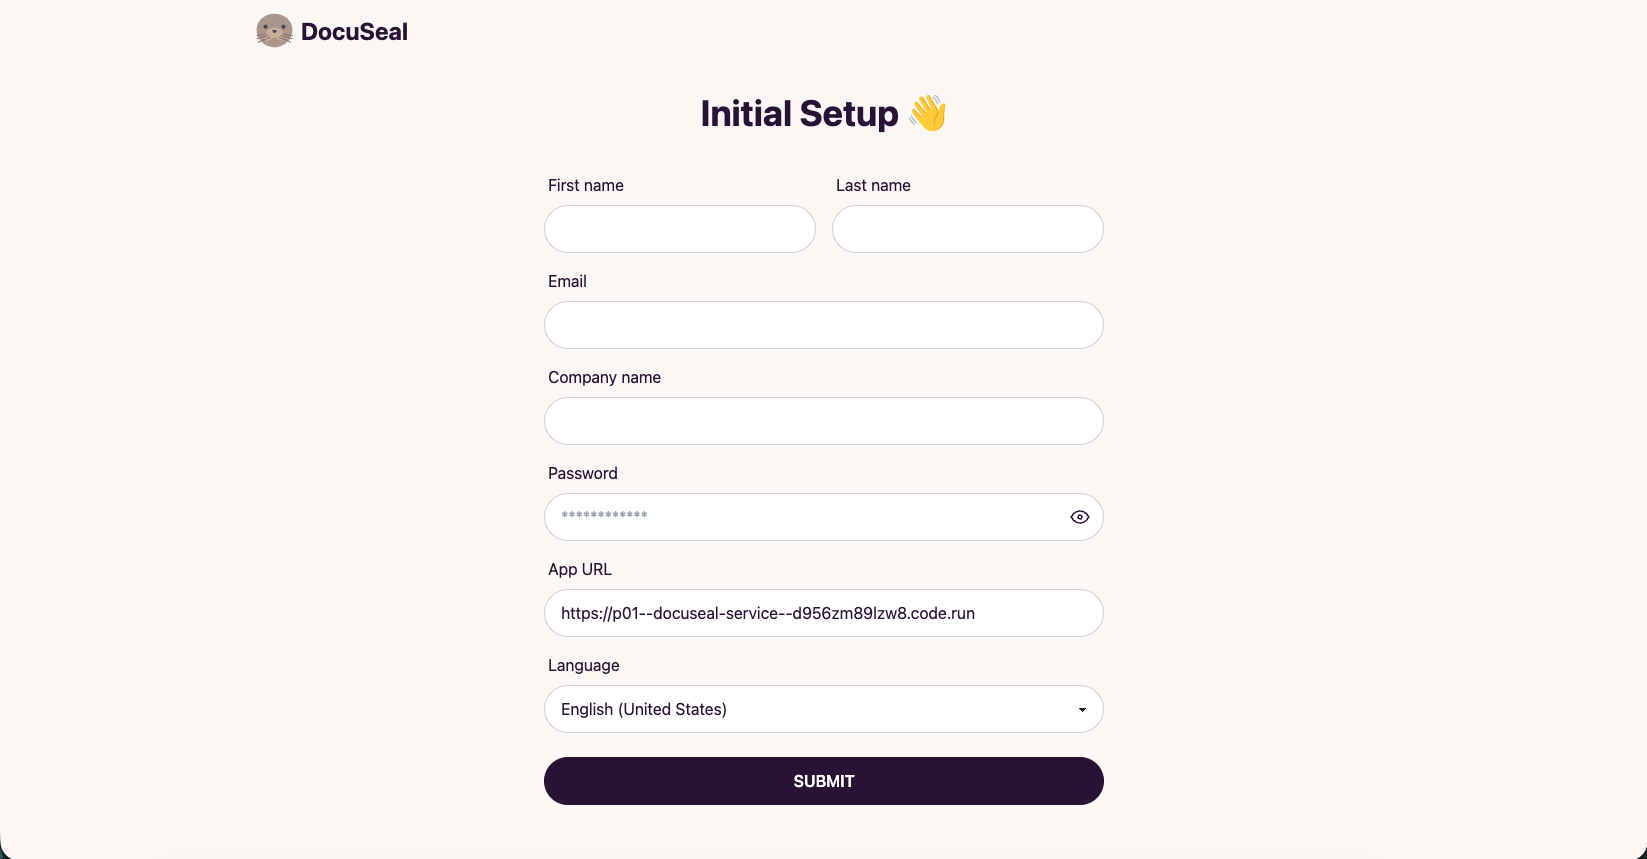
Once the deployment is successful, you’ll see your service’s public URL at the top right corner, e.g.: p01--docuseal-service--d956zm89lzw8.code.run
Deploying DocuSeal on Northflank is the easiest way to run a modern, open source document signing platform that is secure, reliable, and built for production.
You now have a scalable, secure, and production ready DocuSeal environment with everything you need to manage document signing without worrying about infrastructure.