
Umami is a simple, easy to use, self-hosted web analytics solution. The goal is to provide you with a friendlier, privacy-focused alternative to Google Analytics and a free, open-sourced alternative to paid solutions. Umami collects only the metrics you care about and everything fits on a single page.
In this guide we will walk through the process of setting up and hosting Umami on Northflank.
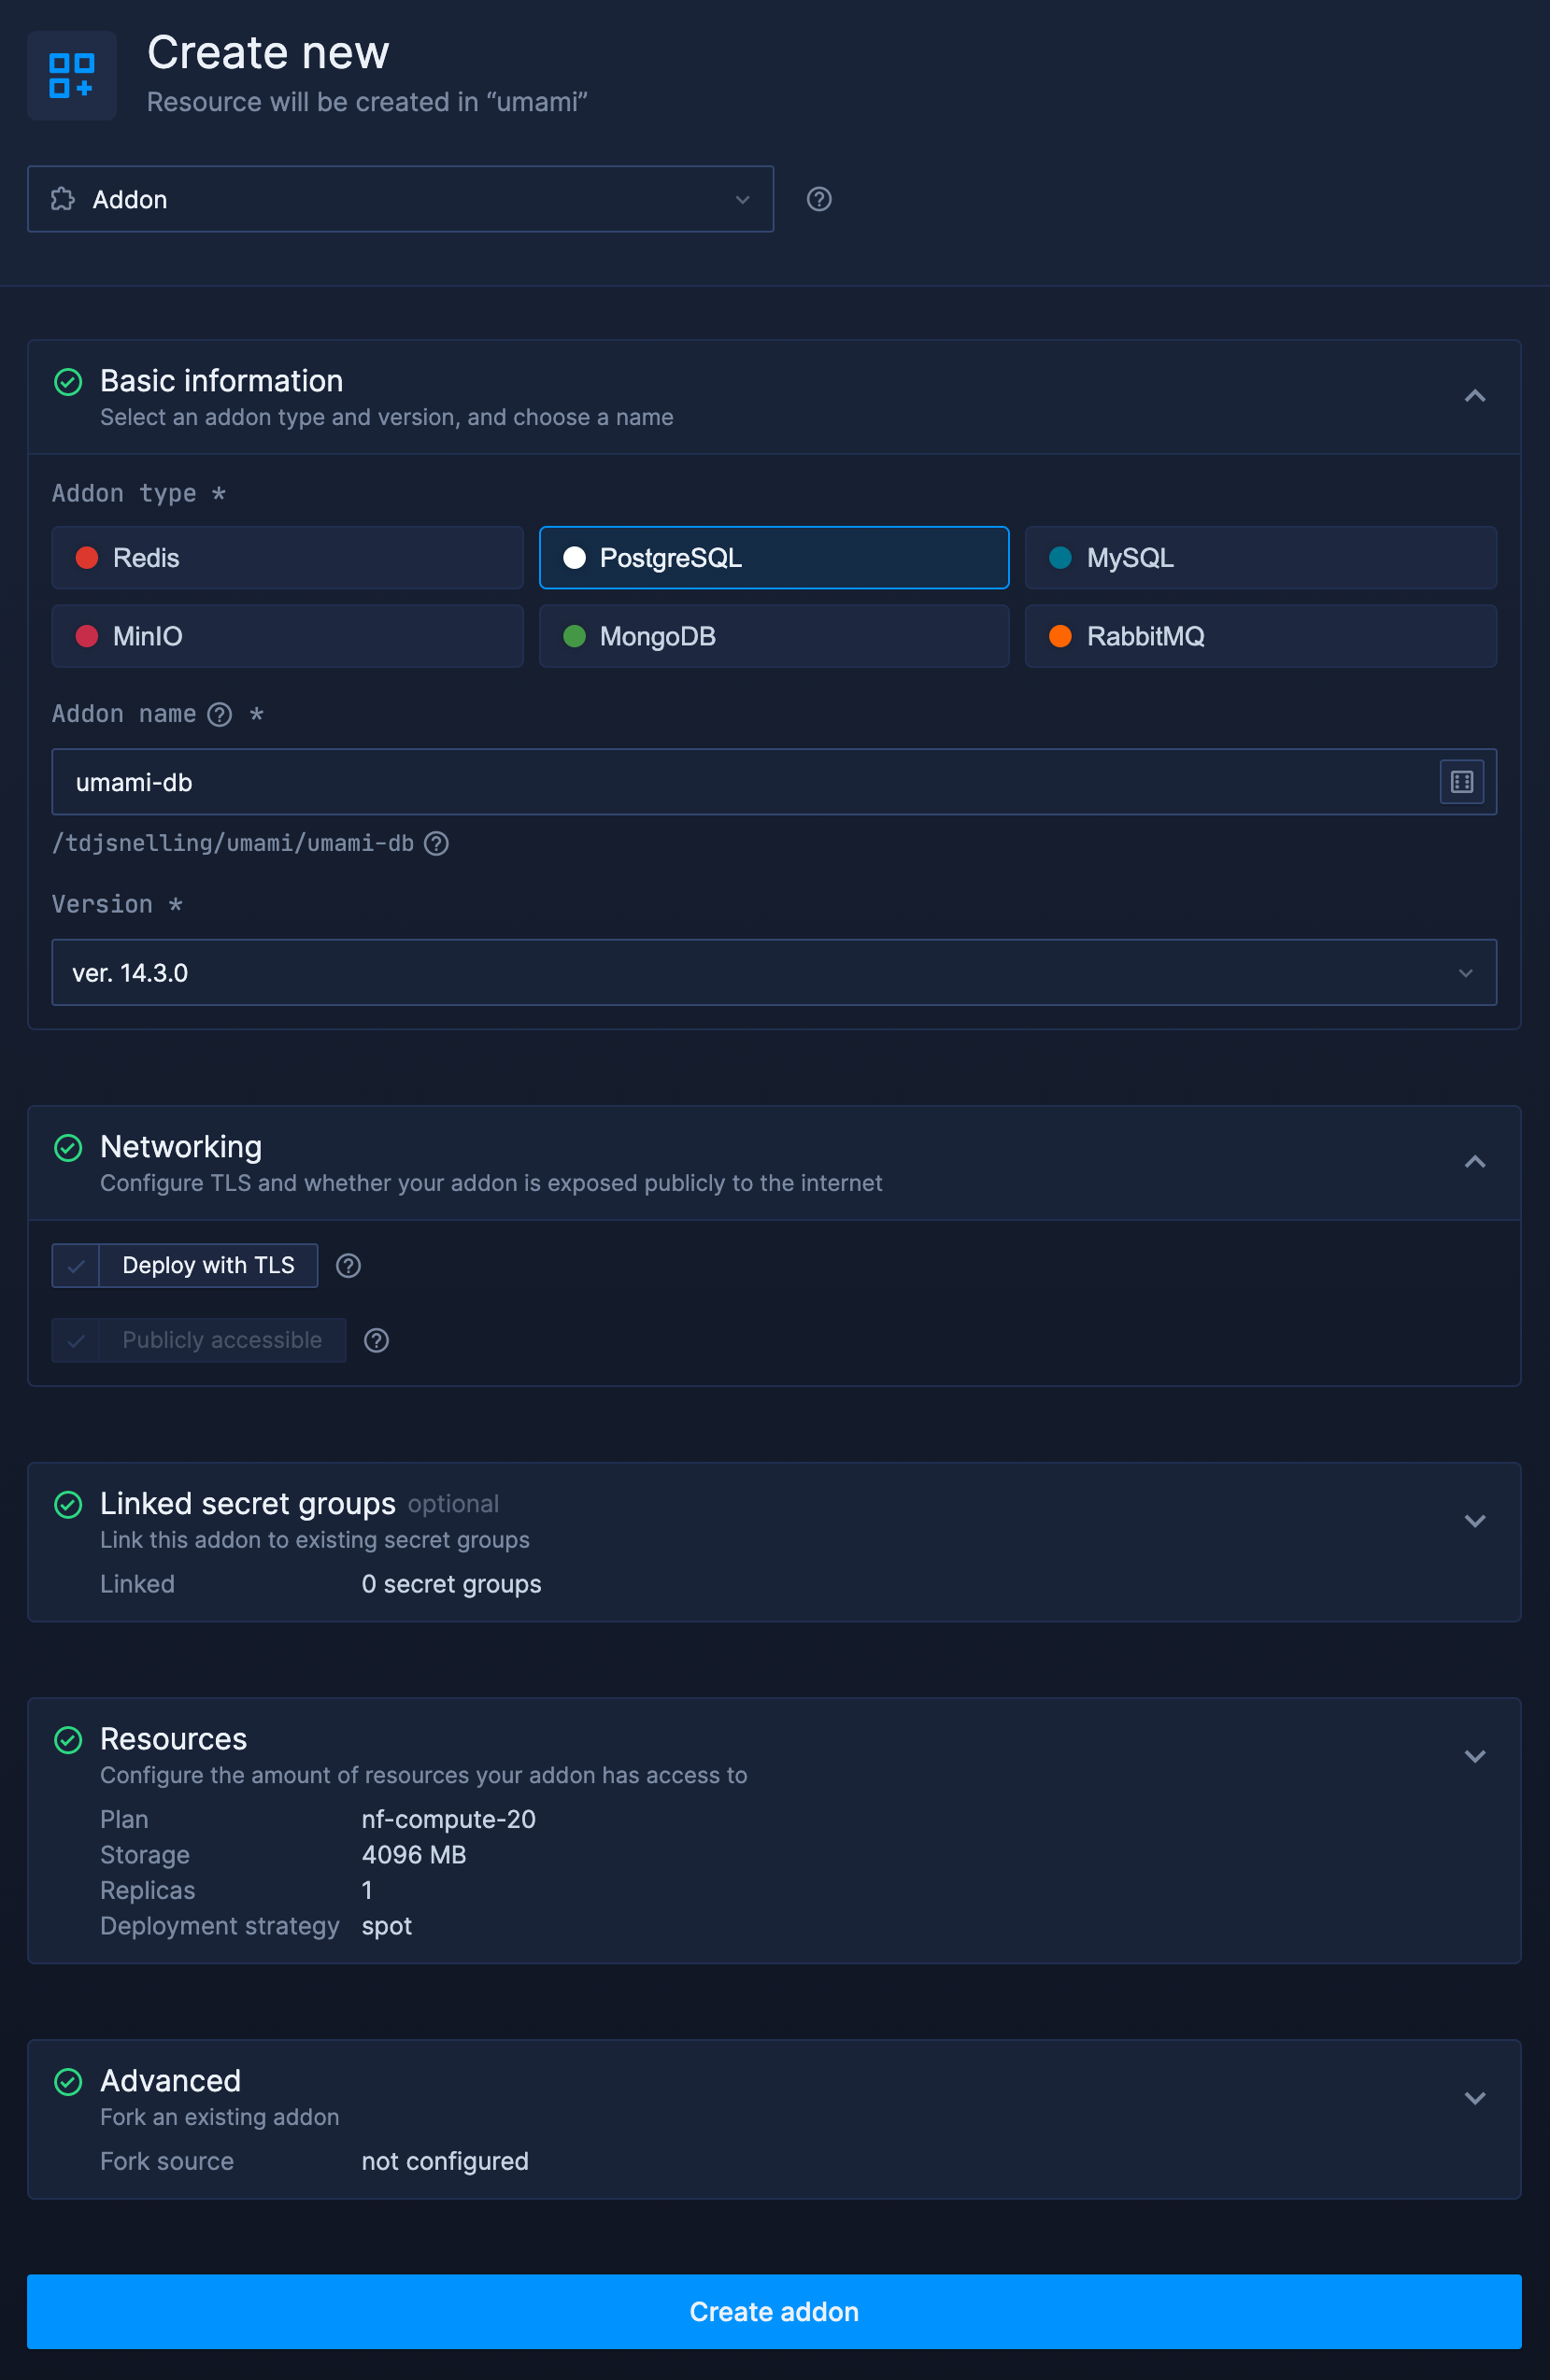
The first thing that we need to create is our database. Umami supports both PostgreSQL and MySQL, but in this guide we will focus on just PostgreSQL.
In a new project, click 'create new' at the top of the page and select addon. In the addon form, select PostgreSQL and give your database a sensible name.
Deselect 'Deploy with TLS', choose your database resources based on your requirements, and click create.
In order for our Umami deployment to be able to access our database, we need to create a secret group and link the required environment variables from our database. Our service will then inherit these variables automatically.
First, we need to add the HASH_SALT variable. Add a new variable in the secrets section with this name, and then click the key icon to generate a unique random value. Copy this value and paste it as the value of HASH_SALT.
Then in the ‘linked addons’ section, select the PostgreSQL database you just created and link the following variables:
| Variable | Alias |
|---|---|
POSTGRES_URI | DATABASE_URL |

Next, we need to create the Umami service itself. We will create a combined service to build the Umami repository from source and deploy the built image.
Give your service a name, and enter the repository URL https://github.com/umami-software/umami when selecting a repo. Choose the master branch.
Next, in the build options section, select Buildpack as the build type.
Add port 3000 as a public HTTP port so you can access your instance once it is up and running. Once this is done, create your service.

When the build has completed and the service has started up, we need to run a command to initialise the database. To do this, go to your list of containers and click the shell button on the running instance.
With the shell connected, first run cd /workspace to move to the correct directory. Then run the command /cnb/lifecycle/launcher yarn update-db. This will run a database migration to create the initial user.

Finally, when the database set up is complete, head back to your service dashboard and click the URL in the top right to access your running Umami instance. You can log in with the username admin and the password umami. Make sure to change the password right away!
From here, you can follow the Umami getting started docs.