
Running migrations on Northflank
You can use Northflank release flows to manage new releases with migrations, or run your migrations manually.
To release a new version of your application with a migration it is recommended you follow the workflow:
- Back up your database, in case you need to roll back
- Deploy the built image for your release to a job and run the migration
- If the migration is successful, deploy the new release to the deployment service
You can configure a pipeline with a release flow to do this automatically, or alternatively:
- Use a job triggered by CI
- Restart your deployment with a command override
- Execute a command in a deployment's container shell
We recommend using a release flow to manage your releases and run migrations, particularly for production workloads, because you can configure the release flow to always back up your database and only deploy the new application if your migration was executed successfully.
This guide will first cover using release flows to run migrations, and then take a look at how to run migrations using a job triggered by CI or manually using command override or via a deployment's container shell.
To use a release flow to run migrations you will need:
- A build service to build your application
- A deployment service to serve your application
- A job to run migrations
- A database addon
You'll need to create a pipeline and add the project resources to a pipeline stage.
In the project open the pipelines page and create a new pipeline. Click the plus + in a stage of the pipeline, and add the deployment service, job, and the database addon. This will make them available in the stage when creating a release flow.
Click + add release flow above the stage to begin creating a release flow. Select get started with visual editor or click the visual tab to create a release flow with the visual editor. You can now click and drag nodes from the list on the right into the workflow in the editor on the left.
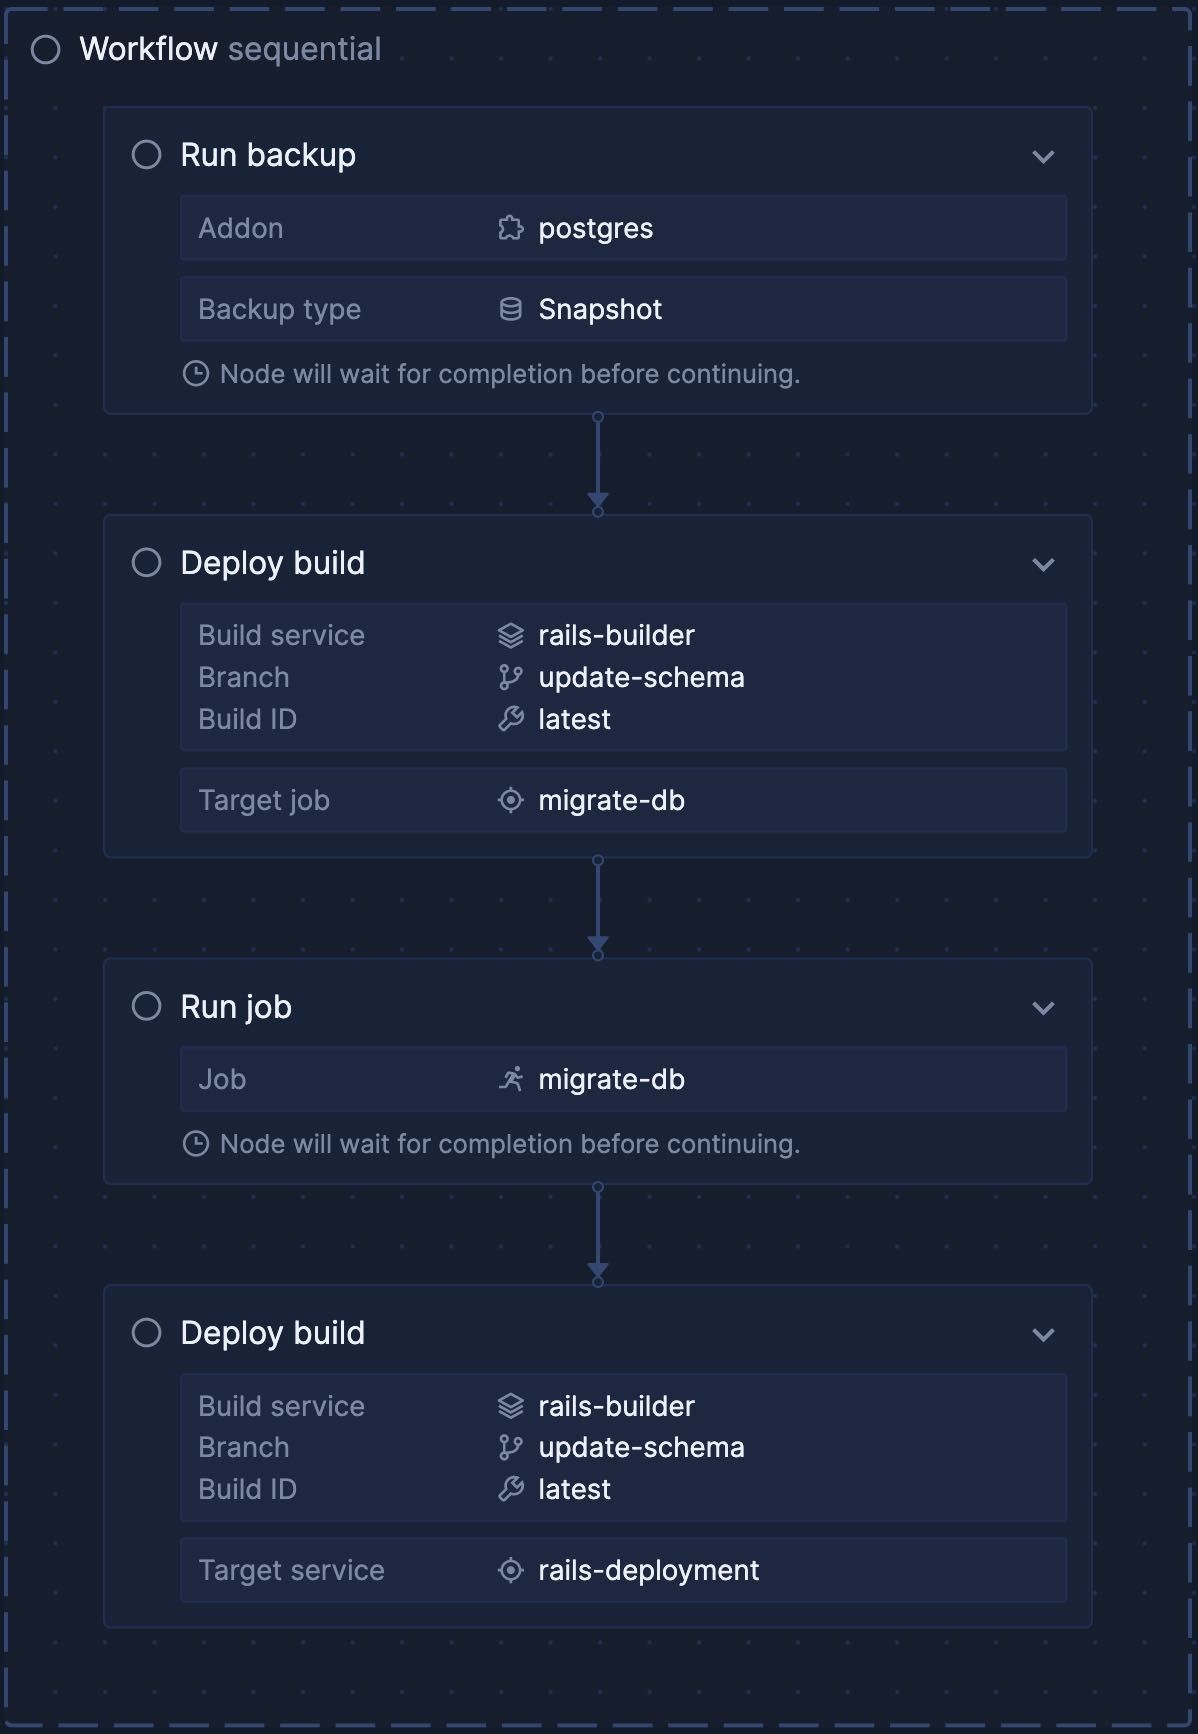
First, drag a run backup node into the editor and click on it to open the node editor. Select your database addon from the addon dropdown selection and choose the backup type. If you don't see the addon in the dropdown menu, exit the release flow editor and ensure it is added to the pipeline stage. Select wait for completion so that the backup is finished before running the migration and save node to finish.
Now, drag a deploy build node underneath the run backup node. It will be added to the workflow with an arrow from the first node to the second, indicating it will be run after it in sequence. You can click and drag nodes to re-order them.
Click the deploy build node to configure it. Select your build service and select the branch (or pull request) relevant for your application and stage (for example your main or production branch), and latest for build. Choose your job as the target and save node to continue.
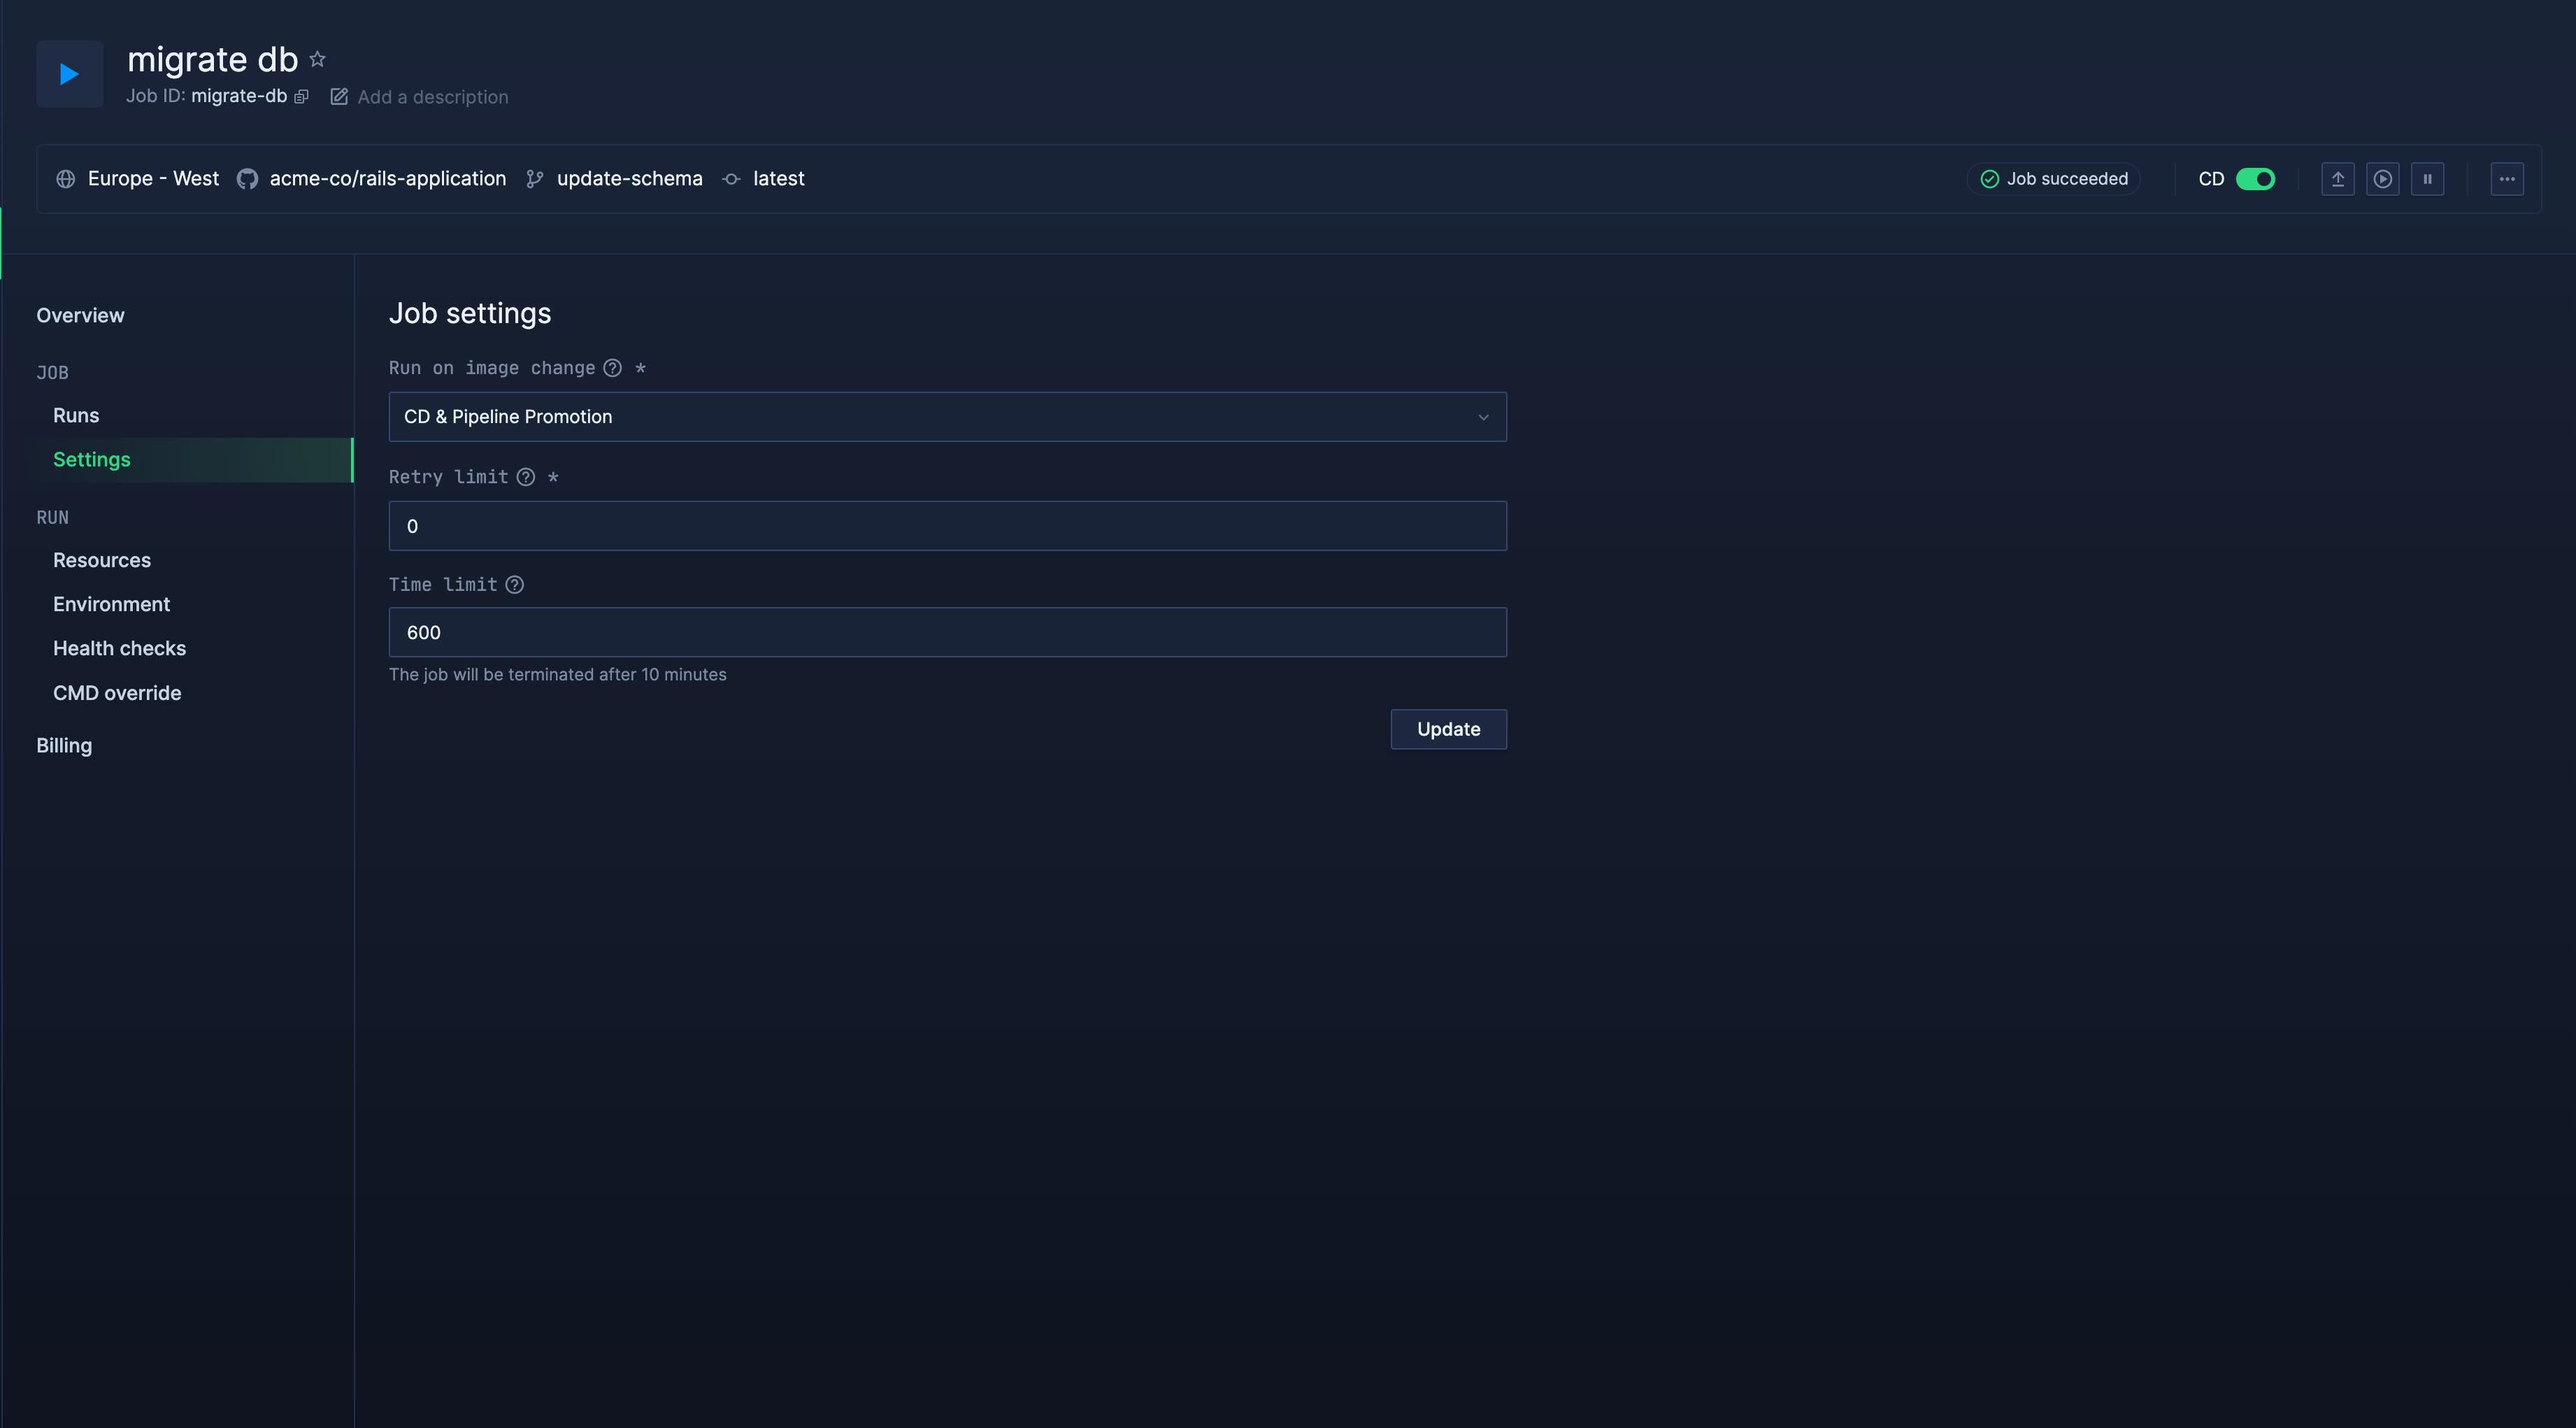
Drag a run job node and select the same job from the dropdown. Toggle wait for completion on, so the next node won't run until the job finishes the migration successfully and save node.
Finally add another deploy build node, selecting the same build service and build as before, but this time with the deployment service as the target, and save node.
Now save release flow and exit the editor.
To recap, the release flow:
- Backs up the database (and waits for completion)
- Deploys the latest build containing your migration to a job
- Runs the job (and waits for completion)
- Deploys the latest build to your deployment service
Click run on the release flow you have just created. You can name your release to more easily identify it, and also add a description if you need to include more information.
You will see the job and deployment service listed in the run dialog, where you can override the builds to deploy for each. You can ignore these and click run to run the release flow with your previously configured builds.
The release flow will now begin running, and the view of the run will automatically open. Each node should move from waiting to completed in sequence. When it has completed you can check your application to see the new release. If the release flow failed for any reason, you can expand a failed node to see the response and why it did not succeed.
Running the release flow will turn off continuous deployment (CD) in your service, so new builds will only be deployed when the release flow is run.
In your pipeline click the options button (three vertical dots) next to your release flow to see the menu. Select view release flow runs to see a list of past runs. You should see your run in the list, with information about the run.
Click on the run to see the result again, and note the buttons in the top-right of the run view: roll back to this release and view rollbacks. Rolling back allows you to quickly revert to a previous deployment if you need to.
You can run a migration automatically by configuring a job to run whenever a new build is completed. You can either enable CD on your deployment service, so that the new release is deployed automatically, or manually deploy the new release.
However, this approach may deploy your new release before the migration has completed, or if the migration fails your new release is deployed anyway. This means you may need to restart or roll back your deployment if this causes your application to crash.
You can either create a job (with CI and CD enabled) that builds from the same repository and branch as the deployment that requires migration, or deploy an image from a build service that also builds the image for your deployment service (with CD enabled on the job).
Create a new manual job with the source for your migration code, either from a repository or a build service. Enable run on image change on your job, select CD & pipeline promotion or always, depending on your desired workflow.
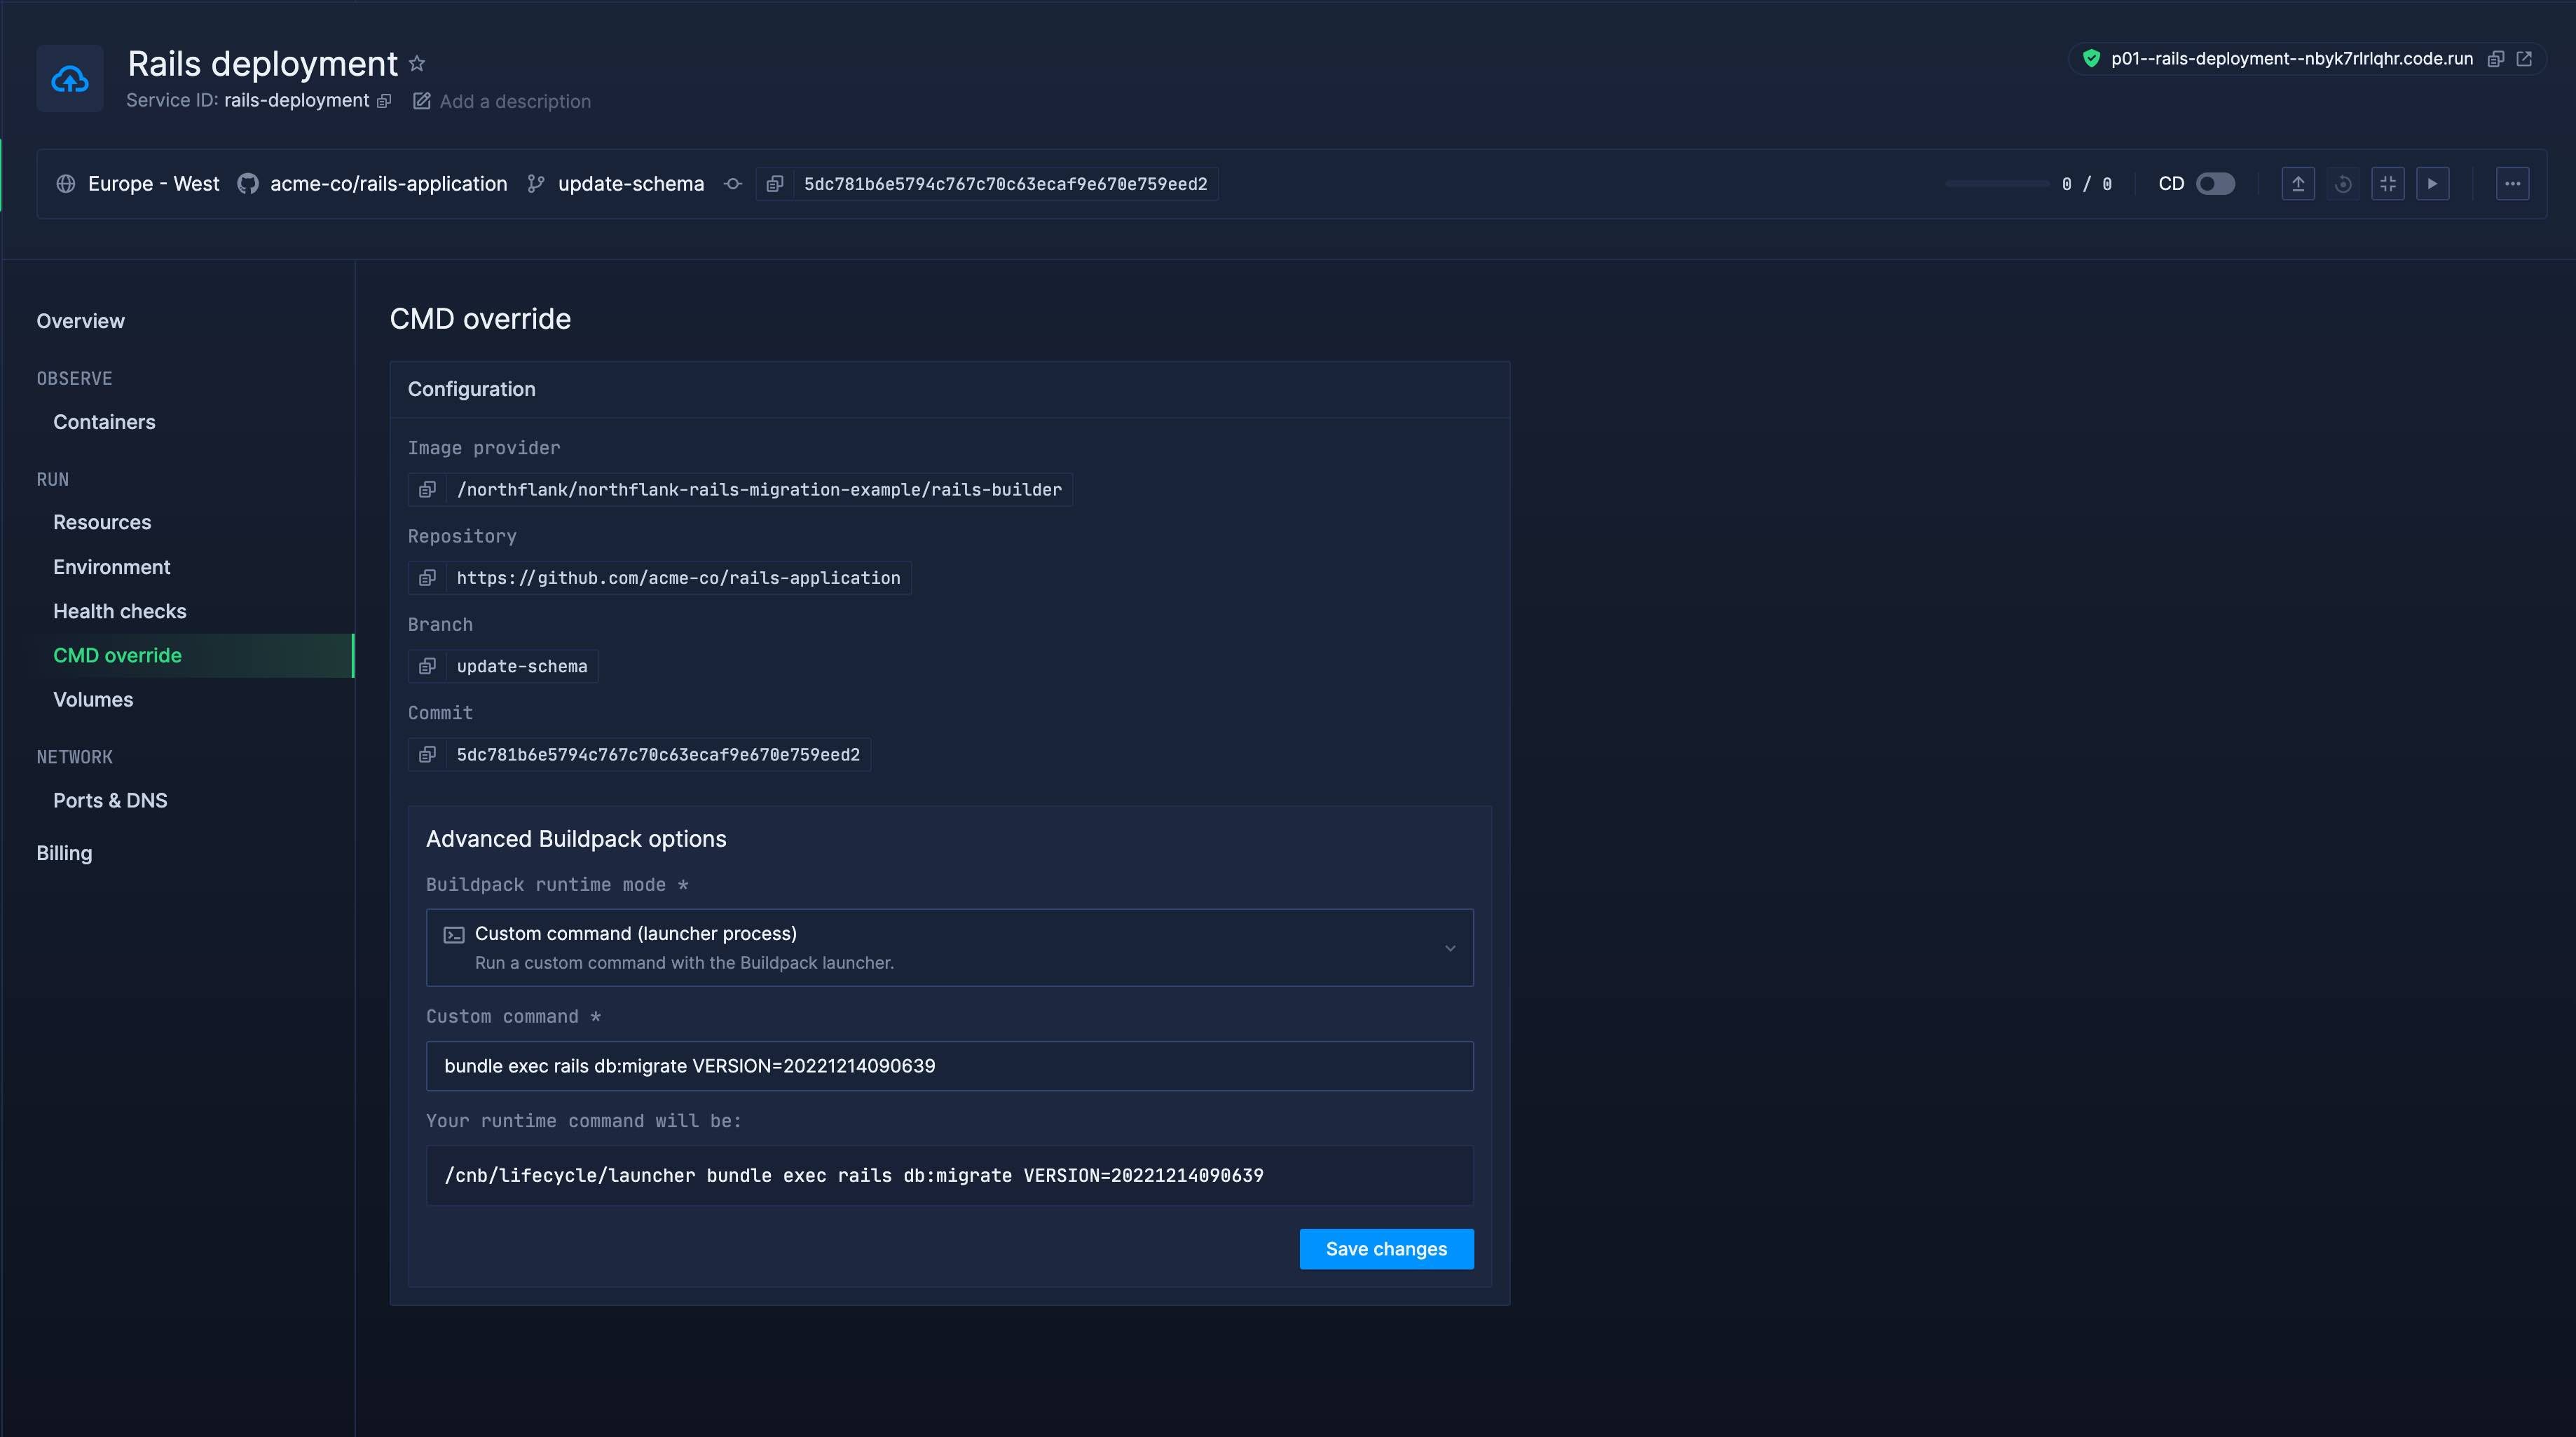
Enter any necessary configuration details to run your migration, for example a command override if your migration code needs to be called with a command other than the default. For example, Python Django might require a command like python manage.py migrate your_app, or for Rails bundle exec rails db:migrate VERSION=20221115174300.
Your job will now execute when your latest commit to the repository is built, so your migration should occur at the same time as your new deployment. You can check the logs for the job run to ensure it has executed successfully.
You can run a migration using command override to execute the migration code when deploying your latest commit. You can set the override in advanced options on the CMD override page of your service, selecting the relevant option from the runtime mode menu. Your deployment will begin redeploying as soon as you save the custom command.
You can enter your own full command, a command to run a script (e.g. from package.json or equivalent), or, if using buildpacks, a custom process from your Procfile.
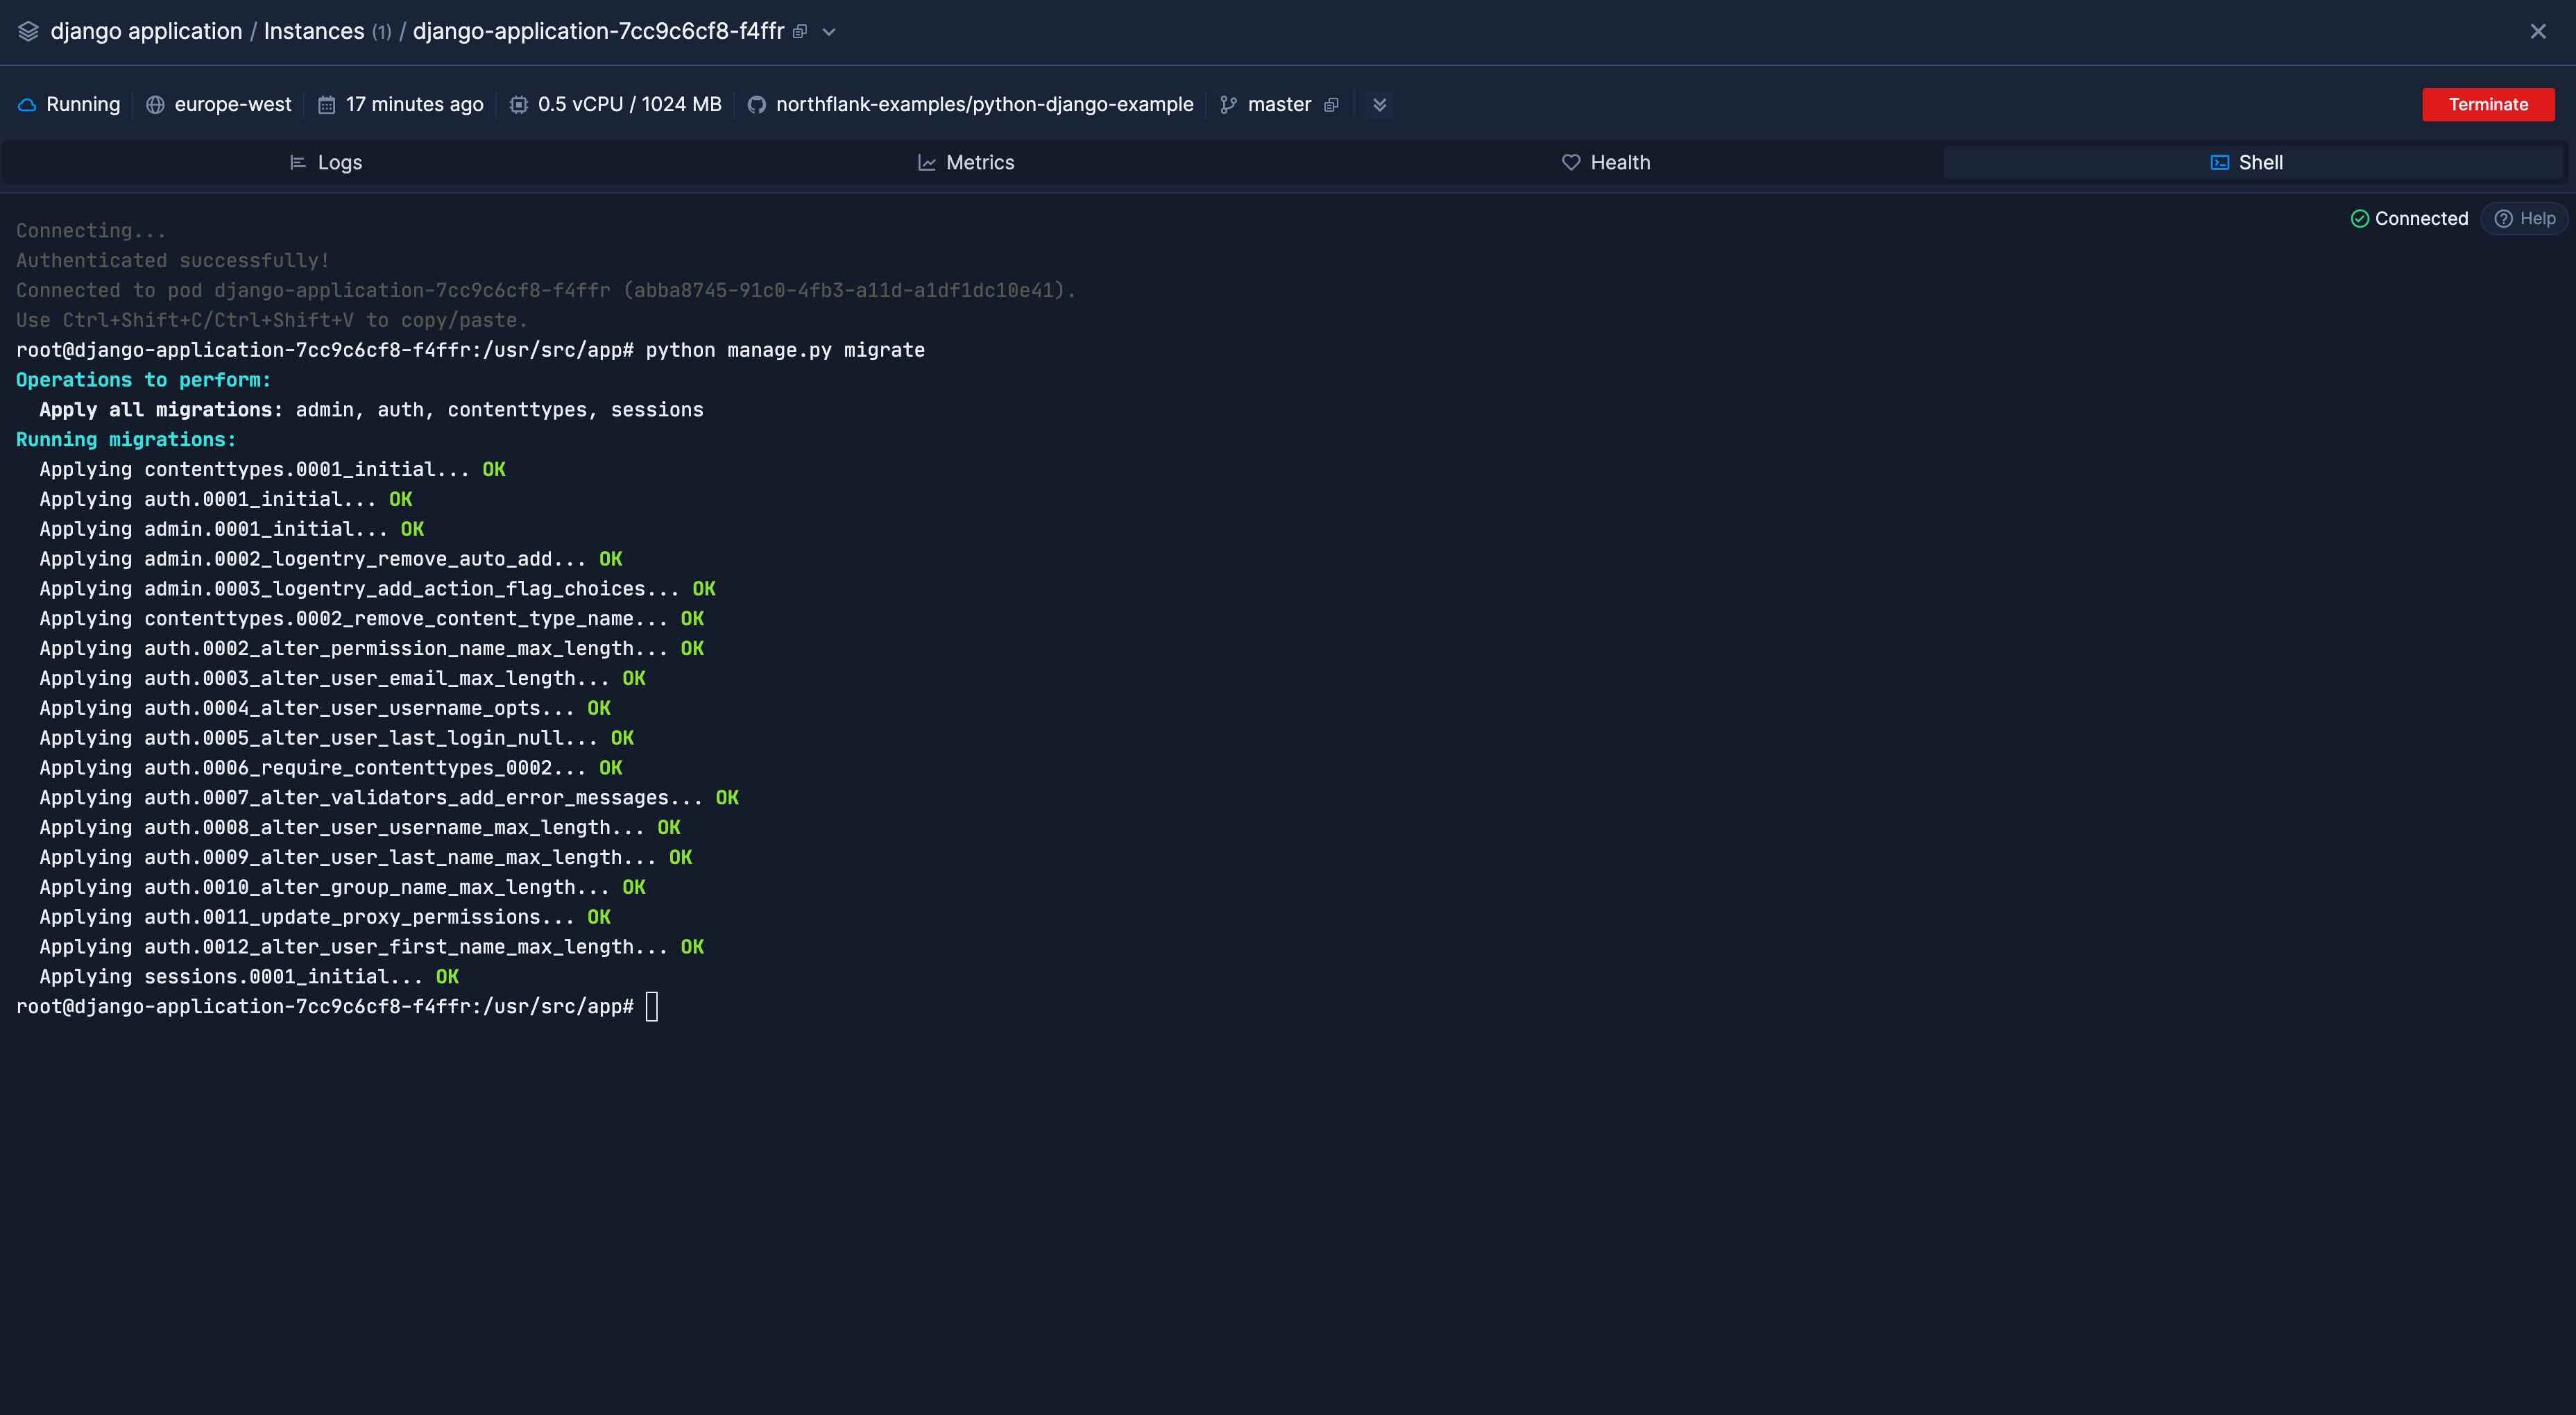
You can manually execute commands in a running workload by accessing the shell from the Northflank application, or by using the Northflank CLI or JS client.
Navigate to your deployment and ensure the commit with your migration is deployed. Open a shell for a running container and enter the command to run your migration.
This method also has the downside of deploying your new release before running the migration, which may require you to restart your deployment if this causes it to crash.
Have questions or feedback regarding release flows and migrations? Contact us. We also have dedicated support plans for business customers available.
Northflank allows you to deploy your code and databases within minutes. Sign up for a Northflank account and create a free project to get started.
- Build your applications using a Dockerfile or buildpacks
- Deploy images with Docker containers
- Create your own stateful workloads
- Persistent volumes
- Observe & monitor with real-time metrics & logs
- Low latency and high performance
- Multiple read and write replicas
- Backup, restore and fork databases