
S3 buckets are a great option for reliable, fast and cheap storage. This type of sink is a useful accompaniment to a feature-rich log aggregator and acts as a backup for all of your logs.
You can send logs to any S3 compatible bucket, but this guide will explain how to set up a log sink using an Amazon Web Services (AWS) S3 bucket.
In your AWS account create an S3 bucket in your desired region. Make sure that public access is allowed so the log forwarder can upload log files.

Create a top level folder which will act as the bucket name in Northflank.
To allow Northflank access to your bucket you need to create an access key. Navigate to your security credentials section in the top right dropdown when viewing your bucket.
Go to access key and create a new one.

Be sure to download the key file or save it in your password manager as you won’t be able to see the secret after closing this popup.
The access point gives you fine grain control over S3 bucket access. Make sure to allow public access and note the access point name.

Once the access point is created, you can access your S3 bucket via a URL in the format: https://<AccessPointName>-<AccountId>.s3-accesspoint.<region>.amazonaws.com.
Your account ID can be found in the dropdown in the top right.
Click here, or navigate to log sinks in your team or user account settings and select add a log sink.
Enter a recognisable name for the sink and select AWS S3 as the sink type.
Enter your endpoint URL, select the region your bucket is hosted in, and provide the access key ID and secret.
Enter the bucket name, the name of the top-level folder you created earlier.
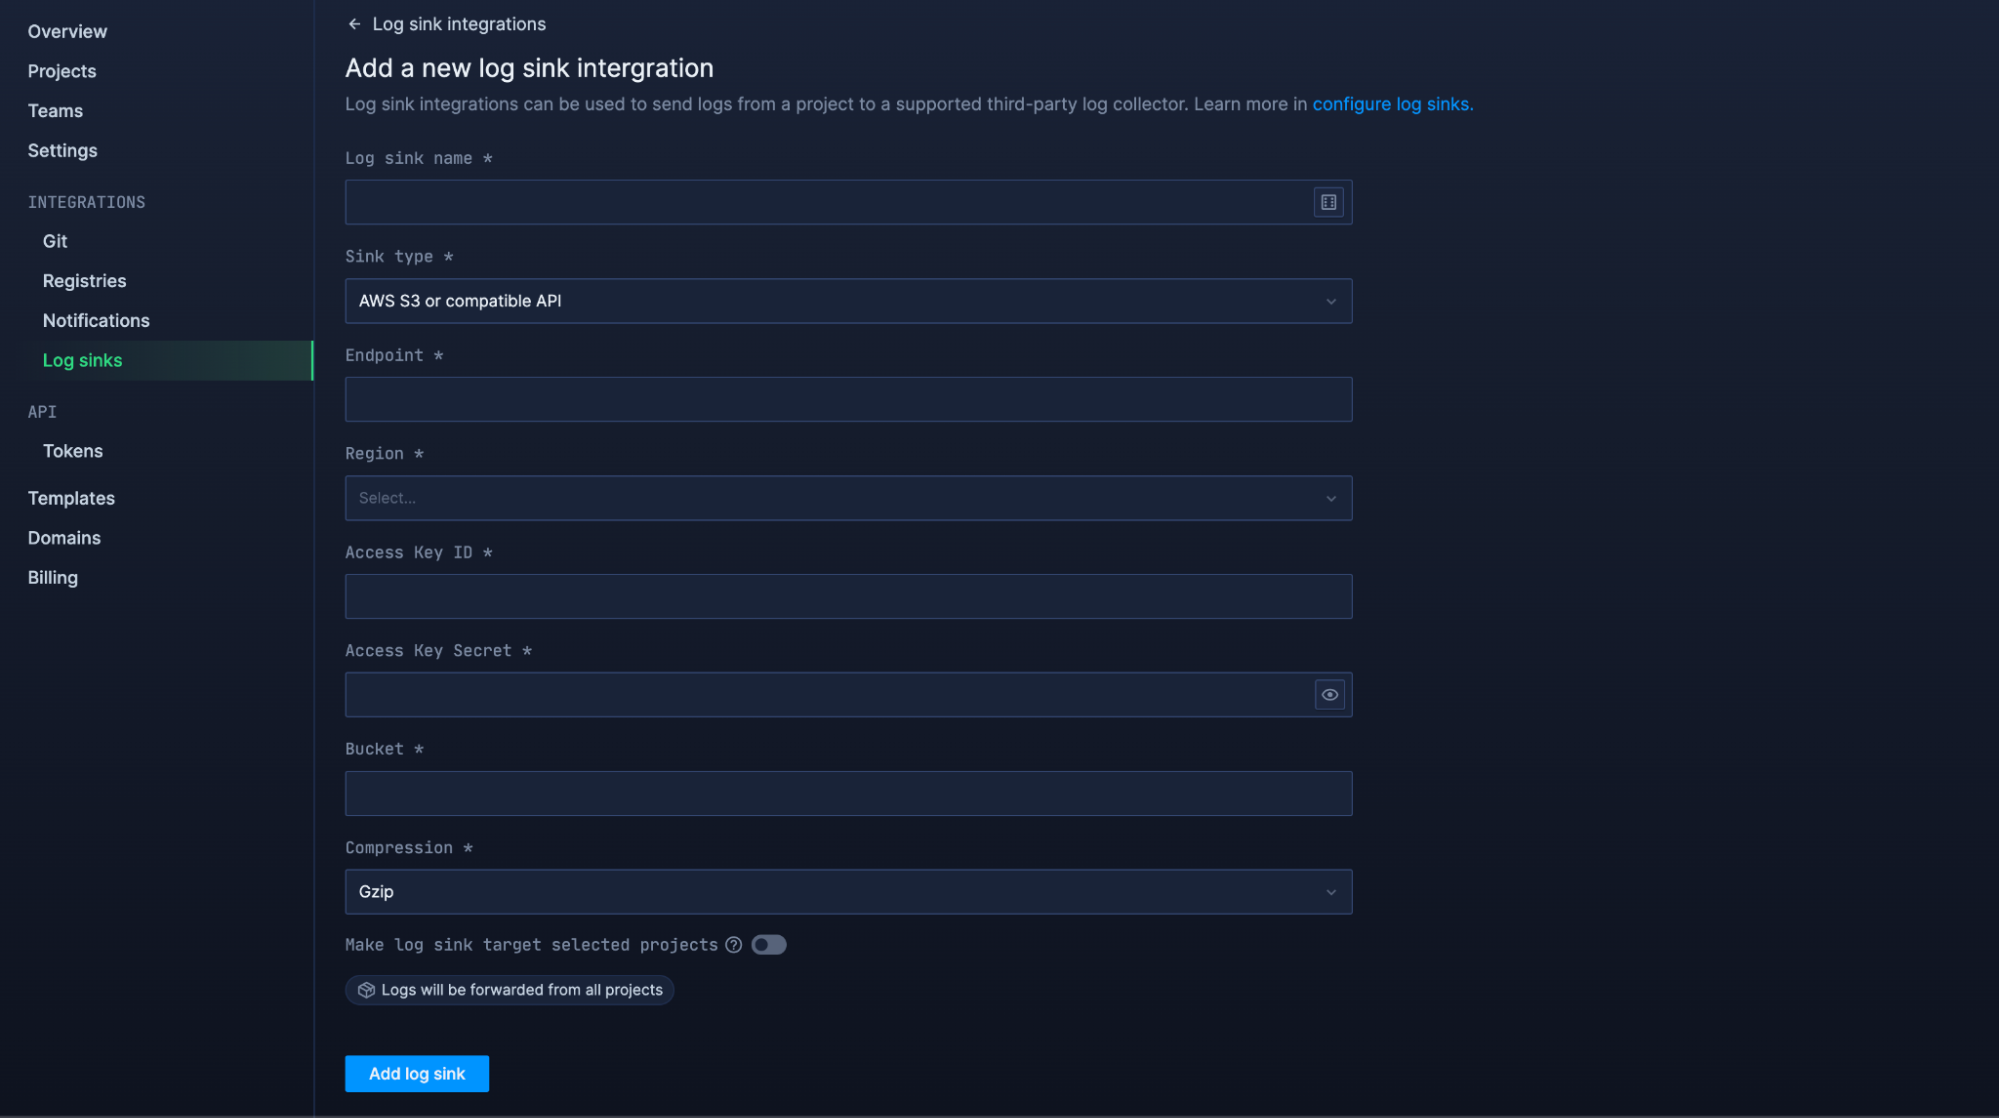
We recommend using Gzip compression to save on space, but you can also send logs as uncompressed text files.
By default, all logs from your account will be forwarded to Axiom. To target specific projects, open advanced options and specify which projects to forward logs from.
You can also enable custom label parsing if your application is configured to send additional keys in JSON-formatted log lines.
Before your log sink is created, Northflank will send a log line to your bucket to verify the credentials are correct. You should see an entry containing the log validating log sink credentials.
To view your logs, simply click on your S3 bucket in the S3 bucket list and inspect the objects. Alternatively, you can look at setting up an Amazon S3 Inventory.
Logs sent to S3 buckets are automatically segmented into folders to help identify and find them. The structure looks like:
| Project | Resource category | Resource |
|---|---|---|
| my-project/ | service/ | my-service -1/ |
| my-project/ | service/ | my-service -2/ |
| my-project/ | addon/ | mongo-db/ |
| my-project/ | job/ | db-cleanup-cron/ |
Other things to note:
- Northflank will create a folder to store logs each day, with the format
date=YYYY-MM-DD - Each log file will be named with a Unix timestamp in seconds, followed by a UUID:
[timestamp]-[UUID].[file-extension] - Logs will have the file extension .log if uncompressed, or .log.gzip for compressed logs
- Logs will be sent in batches no greater than 32.7KB, or every second while logs are being generated
If you want to modify your sink after creation, navigate to the log sink list and click on the sink to view its details.
You can update the project targets and sink data as well as pause/resume the sink.
Have questions or feedback? You can always reach out to our team.