
Mezmo (previously LogDNA) is an easy to setup log collection platform with a practical log viewing tool. You only need an ingestion key to get started. This guide will detail everything you need to know to send logs to Mezmo from Northflank.
In your Mezmo dashboard click on the cog on the left sidebar and navigate to API keys, under organisation settings. If you don’t already have an ingestion key, create a new one.
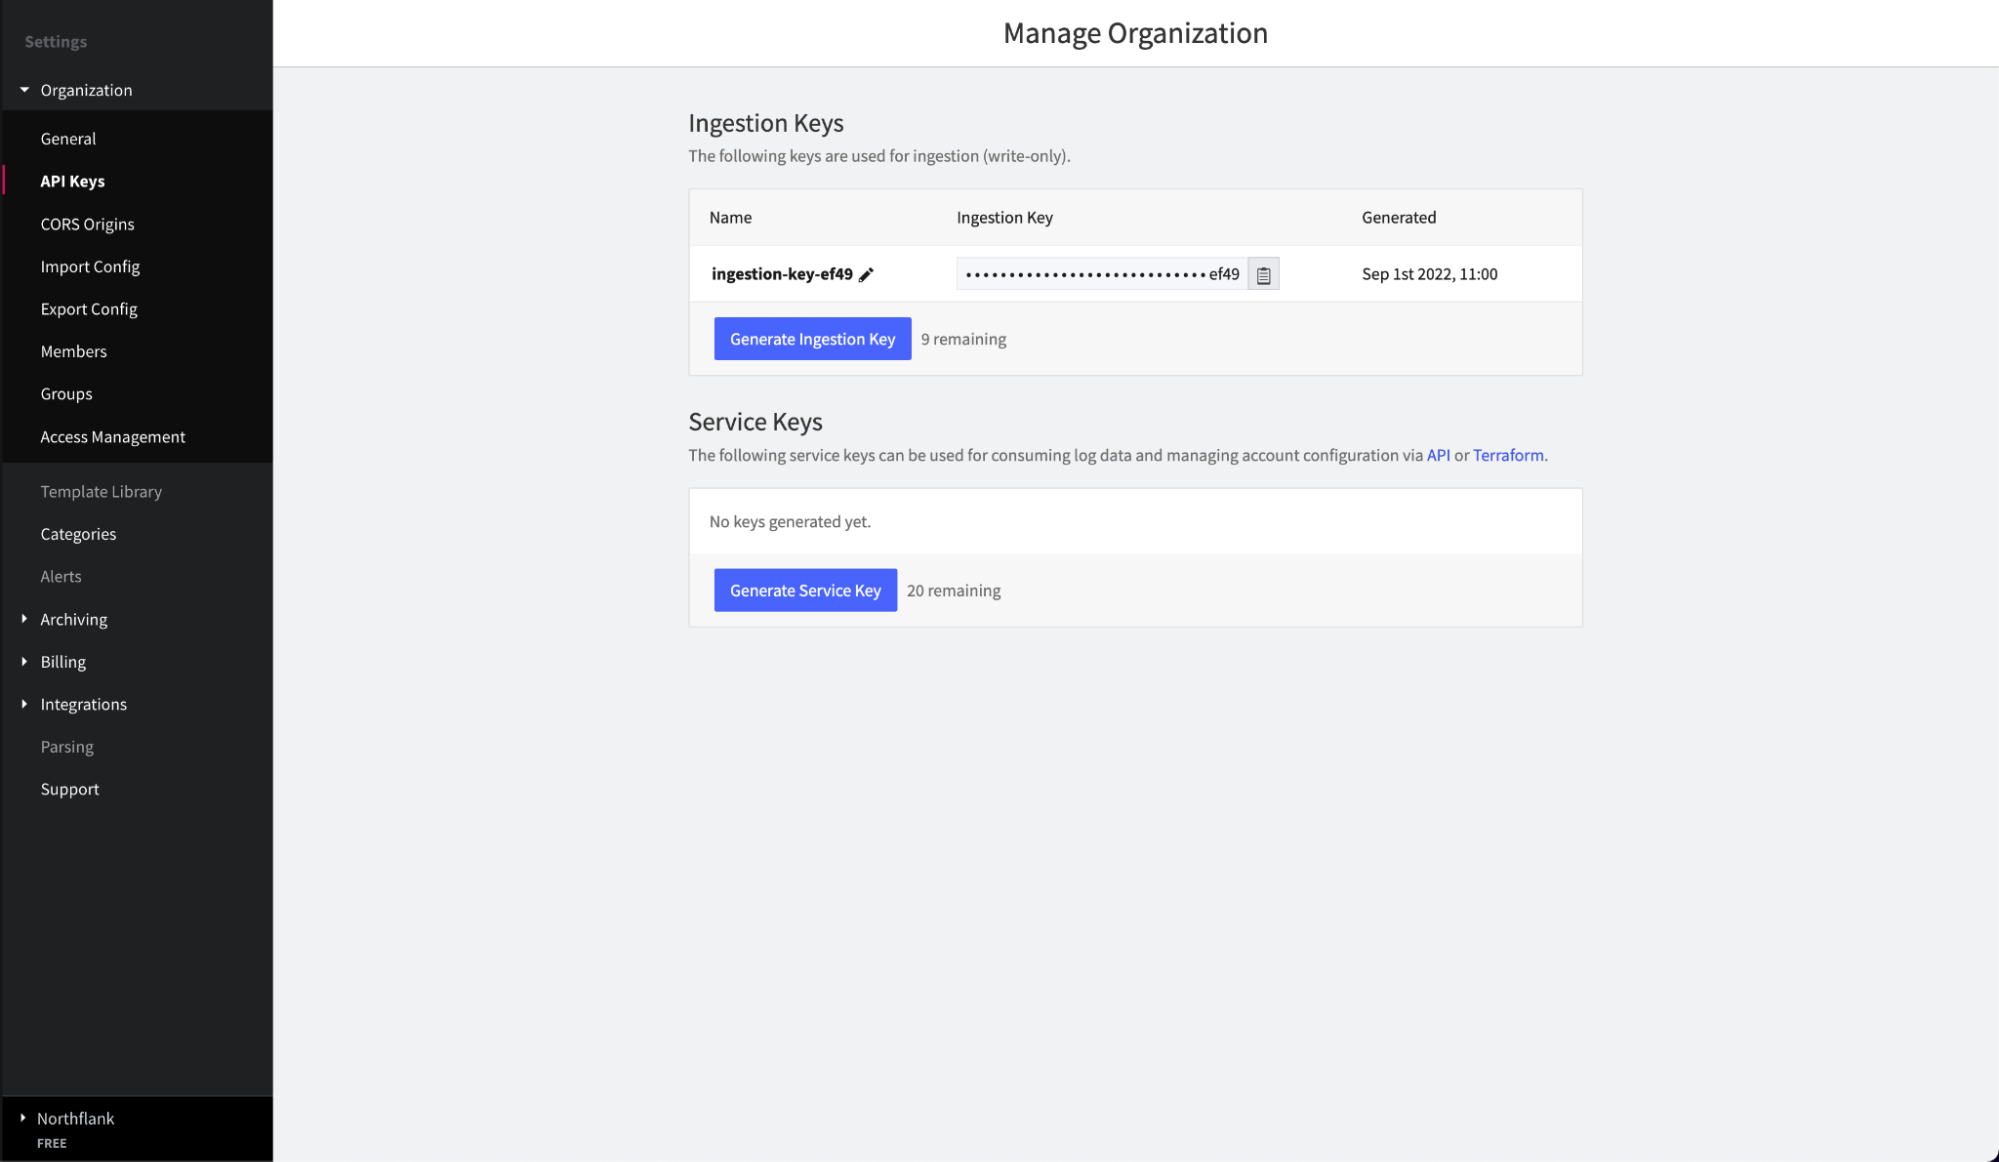
Copy your ingestion key and head to Northflank.
Follow this link or navigate to the log sinks page in your team or user account settings and add a log sink.
Give your sink a name, select Mezmo (formerly LogDNA) as the sink type, and paste in your ingestion key.
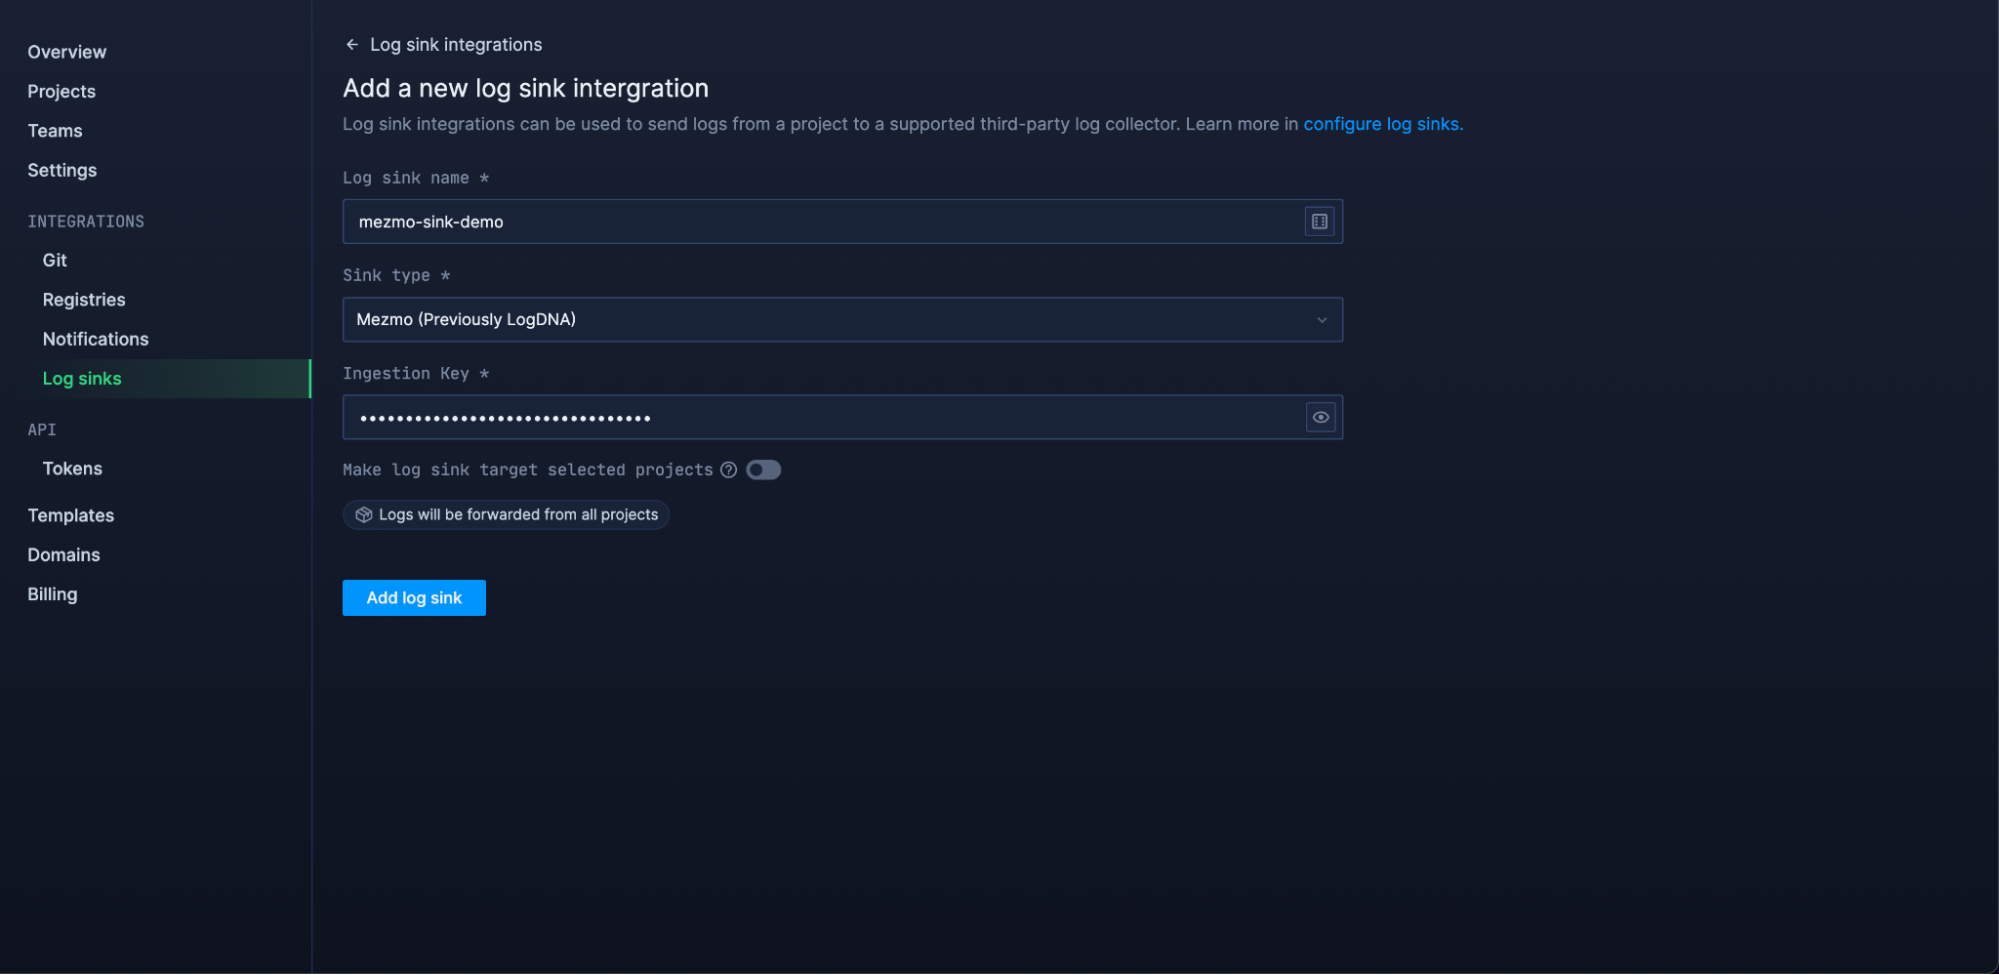
By default, all logs from your account will be forwarded to Mezmo. To target specific projects, open advanced options and specify which projects to forward logs from.
You can also enable custom label parsing if your application is configured to send additional keys in JSON-formatted log lines.
Add your log sink and your logs should start arriving in your Mezmo account.
Before your log sink is created, Northflank will send a log line to your sink to verify the credentials are correct. This appears as a log line consisting of validating log sink credentials.
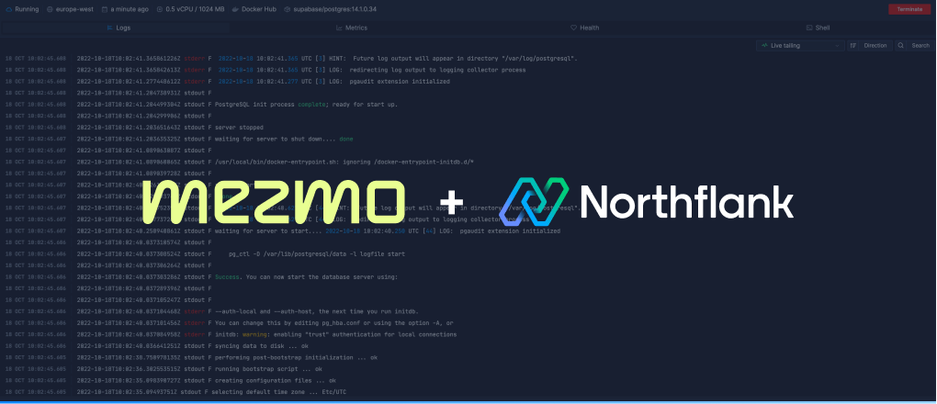
In Mezmo use the left sidebar to navigate to the everything view. This should start live tailing your logs.
We are currently working on a more enriched view of incoming logs for Mezmo integrations.
If you want to modify your sink after creation, navigate to the log sink list and click on the sink to view its details.
You can update the project targets and sink data as well as pause/resume the sink.
Have questions or feedback? You can always reach out to our team.