
How to deploy a SolidJS app on Northflank
SolidJS is a fast, reactive framework designed for building modern web applications. Whether you are creating lightweight interactive pages or full production web apps, SolidJS provides a powerful and efficient developer experience. If you are ready to deploy a SolidJS application, the process can be confusing, especially when preparing the build output and configuring the server. With Northflank, you can deploy a SolidJS project in just a few minutes without managing infrastructure yourself.
In this guide, we will walk through how to host a SolidJS app step by step. You will create a SolidJS project, prepare it for production, choose between a Dockerfile or buildpack deployment, and deploy it to Northflank. By the end, you will have a production-ready SolidJS application with automatic scaling, HTTPS, and monitoring.
Before starting, make sure you have:
- Basic knowledge of SolidJS
- Node.js installed (download here)
- A GitHub, GitLab, or Bitbucket account
- A Northflank account and link your git provider.
- Setting up a basic SolidJS project
- Preparing the project for production
- Deploying a SolidJS application to Northflank
Northflank is a platform that allows developers to build, deploy, and scale applications, services, databases, jobs, and GPU workloads on any cloud through a self-service approach. For DevOps and platform teams, Northflank provides a powerful abstraction layer over Kubernetes, enabling templated, standardized production releases with intelligent defaults while maintaining the configurability you need.
SolidJS is a lightweight, reactive JavaScript framework designed for building fast and scalable user interfaces. It uses fine-grained reactivity to update only the parts of the UI that change, rather than re-rendering components. This approach results in excellent performance both during development and in production. SolidJS applications can be rendered on the client or the server, and the framework provides modern tooling for routing, data loading, and state management.
If you already have a SolidJS project locally or in a Git repository, you can skip this step.
To create a new SolidJS project, run the following command in your terminal:
$ pnpm create solid

◆ Project Name
|  <solid-project>

◆ Is this a SolidStart project?
|  ● Yes / ○ No

◆ Which template would you like to use?
│  ● basic
│  ○ ts-vitest
│  ○ ts-uvu
│  ○ ts-unocss
│  ○ ts-tailwindcss

◆ Use TypeScript?
│ ● Yes / ○ NoNext, cd into your project directory and install the dependencies.
$ pnpm run devOpen your browser and navigate to http://localhost:3000 to see your SolidJS application running.
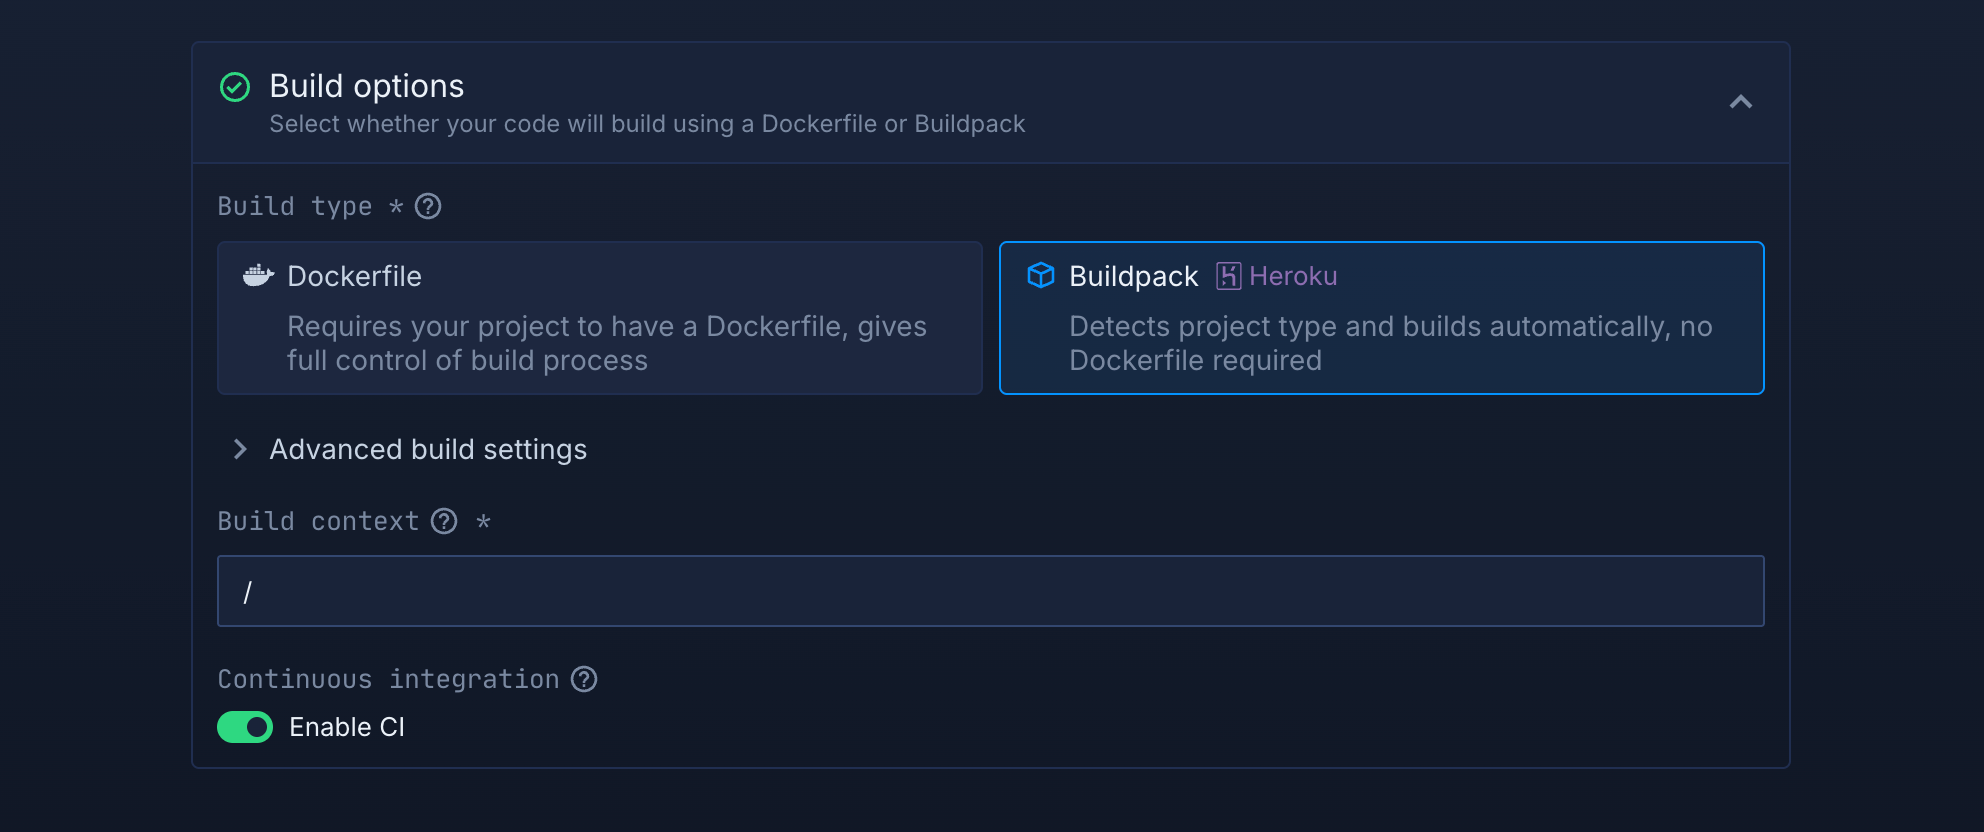
This guide uses the buildpack deployment option, where Northflank automatically installs dependencies and builds your app. Dockerfile deployment is optional if you want full control over the environment.
Make sure your package.json includes valid scripts:
"scripts": {
  "dev": "vinxi dev",
  "build": "vinxi build",
  "start": "vinxi start",
  "version": "vinxi version"
}
Push your code to GitHub or any Git provider you prefer.
Now that you've prepared your SolidJS app for deployment, let's get it live on Northflank. The following steps will guide you through connecting your Git repository, configuring the build process, and setting up your public-facing service. In just a few minutes, you'll have a production-ready SolidJS application with automatic scaling, HTTPS, and monitoring capabilities
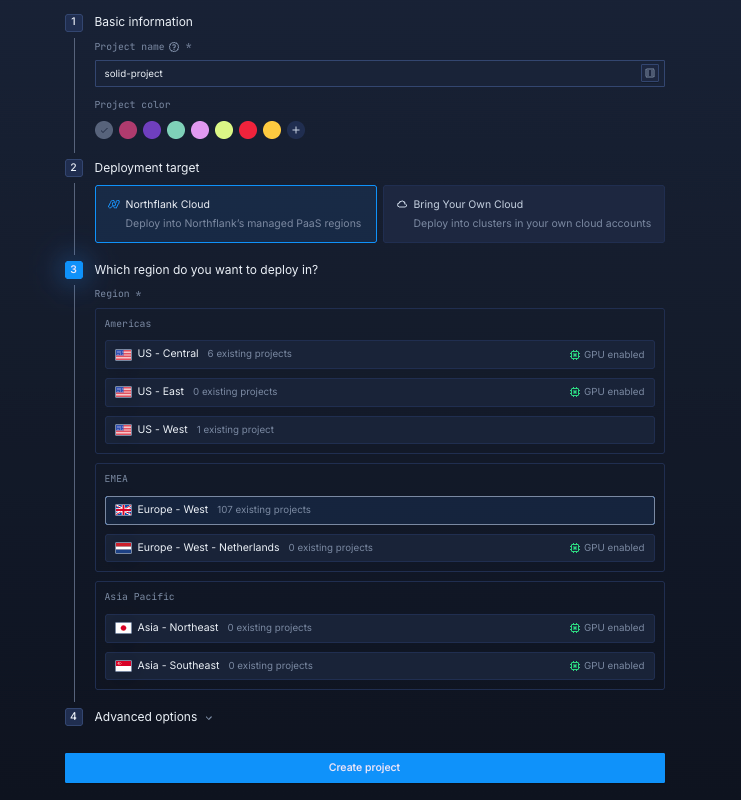
Log in to your Northflank dashboard, click the “Create new” button (+ icon) in the top right corner of your dashboard. Then, select “Project” from the dropdown.

Projects serve as workspaces that group together related services, making it easier to manage multiple workloads and their associated resources.
You’ll need to fill out a few details before moving forward.
-
Enter a project name, such as
solid-projectand optionally pick a color for quick identification in your dashboard. -
Select Northflank Cloud as the deployment target. This uses Northflank’s fully managed infrastructure, so you do not need to worry about Kubernetes setup or scaling.
(Optional) If you prefer to run on your own infrastructure, you can select Bring Your Own Cloud and connect AWS, GCP, Azure, or on-prem resources.
-
Choose a region closest to your users to minimize latency.
-
Click Create project to finalize the setup.
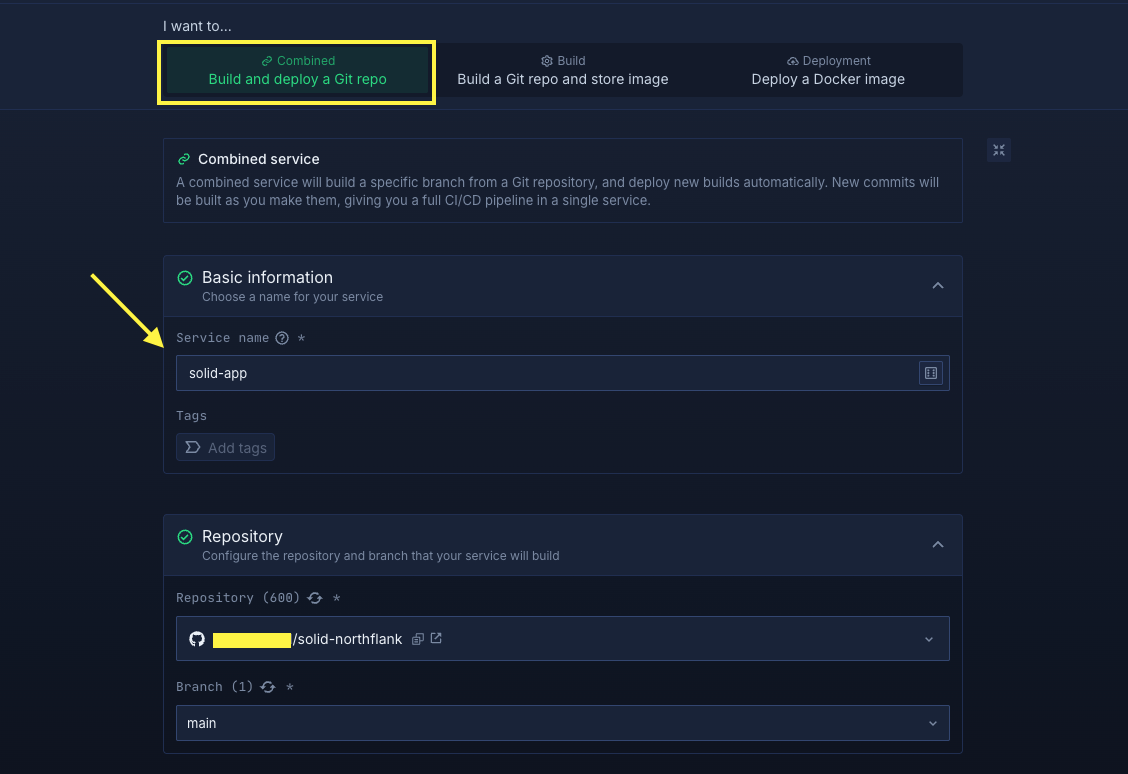
In your project, navigate to the Services tab in the top menu and click Create New Service. Select Combined and name your service, for example, solid-app. For the Repository, link to your app repository.
Select Build Option:
Choose Dockerfile/Buildpack for deployment.
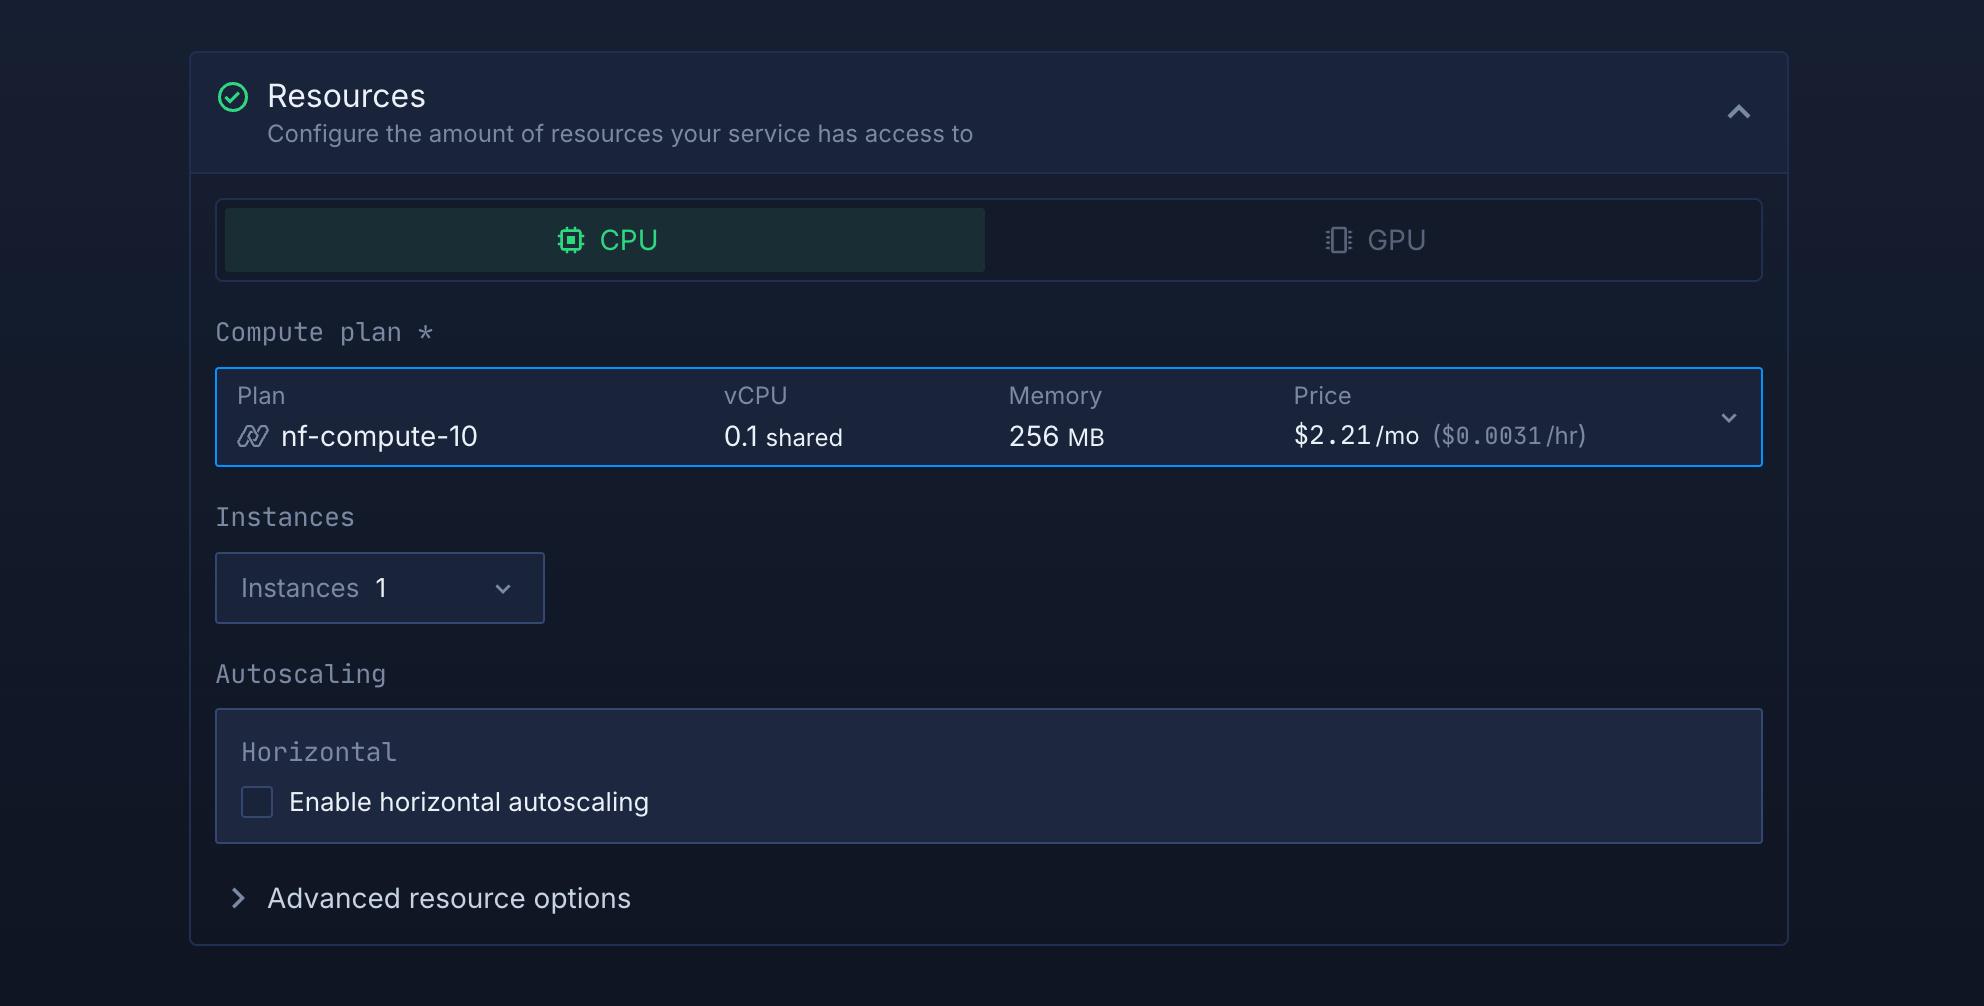
Select compute resources
Choose the compute size that best matches your workload:
- Small plans are fine for lightweight usage.
- Larger plans are recommended for heavy usage.
Note: You can adjust resources later, so you can start small and scale as needed.
Set up a port so your app is accessible:
- Port:
8080 - Protocol:
HTTP - Public access: enable this to let people access your app from the internet
Northflank will automatically generate a secure, unique public URL for your service. This saves you from having to manage DNS or SSL certificates manually.

Deploy your service
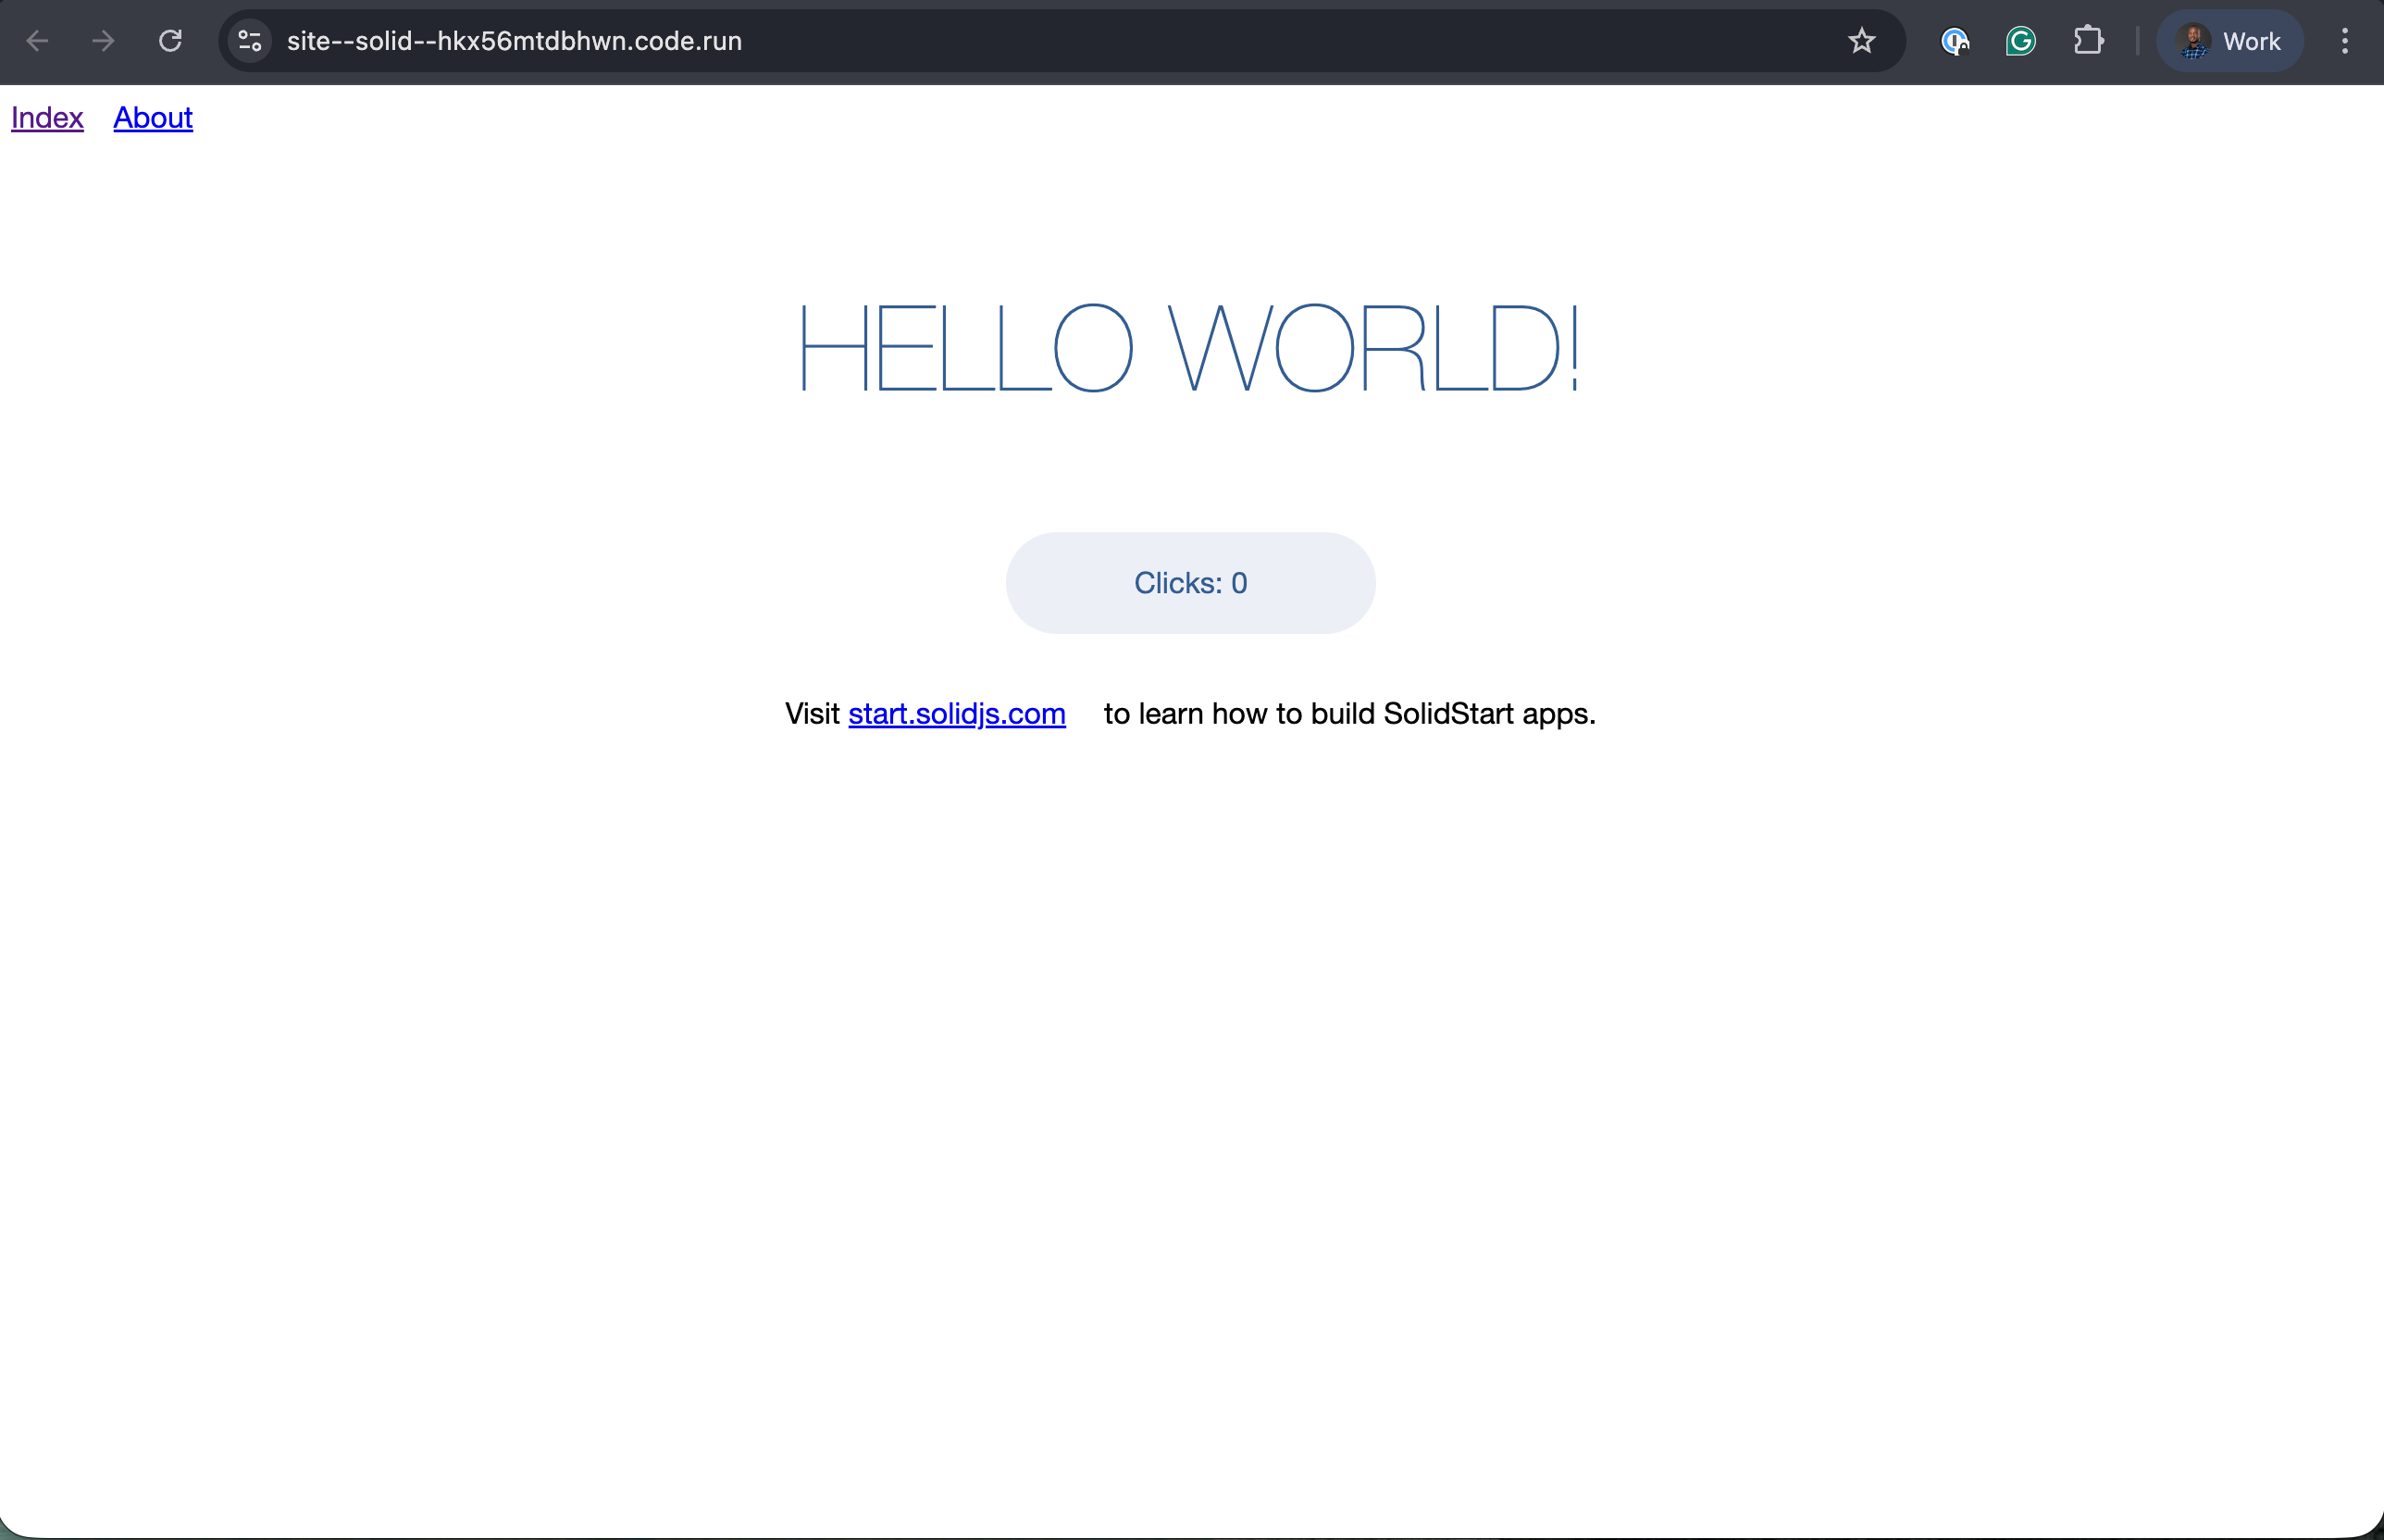
When you’re satisfied with your settings, click “Create service.” and Northflank will deploy your app.
Once the deployment is successful, you’ll see your service’s public URL at the top right corner, e.g.: p01--solid-app--lppg6t2b6kzf.code.run
From here, you can:
- Add a custom domain with automatic HTTPS
- Scale your service by increasing replicas or resources
- Add backend services (e.g. APIs, databases)
- Securely manage environment variables with Secrets groups
- Monitor logs and performance in real-time
For more advanced setups, check the Northflank documentation.
You have successfully deployed a SolidJS application to Northflank. This workflow gives you a fast and reliable setup for hosting SolidJS applications with containerized builds, automated deployments, and production-ready infrastructure. You now have a scalable environment that can grow alongside your application, with tools for monitoring, HTTPS, and multi-service deployment built in.