
How to deploy Infisical: step-by-step deployment guide
If you’re looking for a secure and open source platform to manage secrets and environment variables, Infisical is one of the best options available. It helps developers and teams store, share, and synchronize sensitive configuration values across projects safely and efficiently.
With Northflank, you can deploy Infisical in minutes using a one-click template or configure it manually. Northflank manages scaling, storage, networking, and infrastructure so you can focus on your security setup instead of DevOps complexity.
Before you begin, create a Northflank account.
- Deploying Infisical with a one-click template on Northflank
- Deploying Infisical manually on Northflank
What is Northflank?
Northflank is a modern developer platform that makes it easy to build, deploy, and scale applications, databases, jobs, and services. It abstracts Kubernetes complexity with smart defaults, providing production-ready infrastructure while still allowing deep customization when needed.
You can launch Infisical on Northflank in just a few minutes using the ready-made template. This option is ideal if you want a quick, reliable, and secure deployment without performing manual configuration.
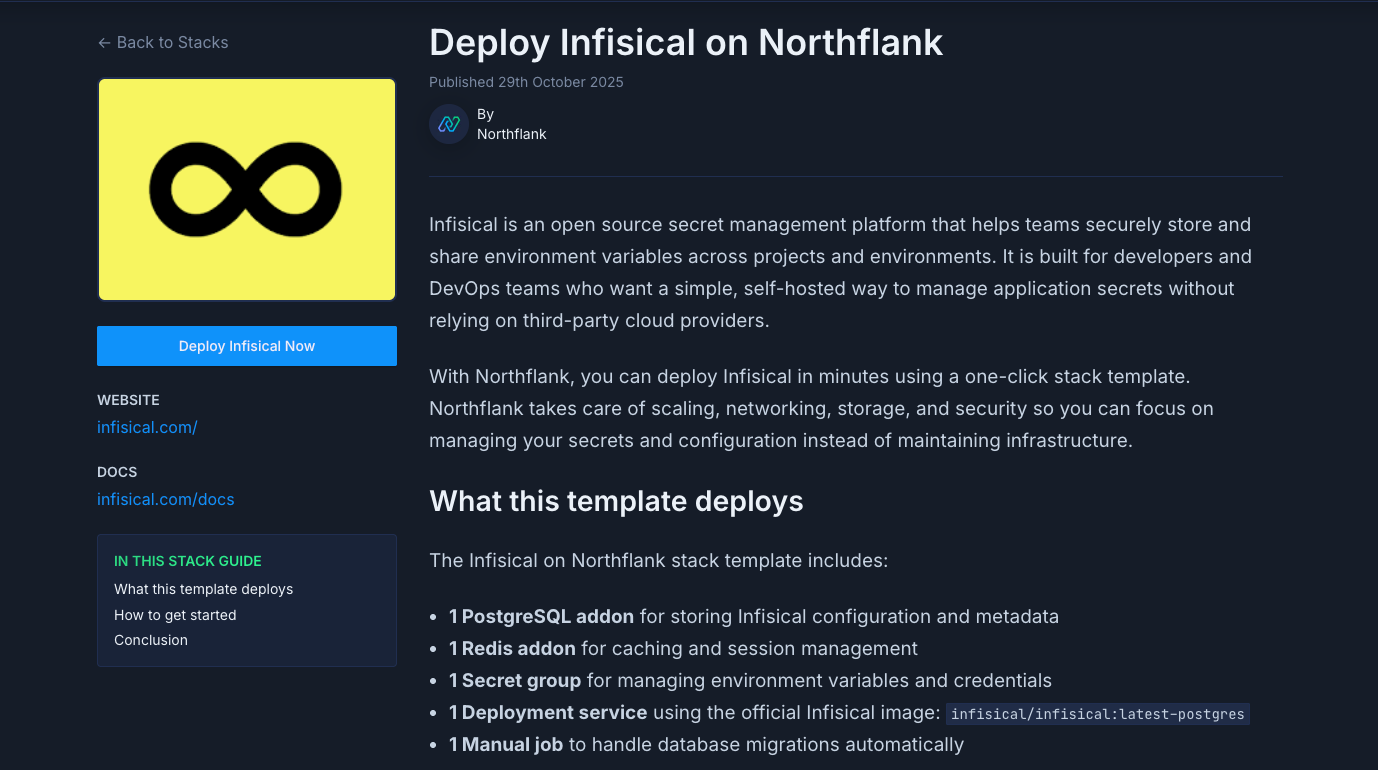
The Infisical deployment on Northflank includes:
- 1 PostgreSQL addon for storing application and configuration data
- 1 Redis addon for caching and session handling
- 1 Secret group for environment variables and credentials
- 1 Deployment service using the official Docker image:
infisical/infisical:latest-postgres - 1 Manual job for running database migrations
This setup creates a fully functional Infisical instance, preconnected to all required dependencies for secure and scalable hosting.
- Visit the Infisical template on Northflank
- Click
Deploy - Northflank will automatically:
- Create the project and database
- Provision Redis and link credentials
- Set up the secret group
- Deploy the Infisical service
- Expose a public URL for your Infisical dashboard
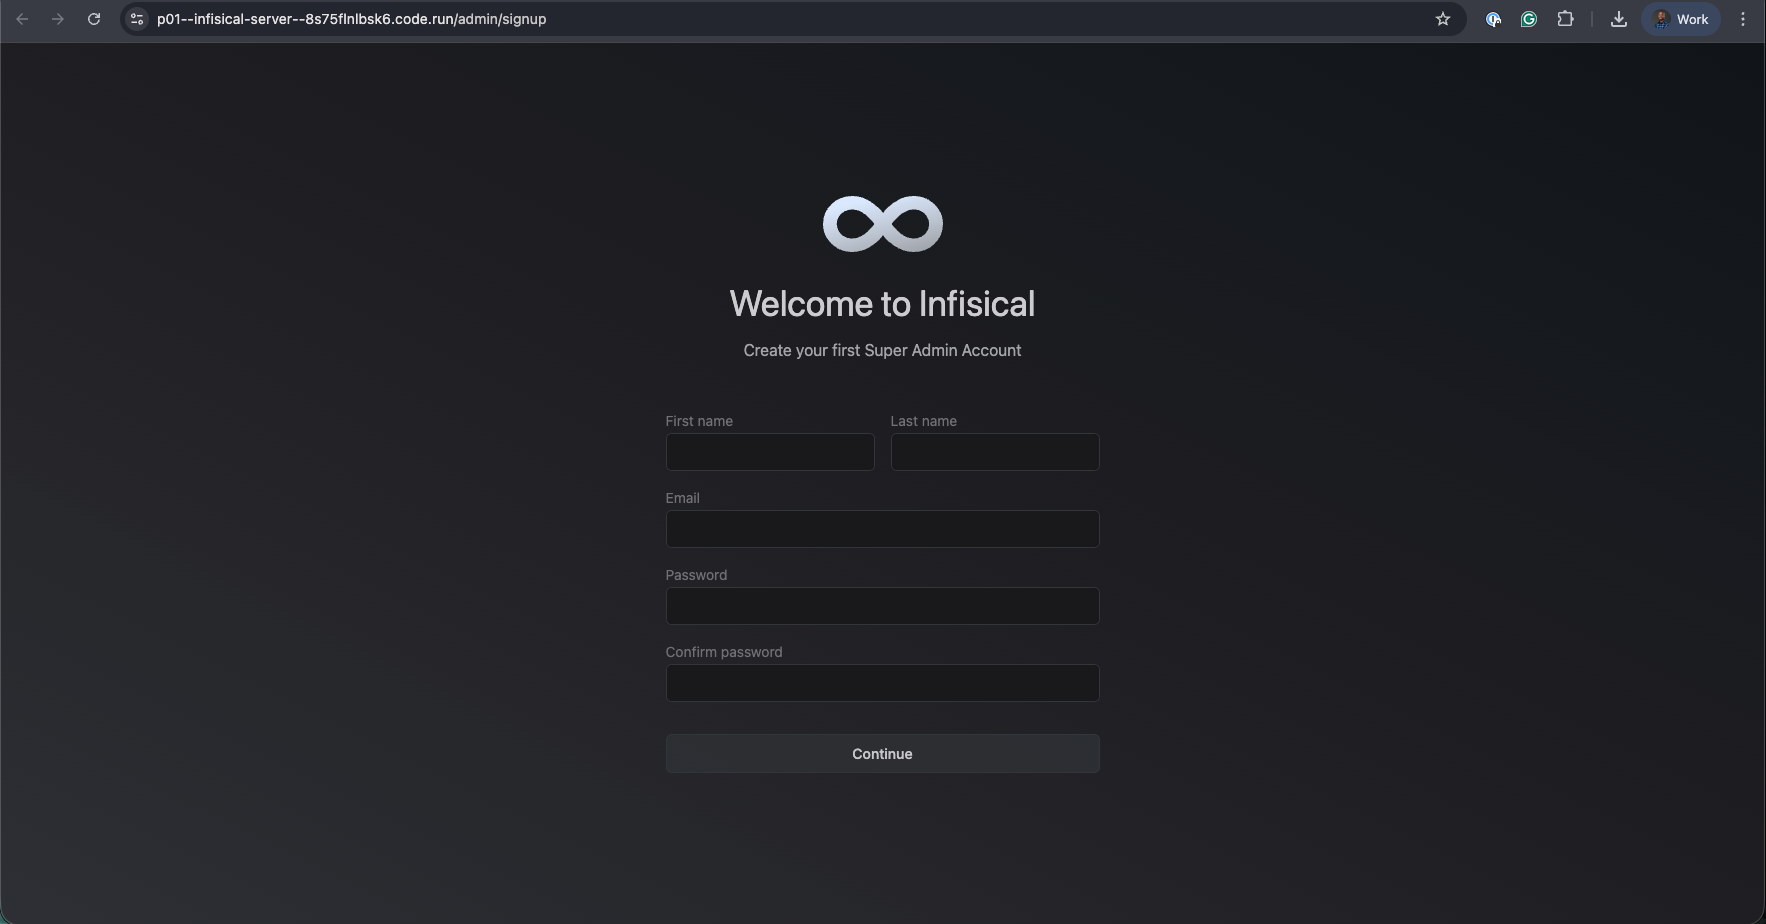
- Once deployment completes, open the generated URL to access your Infisical web app
If you prefer a more customizable setup, you can deploy Infisical manually. This gives you full control over configuration, addons, and environment variables.
Note: You can also customise Northflank's one-click deploy templates.
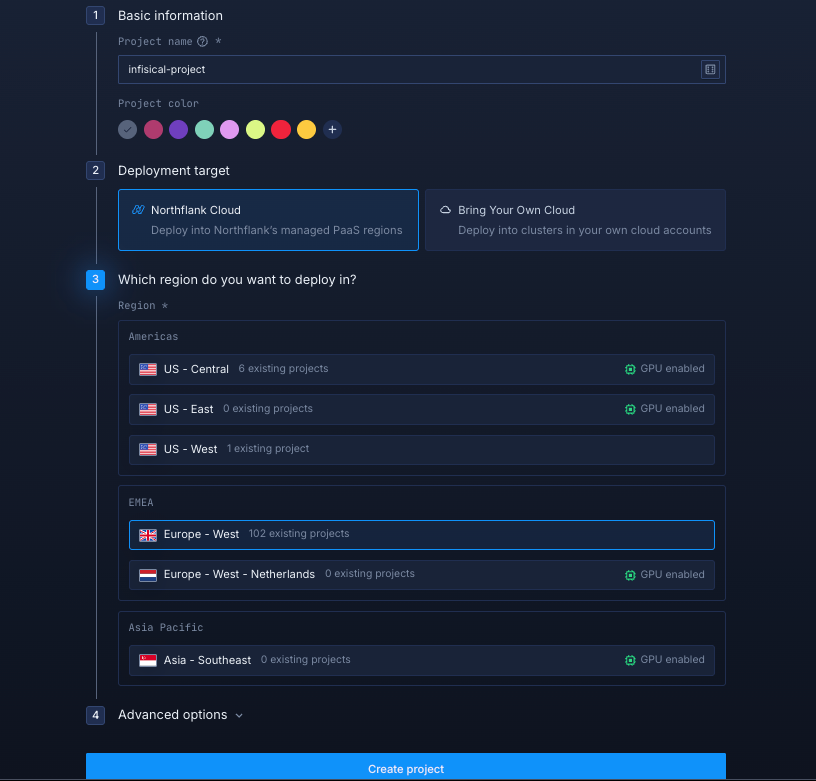
Log in to your Northflank dashboard, click the “Create new” button (+ icon) in the top right corner of your dashboard. Then, select “Project” from the dropdown.

Projects serve as workspaces that group together related services, making it easier to manage multiple workloads and their associated resources.
You’ll need to fill out a few details before moving forward.
-
Enter a project name, such as
infisical-projectand optionally pick a color for quick identification in your dashboard. -
Select Northflank Cloud as the deployment target. This uses Northflank’s fully managed infrastructure, so you do not need to worry about Kubernetes setup or scaling.
(Optional) If you prefer to run on your own infrastructure, you can select Bring Your Own Cloud and connect AWS, GCP, Azure, or on-prem resources.
-
Choose a region closest to your users to minimize latency.
-
Click Create project to finalize the setup.
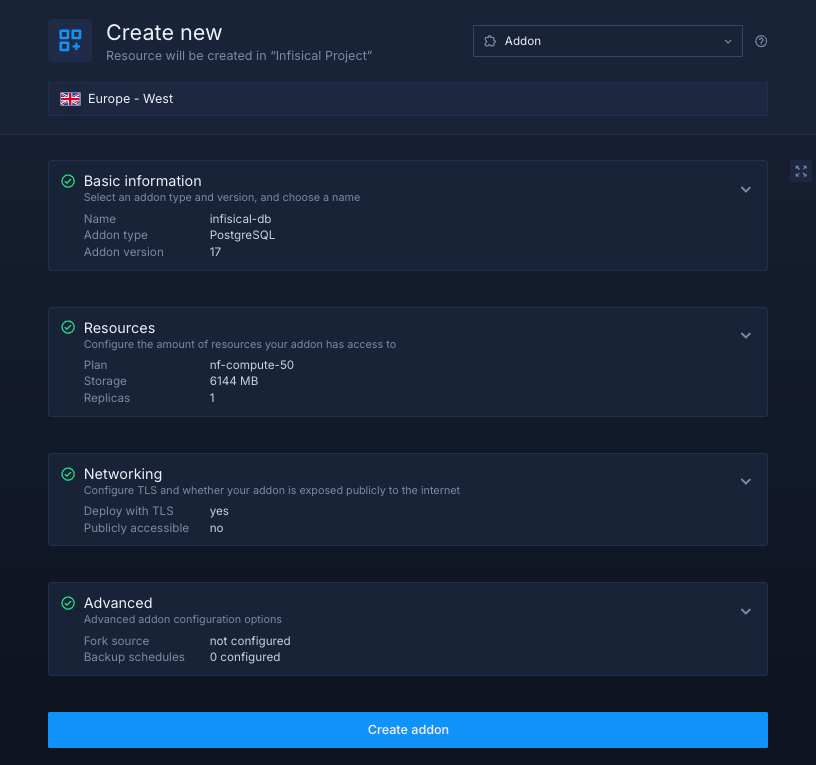
Inside your project, go to the Addons tab at the top menu and click "Create new addon". Then, select PostgreSQL as the Addon type, give it a descriptive name such as infisical-db, select your preferred version, and choose a compute plan size.
- If you’re just testing or experimenting, the smallest option is cost-effective and sufficient.
- For production, we recommend starting with
nf-compute-50. This provides more resources and stability, ensuring Infisical runs reliably under real workloads.
Once you’ve configured the settings, click Create addon to provision your database.
Next, you’ll need a Redis instance for caching and session management.
- Go to the Addons tab again and click Create new addon.
- Select Redis as the Addon type.
- Give it a name like
infisical-rd. - Choose a version (the default latest version is recommended) and a compute plan.
- Click Create addon to provision your Redis service.
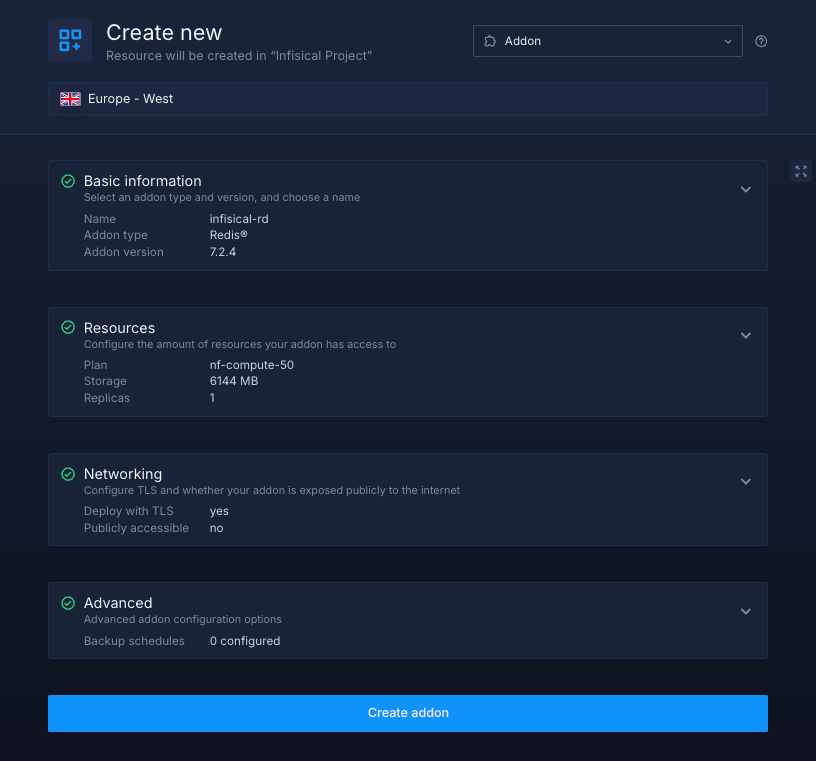
Redis helps Infisical store sessions, authentication tokens, and caching data efficiently.
Next, go to the Secrets tab and click Create Secret Group. Name it something easy to recognize, such as infisical-secrets. This group will hold all the environment variables required by Infisical. You can find the full list of supported variables in the Infisical documentation.

If you don't want to go through the stress of manually configuring or searching for environment variables to use, you can use the already configured ones below:
ENCRYPTION_KEY="${fn.randomSecret(32)}"
AUTH_SECRET="${fn.randomSecret(32)}"
SITE_URL="https://${refs.infisical-server.ports.0.dns}"
Notes about these values:
ENCRYPTION_KEYis a randomly generated 32-character secret used to securely encrypt sensitive data stored by Infisical.AUTH_SECRETis another unique secret key used for signing and verifying authentication tokens, ensuring secure user sessions.SITE_URLautomatically references your Infisical service’s public Northflank domain, allowing the app to correctly resolve links, callbacks, and API routes.
Link the PostgreSQL and Redis addons to your secret group
Northflank addons like PostgreSQL and Redis expose connection details such as username, password, host, and ports.
Instead of copying these values manually into your secrets, you can link each addon directly to your secret group.
This way, whenever credentials are rotated, your Infisical service automatically receives the updated values.
Under the Linked addons section:
-
For PostgreSQL, click Configure and map the following
POSTGRES_URI_ADMIN→DB_CONNECTION_URI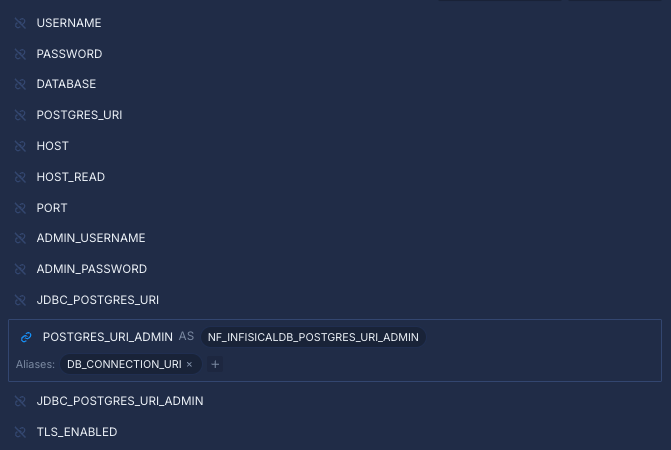
-
For Redis, link
REDIS_MASTER_URL→REDIS_URL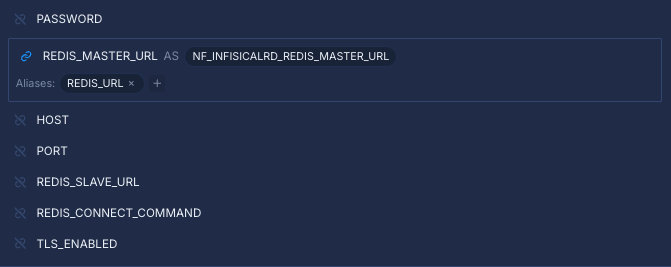
Finally, click Create secret group to save everything.
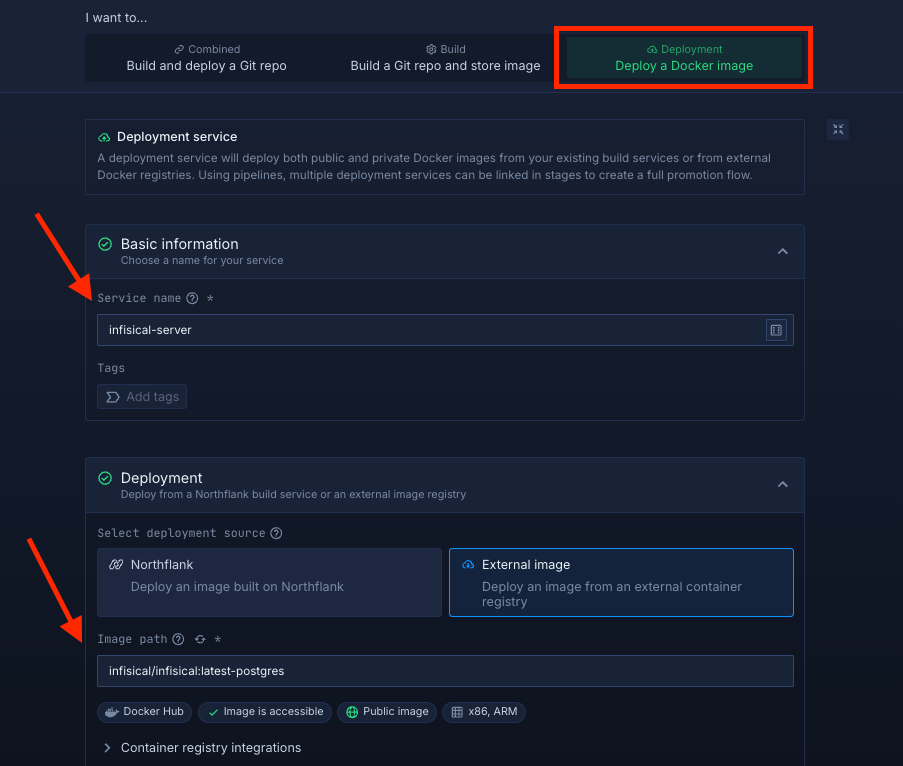
Within your project, navigate to the Services tab in the top menu and click “Create New Service.” Select Deployment and give your service a name such as infisical-server.
For the deployment source, choose External image and enter the official Infisical Docker image: infisical/infisical:latest-postgres
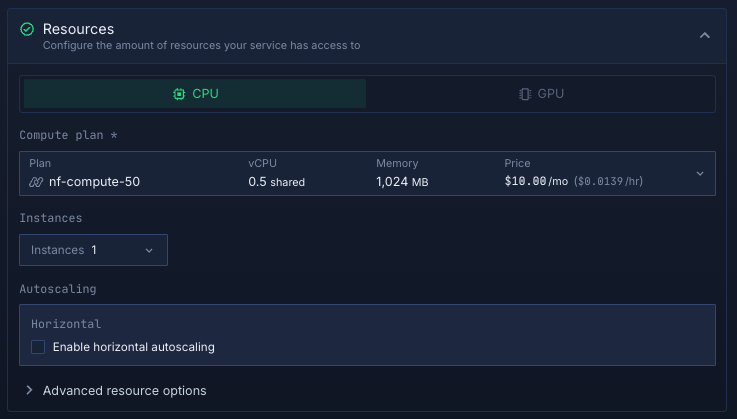
Select compute resources
Choose the compute size that best matches your workload:
- Small plans are fine for testing or lightweight usage.
- Larger plans are recommended for production, as Infisical can be resource-intensive under real-world traffic.
The flexibility to adjust resources later means you can start small and scale up as your usage grows.
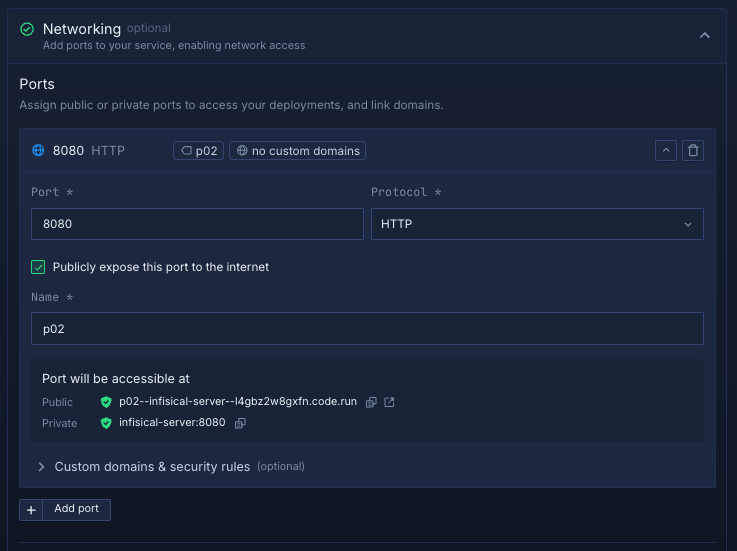
Set up a port so your app is accessible:
- Port:
8080 - Protocol:
HTTP - Public access: enable this to let people access your Infisical instance from the internet
Northflank will automatically generate a secure, unique public URL for your service. This saves you from having to manage DNS or SSL certificates manually.
Deploy your service
When you’re satisfied with your settings, click “Create service.” Northflank will pull the image, provision resources, and deploy Label Studio.
Once the deployment is successful, you’ll see your service’s public URL at the top right corner, e.g.: p01--infisical-server--lppg6t2b6kzf.code.run
After deploying Infisical, you need to run database migrations to set up the required tables.
- Inside your project, go to the Jobs tab and click Create new job.
- Name it
infisical-migration. - Select External image and use the image
infisical/infisical:latest-postgres. - Choose a compute plan based on your needs.
- In the Advanced section, select Custom command and enter:
npm run migration:latest
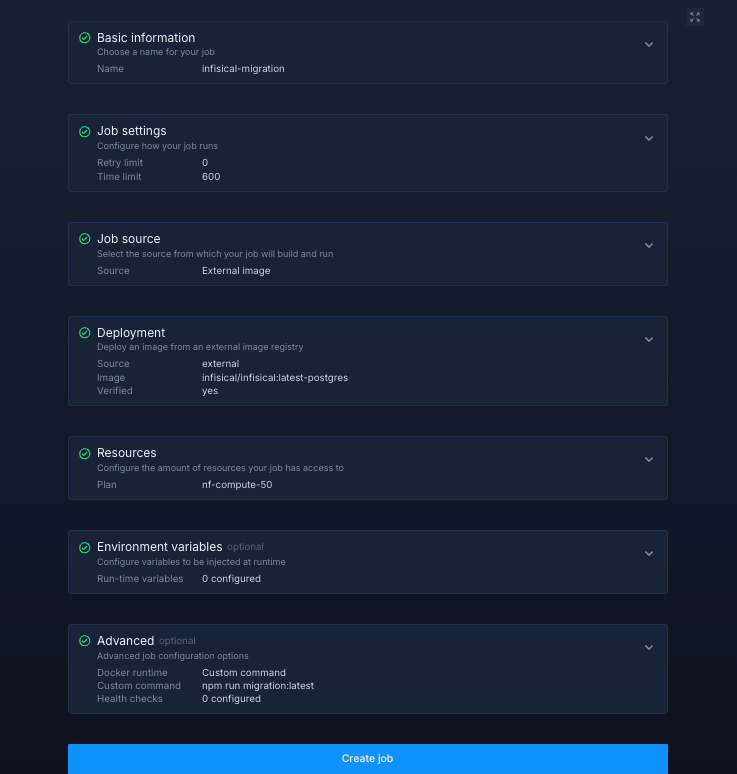 Click Create job to save, then run it once to apply all database migrations.
Once the job completes successfully, your database is fully initialized Infisical is ready to use.
Deploying Infisical on Northflank gives you a production-ready way to manage and secure secrets without worrying about infrastructure.
Whether you use the one-click template for simplicity or set it up manually for full control, Northflank handles scaling, storage, and networking so you can focus on building securely.
This setup is ideal for teams, startups, or organizations that need a reliable, open source, and scalable secrets management platform with minimal operational overhead.