

FastAPI is a modern, high-performance Python web framework for building APIs, built on Starlette and Pydantic, which offers developers a powerful toolset for creating efficient and scalable web services. Its key strengths include automatic interactive documentation generation through Swagger UI, support for asynchronous applications, and robust data validation capabilities, making it an increasingly popular choice for developers seeking to create complex, high-performance microservices and data-driven applications with remarkable ease and speed.
This article provides an introduction to deploying and managing FastAPI applications using Northflank's platform, covering Northflank features such as simplified deployment with a combined service and integrating a Postgres databases with a Northflank managed addon.
You'll also learn how to separate development layers using build and deployment services, so that you can manage your environments and releases using pipelines and release flows, as well as how you can leverage Northflank templates and BYOC for flexible multi-cloud deployments.
Before demonstrating Northflank services to deploy FastAPI, let’s make sure you have done the following prerequisites:
- Sign up or login to your Northflank account, create or select a team, then create a project
- Connect your Git account containing your FastAPI development code to Northflank, to enable building and deploying directly from your repository
If you don't already deploy your FastAPI application using Docker you can simply add a Dockerfile to build and deploy on Northflank.
First, ensure you have a requirements.txt file in your repository root listing all dependencies (e.g., fastapi, asyncpg). Here’s an example:
fastapi[standard]>=0.113.0,<0.114.0
asyncpg==0.30.0
databases==0.9.0
Next, add a Dockerfile to your repository root to containerize your app. Here’s an example:
# Use a lightweight Python image
FROM python:3.10-slim

# Set working directory
WORKDIR /app

# Copy the requirements file
COPY requirements.txt .

# Install dependencies
RUN pip install --no-cache-dir -r requirements.txt

# Copy the application code
COPY . .

# Expose the port
EXPOSE 8000

# Command to run the FastAPI app
CMD ["uvicorn", "app.main:app", "--host", "0.0.0.0", "--port", "8000"]
This Dockerfile creates a lightweight container for a FastAPI application. It sets the working directory, installs dependencies from requirements.txt, copies the application code into the container, exposes port 8000, and sets the command to run the FastAPI app using Uvicorn.
The Dockerfile assumes your FastAPI app is called in the main.py file in the directory app. Here's an example:
from fastapi import FastAPI

app = FastAPI()

@app.get("/")
def read_root():
    return {"Hello": "World"}
Our example repository structure looks like this:
|   Dockerfile
|   requirements.txt
\--app
        main.py
If you're creating microservices (each service in a different repository) your repository structure should look similar, with the Dockerfile at the root. Northflank also supports building and deploying from monorepos, where your different services are contained in subdirectories in your repository. In this case you can include the Dockerfile with your service, point Northflank to its location, and set the build context to your service's directory.
Combined services in Northflank facilitate the development and deployment process by integrating continuous integration and delivery (CI/CD) into a single, unified workflow. With combined services developers can build their application directly from a Git repository and deploy it to your non-production or production environments with minimal configuration.
This approach eliminates the need to manage pipelines and separate deployment services, making it ideal for fast iteration with reduced overhead.
Follow these steps to build and deploy FastAPI in a combined service:
- Navigate to your project then choose
create new > servicefrom the project dashboard. Make surecombined serviceis selected
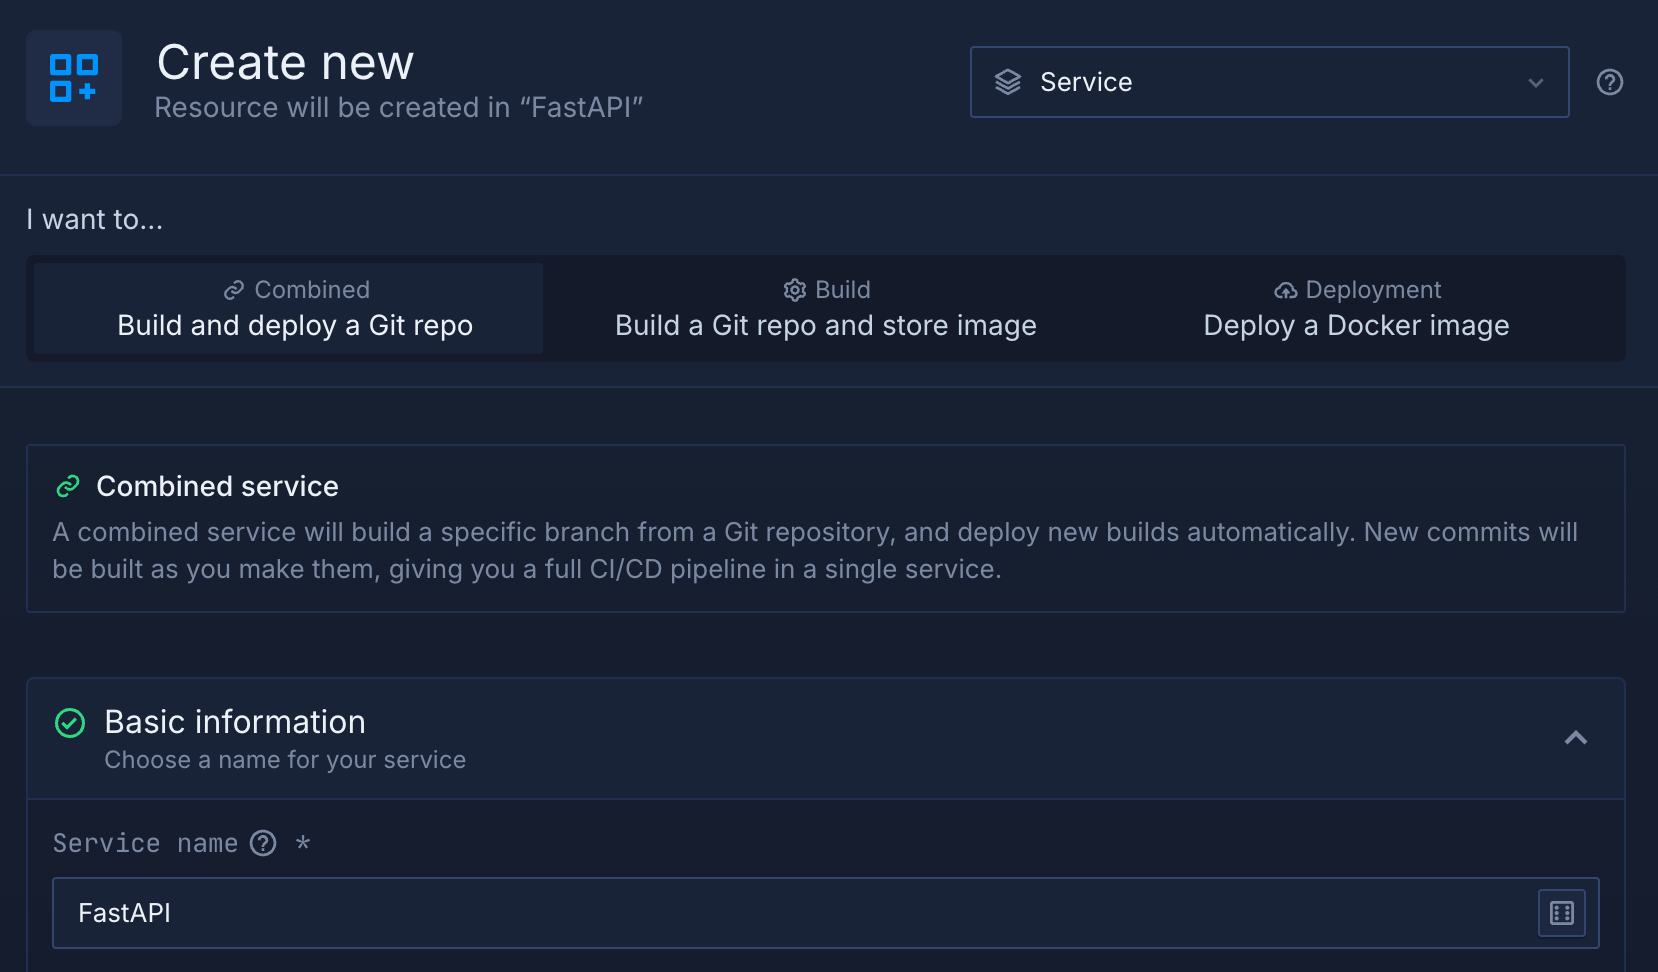
- Give it a name, go to the repository section and pick your FastAPI repo and desired branch from the list (for example
main)

- Select
Dockerfileas the build type. You can change the location of your Dockerfile if it's not in your repository root, or change your build context if your FastAPI app is in a subdirectory of your repo - You can add any build arguments or environment variables required for your app, such as API tokens or configuration values
- Northflank scans your Dockerfile to detect any exposed ports and automatically adds them in the networking section. You can rename your ports if desired, which will reflect in your Northflank-generated public DNS, or use your own custom subdomain.
- Click
create serviceand Northflank will build and deploy your FastAPI application
You can check the status and the public domain from the overview page of the service and view metrics for the deployed service on the observe page.
If your application requires more CPU or memory you can select a more powerful compute plan on the resources page. If you're serving a lot of requests you can increase the number of running instances to handle them. You can click through to an individual container to view logs and metrics for it, as well as configured health checks and shell access.

CI/CD is enabled by default, which means whenever you push new code to the configured repository and branch, it will be built and deployed automatically by your service. You can toggle these in your service's header.
When your service is built and running you can navigate to the public URL to test the service default page. Append /docs to the URL to view the Swagger UI.

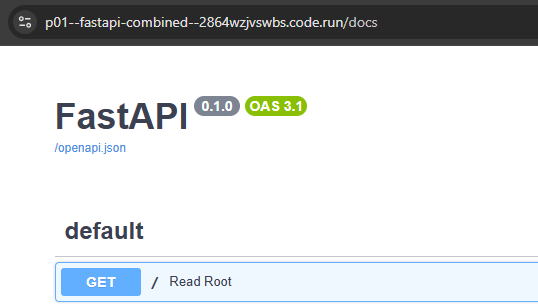
Now you have successfully deployed your FastAPI application using a combined service on Northflank!
In the next section, let’s explore how we can achieve the same results using separate build and deployment services.
Northflank addons are pre-configured, managed services that can be easily integrated into your applications to provide additional functionality. They simplify the process of setting up and managing common infrastructure components databases (e.g., Postgres), caching layers (e.g., Redis), or other third-party services without requiring manual configuration.
The following steps demonstrate how you connect your FastAPI application to Postgres using a Northflank addon by provisioning a Postgres addon in Northflank, retrieving its connection details, and configuring your FastAPI application to use them:
- Navigate to your project then choose
create new > addonfrom the project dashboard and select PostgreSQL as the addon type - Give it a name and select the version, then choose your desired configuration in terms of networking and resources
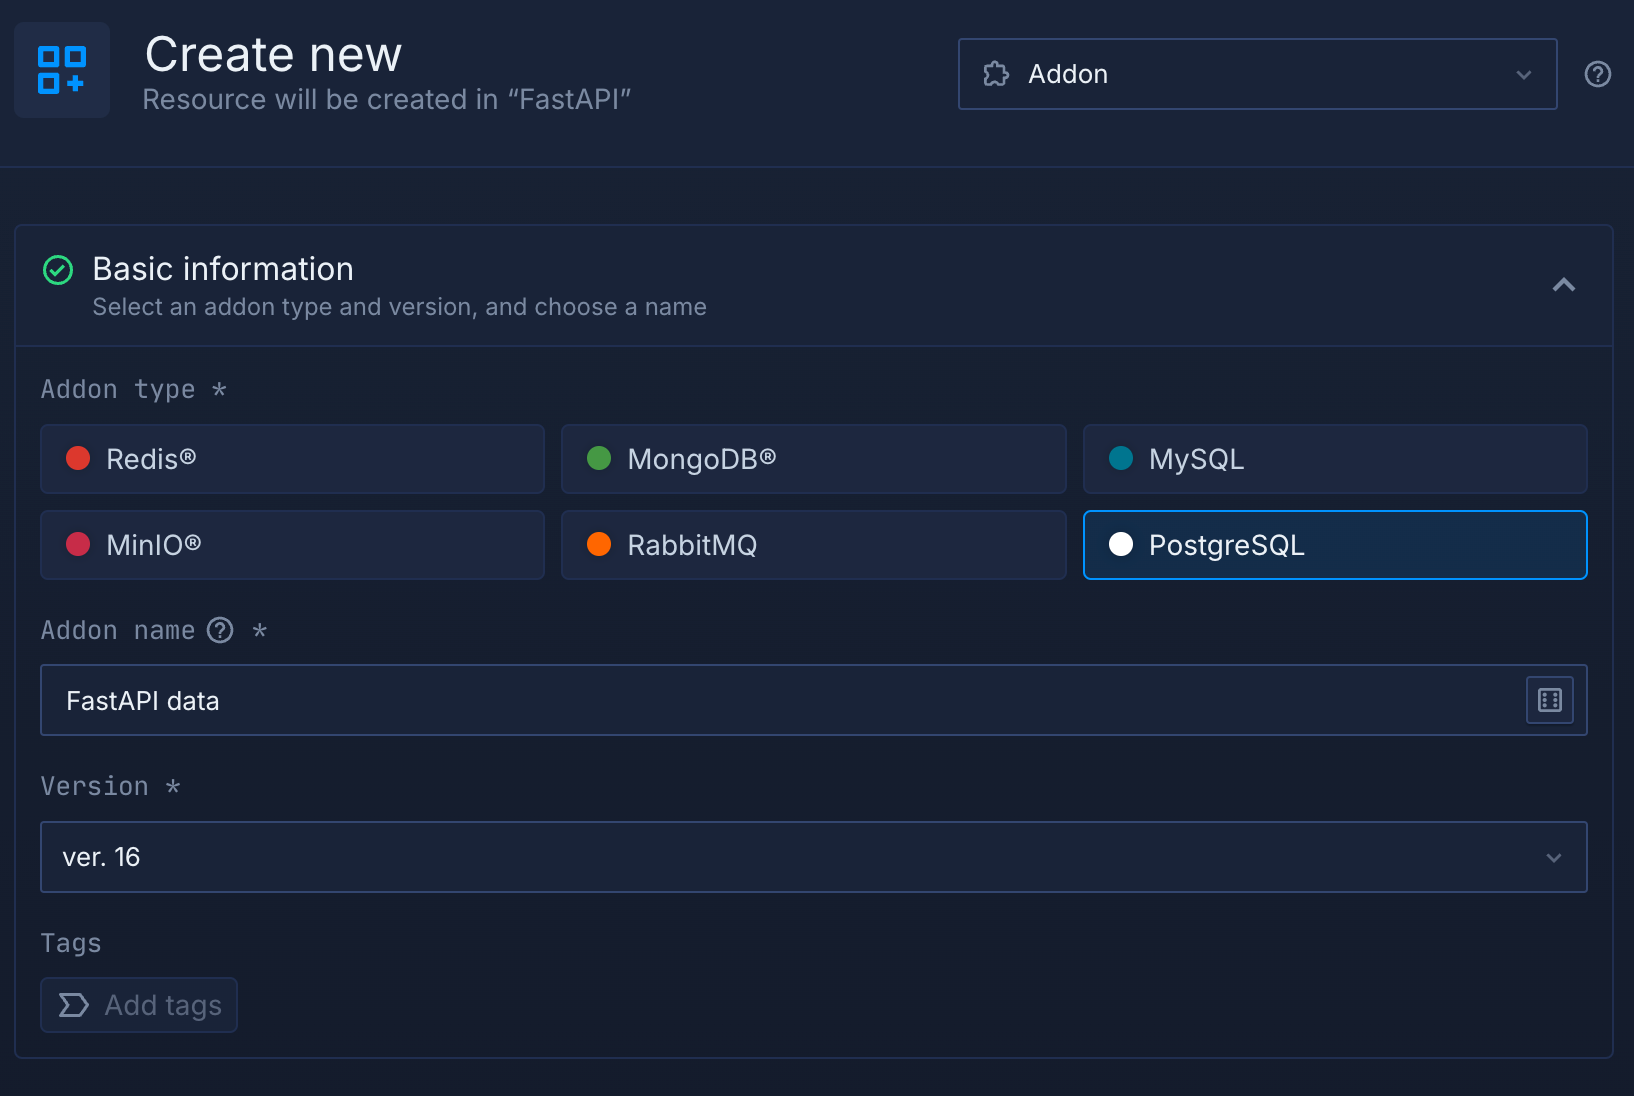
- Create the addon and wait until it’s up and running then retrieve its connection details
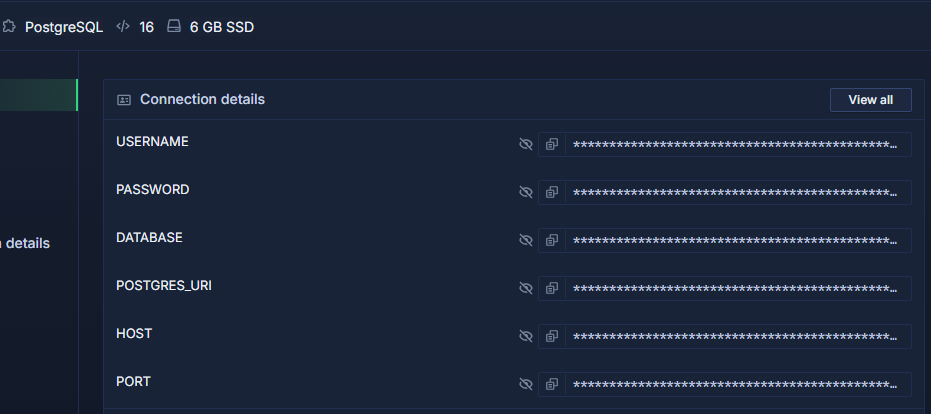
- Now you need to configure your combined service or deployment service where your FastAPI is deployed, to use the Postgres addon's connection details
- Navigate to your deployment service's environment page, then add a variable with the key
DATABASE_URL. Set the value as the connection string copied from your addon'sPOSTGRES_URIsecret. - If your FastAPI application isn't already configured to use these environment variables, you must update it to connect to the database
Here’s an example of a main.py file where the FastAPI application is configured to load environment variables, then connect to the database and run a sample query.
import os
from typing import Union
import databases
from fastapi import FastAPI

# Get the database URL
DATABASE_URL = os.getenv("DATABASE_URL")

# Initialize the database connection
database = databases.Database(DATABASE_URL)

app = FastAPI()

@app.on_event("startup")
async def startup():
    await database.connect()

@app.on_event("shutdown")
async def shutdown():
    await database.disconnect()

@app.get("/")
async def read_root():
    return {"message": "Connected to Postgres!"}

@app.get("/get-time")
async def get_time():
    query = "SELECT NOW()"
    rows = await database.fetch_all(query=query)
    return {"Time now is": rows}
When you push these changes to your branch, a new build and deployment will be triggered automatically if you already configured build rules, or you can trigger this manually.
Now we can test connectivity to the database by navigating to the root endpoint and retrieve sample data by appending /get-time to the URL.

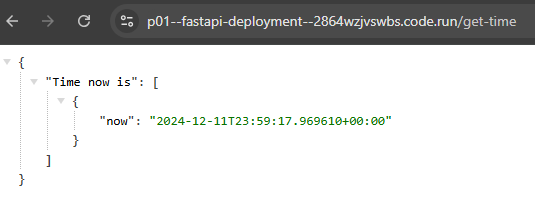
You could alternatively link your Northflank addon to a secret group, so that your connection details can be inherited by multiple services and jobs in your project and automatically updated if they change.
Now you have successfully deployed your FastAPI application on Northflank and connected it to PostgreSQL using a Northflank addon. In the next section we will explore how to use separate build and deployment services so that you can manage your development process through development, staging, and production environments and automate your release workflow.
Build and deployment services on Northflank enhance flexibility by separating the processes of building and deploying applications. This allows you to reuse built images in different deployment services and different environments, and take advantage of pipelines to manage your releases.
To build and deploy using a pipeline, we'll first need to create separate build and deployment services. In this example we'll create them manually, but in future you can use Northflank templates to define your projects. This lets you deploy entire projects and more with a single click, repeatable across different regions and cloud providers.
- Navigate to your project then choose
create new > servicefrom the project dashboard and make sure build service is selected this time
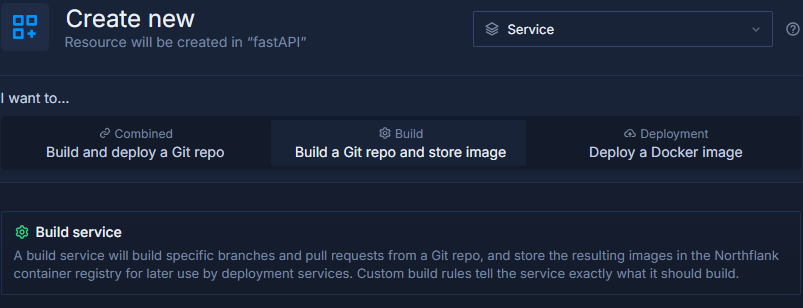
- Give it a name (e.g.
FastAPI builder) then go to the repository section and pick your FastAPI repo from the list - You can change the build rules to decide what branches the service will build (by default it will build all pull requests and the
mainbranch)
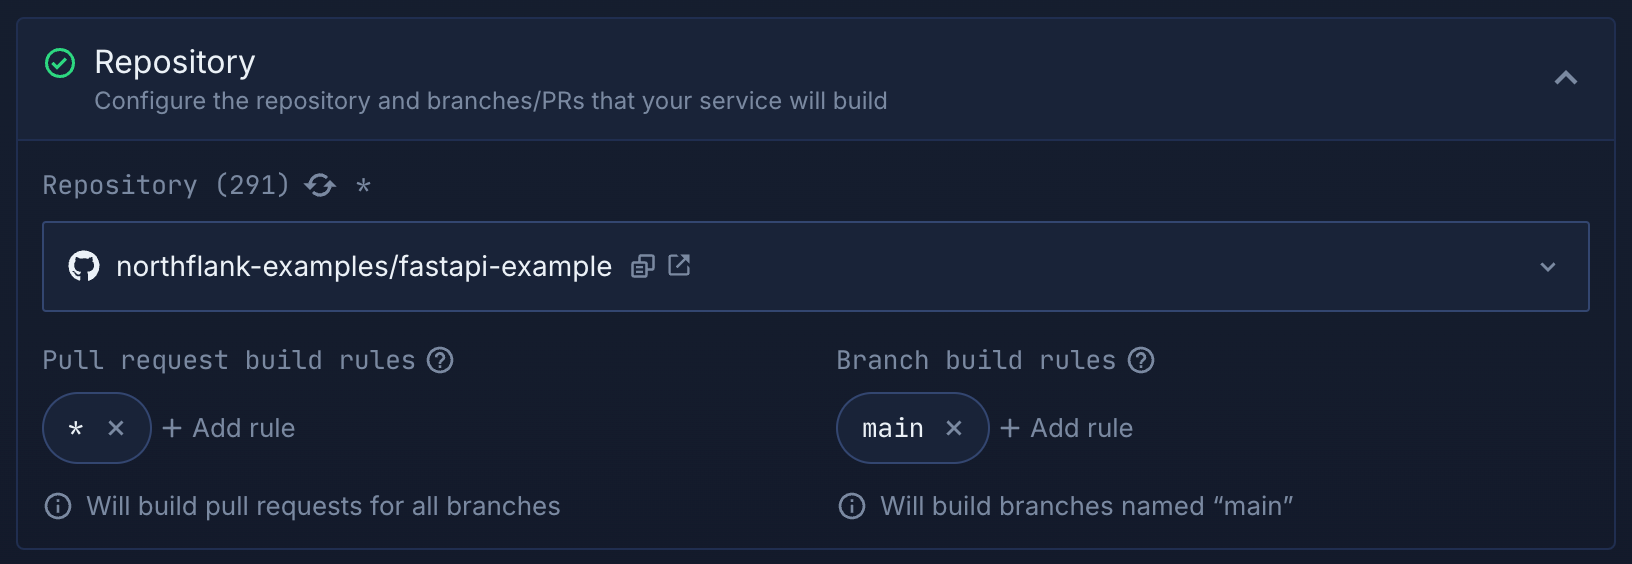
- Then you can configure the build settings and build arguments as we have defined for the combined service above
- Create the build service, and you will be taken to the service overview. Click
new buildnow and choose the branch and commit you want to build. Click on the build in the list to view your build logs.

- Now the image is built, pushed to the Northflank registry, and ready to be consumed by a deployment service to launch your FastAPI application
While CI is enabled your build service will automatically trigger a new build for any commits to branches that match your branch and pull request rules. To use it with a Git trigger in the release flow we're going to create, you can toggle CI off.
- Choose
create new > servicefrom the project dashboard and make sure the deployment service is selected this time - Give it a name (such as
FastAPI dev) and select Northflank as the deployment source. Leave the build service blank, as we'll deploy a build using a release flow later. - Set the ports, add environment variables, and configure any other settings or features you require on the deployment
- Create the service, then open the menu in the header to select
duplicate service
- Give this deployment service a different name (for example
FastAPI staging) and create it
Now we have the necessary services, we can populate a pipeline and configure release flows to automate our release processes for each stage.
Release flows in Northflank provide several key benefits that enhance the CI/CD process. They ensure consistent builds and deployments across different environments (e.g., development, staging, production) by using predefined steps and configurations. Also, they centralize the entire application lifecycle in a single, organized pipeline, making it easier to manage complex projects.
You'll need to first create and populate a pipeline to start adding release flows.
- Choose
create new > pipelinefrom the project dashboard and give it a name - Add your first deployment service to the development stage, and your second to the staging stage
- Click
create pipeline
You'll now see your pipeline with different stages for your development, staging, and production environments. You'll also see preview environments here, which you can configure to create ephemeral environments to preview pull requests and branches.
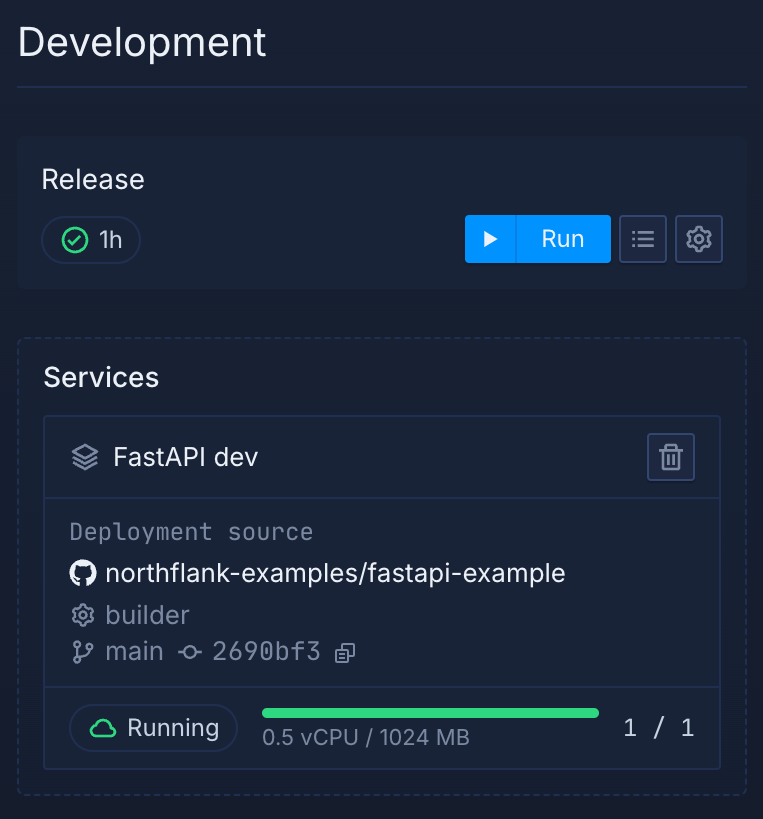
Click add release flow in your development stage and open the visual editor to begin configuring it. You can then drag and drop actions from the node list to replicate your release workflow.
For this example you can simply:
- Drag a
start buildnode into your workflow. Select your FastAPI build service, and then select your development branch and save the node.
- Drag a
deploy buildnode into your workflow, under your start build node
- Select the reference to the start build node for the build service, branch, and build fields. This will get the values for the build to deploy.
- Set your development service as the target service and save the node
- Click
save template
Now you can click run to start a new release. This will open the release dialog where you can set a name and description for the release and override the configured values for triggers, nodes, and arguments. Click run in the dialog and you will see your release flow being executed. When the build node has finished the deploy node will execute, and you can click through to your deployment service to view your deployment.
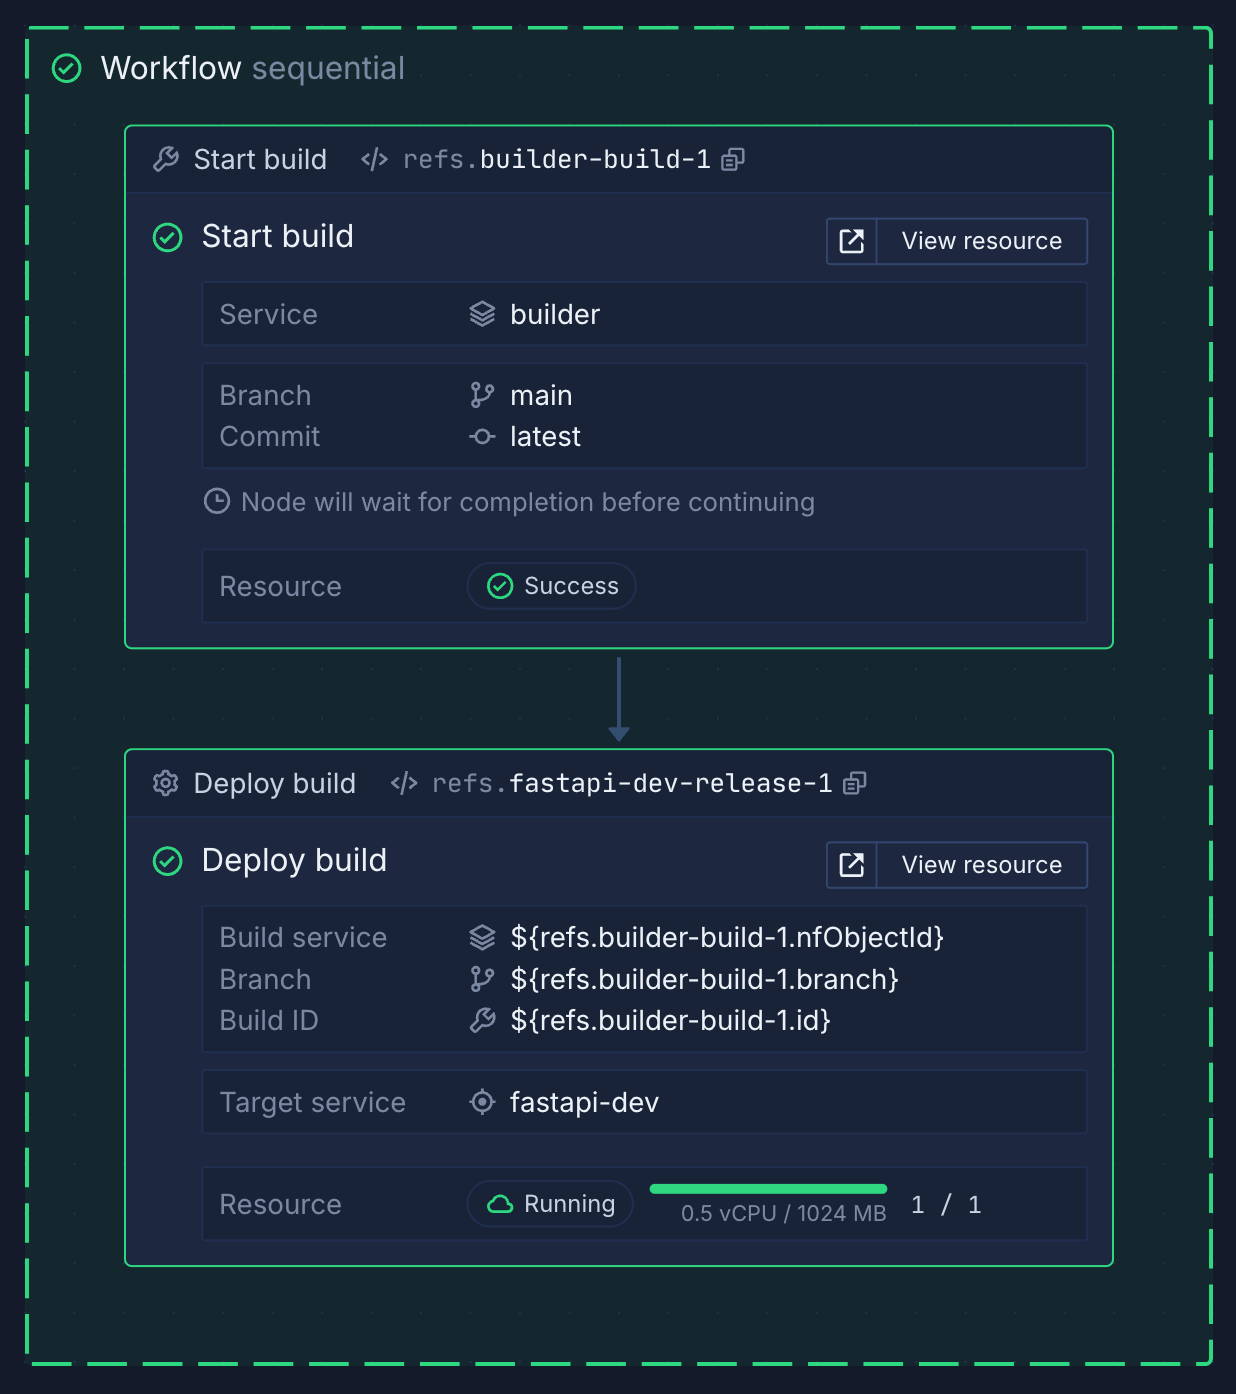
Rather than manually running a release you can configure Git or webhook triggers to run a release when you commit to a specific branch, open a PR, or request the webhook. You can use the reference to the trigger in the start build node, and elsewhere in the template.
For later stages you can, instead of building commits, promote deployed images from one stage to another. You can also add nodes to automate complex tasks like backing up databases and running jobs.
Templates in Northflank are blueprints for creating and updating projects, services, or workflows. They encapsulate configurations for build services, deployment services, addons, and all Northflank resources and integrations, enabling developers to replicate and deploy projects quickly.
To create a template in Northflank, navigate to create new > template. Select your FastAPI project, or create a new project in the selected project node.
You can now drag-and-drop nodes for all the resources and actions you require into your template workflow, such as the build and deployment services, the Postgres addon, and more. Running your template will create a new project, services, and addons, or update existing resources with the configuration in the template. You can learn more about writing templates in this guide.
You can manage your infrastructure as code by enabling bidirectional GitOps and selecting to run the template when it is updated, which means that any changes you commit to the template, or any changes you make to the template on Northflank, will automatically update your projects. Learn more about GitOps on Northflank.
You can use templates to deploy into different regions, or into different cloud providers, making true multi-cloud or true cloud-agnostic infrastructure easy.
BYOC (Bring Your Own Cloud) on Northflank is a deployment strategy that allows you to leverage your existing cloud infrastructure in different cloud providers, such as AWS, Google Cloud Platform, Azure, and others, while using all of Northflank's build, deployment, observability, and management capabilities.
Northflank offers robust credential management, comprehensive access controls, and secure account linking mechanisms to ensure security while gaining the advantages of Northflank, maintaining control over your cloud infrastructure and costs and ensuring compliance with organizational data requirements.
You can adapt your template to deploy into your own cloud account by adding a BYOC integration and deploying a BYOC cluster. You can either do this manually, or use the relevant nodes in your template. You can securely provide your credentials to the template as argument overrides, which are encrypted at rest, injected on template runs, and only accessible to team members with the relevant roles.
You can then select your own cluster as the target for your project in the template, or when creating a new project in the Northflank application.
This article demonstrated how Northflank offers a powerful platform for deploying, managing, and scaling FastAPI applications. With features like managed addons, pipelines and release flows, templates, and different types of services that manage the lifecycle of the application, it simplifies complex workflows while maintaining flexibility and efficiency.
Whether you’re a solo developer or part of a large team, Northflank empowers you to focus on delivering high-quality applications while it handles the headache of infrastructure management.
You can continue reading other guides on how to deploy different applications on Northflank or explore the benefits of Bring Your Own Cloud feature on Northflank.
Northflank allows you to deploy your code and databases within minutes. Sign up for a Northflank account and create a free project to get started.
- Deployment of Docker containers
- Create your own stateful workloads
- Persistent volumes
- Observe & monitor with real-time metrics & logs
- Low latency and high performance
- Backup, restore and fork databases
