Preview blueprints are templates that automatically create ephemeral environments when you open pull requests or push to branches. Each preview environment is an isolated instance of your application with its own services, databases, and URLs.
Preview blueprints can be triggered by Git events (pull requests and pushes), webhooks, or API calls. While Git triggers are the most common, you can also trigger preview blueprints dynamically via webhook or API for custom workflows.
Create a preview blueprint
-
Navigate to Environments in your project
-
Click Create preview blueprint
-
Configure the blueprint:
- Name: Enter a name (e.g.,
pr-previews) - Naming convention: Select how preview resources should be named
- Prefix / Suffix: Toggle whether to prepend or append pull request numbers or branch names to resource names
- Name: Enter a name (e.g.,
-
Click Add trigger:
- Kind: Select Git pull request or Git push
- Repository: Select the repository to watch
-
Click Continue to open the visual editor
The visual editor opens where you can define the resources that will be created in each preview environment.
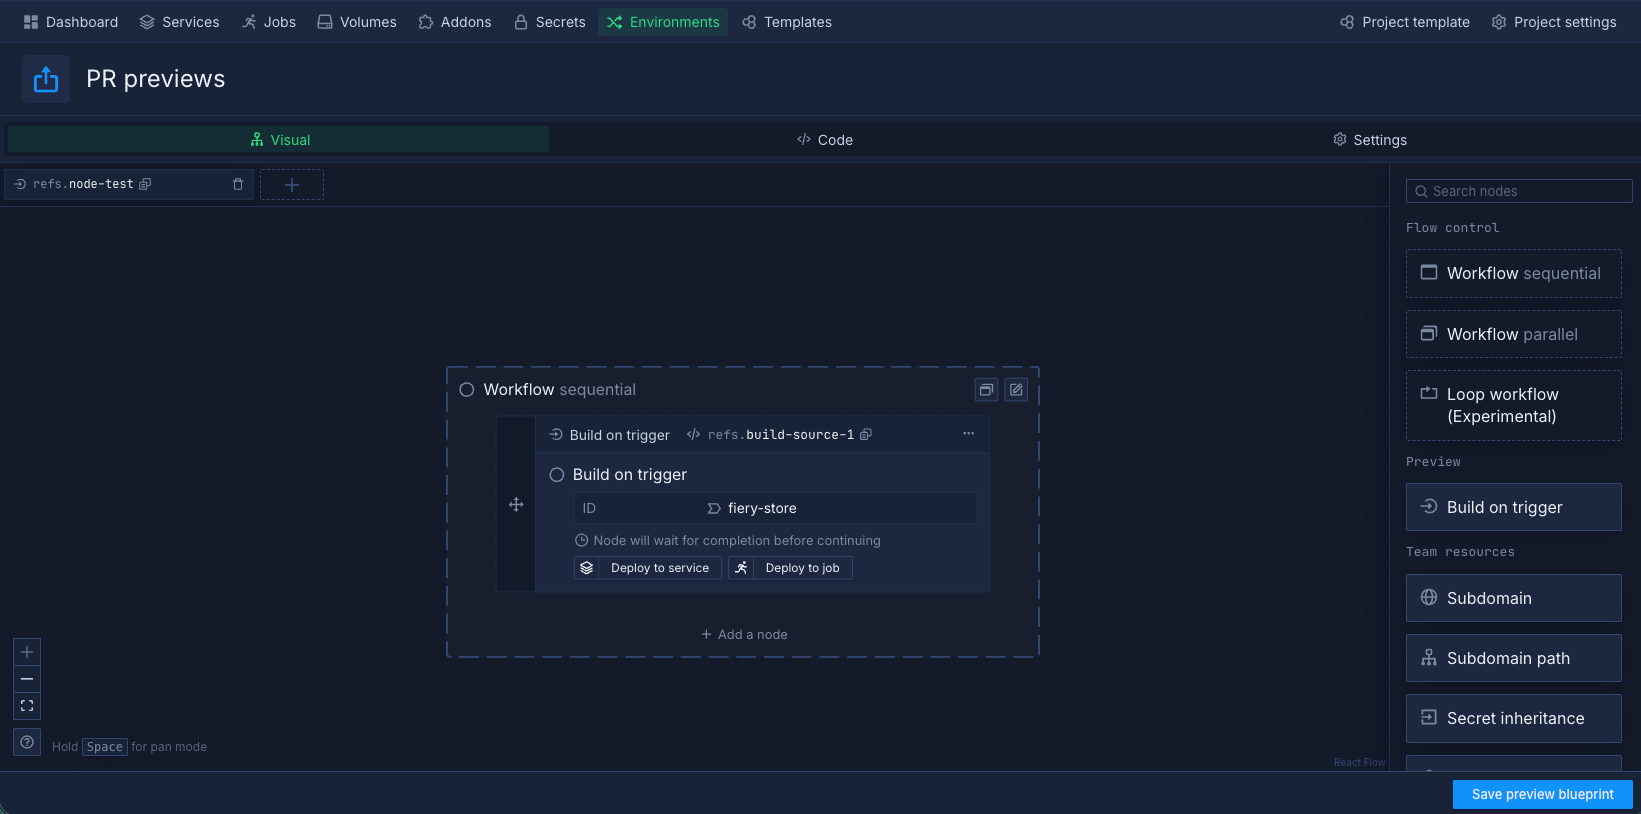
Configure the preview blueprint
Use the visual editor to define what gets created in each preview environment. Connect nodes together to build your preview infrastructure.
-
Start with a Build on trigger node that builds code from the pull request or branch
-
Add deployment nodes to deploy the built code to services
-
Add infrastructure nodes to create databases, volumes, or other resources
-
Configure networking to expose services with unique URLs
-
Click Save preview blueprint
Common patterns
Simple frontend or API
Build your code and deploy it as a single service with a public URL. Each preview gets its own URL so reviewers can open the exact version from the PR.
Nodes: Build on trigger → Create service → Expose port with generated domain
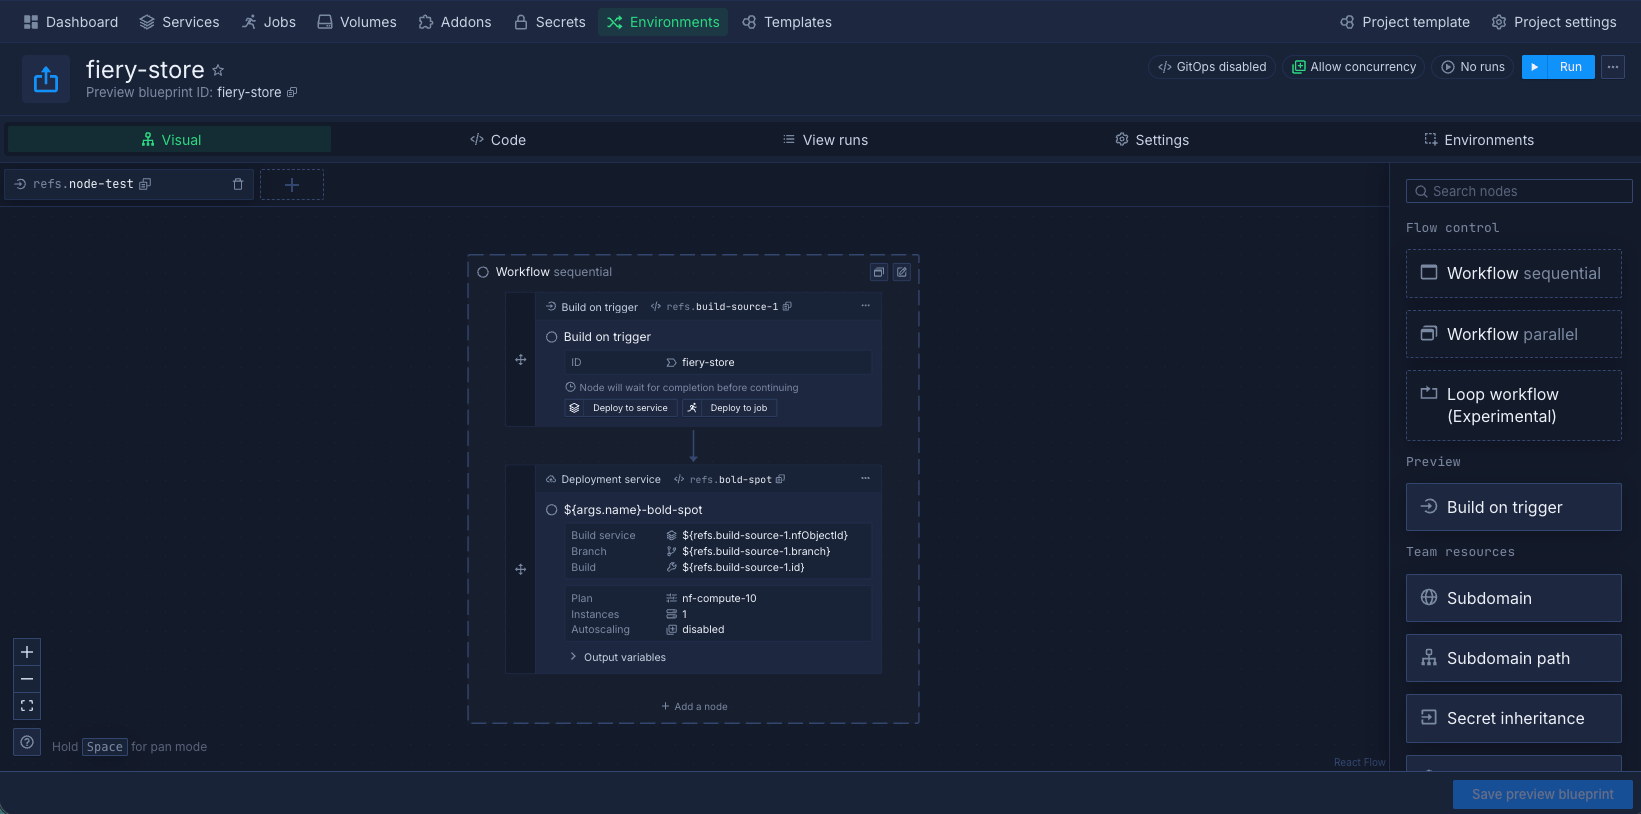
Full stack application
Build your application, provision a fresh database for the preview, deploy the application, and inject the database credentials. Each preview environment is fully isolated with its own data.
Nodes: Build on trigger → Create addon (e.g. PostgreSQL) → Deploy build → Link addon credentials to service
This is the most common pattern for web applications. Because the database is created fresh for each preview, you can seed it with test data using a job node that runs after the database is ready.
Full stack with seed data
Extend the full stack pattern by running a one-off job after the database is ready to load fixtures or seed data. Alternatively, fork your database from a snapshot to restore pre-seeded data more efficiently. The preview is then ready to use immediately after deployment without manual setup.
Nodes: Build on trigger → Create addon (or fork from snapshot) → Run job (seed data, optional) → Deploy build → Link addon credentials
Microservices
Build and deploy multiple services in the same preview. Internal services communicate using Northflank's private networking, while only the public-facing service is exposed externally.
Nodes: Build service A → Build service B → Deploy service A → Deploy service B → Expose service A
Use condition nodes to skip certain services if the PR only touches specific parts of the codebase.
Branch-specific overrides
Use the Skip node execution option with conditional functions like fn.if() in node references to change what gets deployed based on which branch or repository triggered the preview. For example, skip creating a full database and deploy a lightweight mock instead when the PR is against a docs branch.
Nodes: Build on trigger → Condition (check ${triggers.repo.branch}) → Deploy full stack (true path) → Deploy lightweight mock (false path)
Configure triggers
Preview blueprints can have multiple triggers to create environments automatically.
Git pull request trigger
Creates preview environments when pull requests are opened and updates them when new commits are pushed:
-
Click the plus sign or Add trigger
-
Select Git pull request
-
Configure:
- Repository: Select your repository
- Pull request rules: Specify when to trigger
-
Click Save
Preview environments are automatically deleted when pull requests are closed or merged.
Git push trigger
Creates preview environments when commits are pushed to specific branches:
-
Click the plus sign or Add trigger
-
Select Git push
-
Configure:
- Repository: Select your repository
- Branch rules: Specify branches to watch
-
Click Save
Cron schedule trigger
Recreates preview environments on a schedule to refresh test data:
-
Click the plus sign or Add trigger
-
Select Cron schedule
-
Enter a cron expression (times are UTC, minimum interval is 10 minutes)
-
Click Save
Webhook trigger
Manually trigger a preview environment by sending a webhook request to Northflank. Useful for integrations with external systems or custom CI/CD pipelines.
-
Click the plus sign or Add trigger
-
Select Webhook
-
Copy the webhook URL provided
-
Click Save
Send a POST request to the webhook URL to trigger a new preview environment.
Tagged release trigger
Triggers a new preview environment whenever a new Git tag is created in your repository. Useful for testing release candidates or deploying specific versions.
-
Click the plus sign or Add trigger
-
Select Tagged release
-
Configure:
- Repository: Select your repository
-
Click Save
GitHub check suite trigger
Automatically triggers a preview environment only after all GitHub checks (tests, linters, security scans) pass on a pull request. Prevents deploying broken code.
-
Click the plus sign or Add trigger
-
Select GitHub check suite
-
Configure:
- Repository: Select your repository
- Branch trigger rules: Specify which branches to watch
- Path rules: Optionally filter by file changes
- Commit message ignore flags: Optionally skip based on commit messages
-
Click Save
All status checks configured on your repository must pass before the preview runs.
GitHub PR label trigger
Triggers a preview environment when a pull request is labeled with a specific label. Useful for on-demand previews triggered by reviewers or automation.
-
Click the plus sign or Add trigger
-
Select GitHub PR label
-
Configure:
- Repository: Select your repository
- Label trigger rules: Choose which labels should trigger previews
- Branch rules: Optionally limit to specific branches
- Path rules: Optionally filter by file changes
- Commit message ignore flags: Optionally skip based on commit messages
-
Click Save
Configure preview settings
Click Settings in the blueprint editor to configure preview environment behavior:
Resource naming
Controls how resources created inside each preview environment are named.
Use pull request ID: Resources are named with the pull request number (e.g., api-pr-123). This is predictable and stable; the name stays the same if you push new commits to the same PR.
Use branch name: Resources are named with the branch name (e.g., api-feature-login). Useful when you want the resource name to reflect what is being reviewed, but names can become long for branches with verbose naming conventions.
Custom naming: Use template variables to define your own naming scheme, e.g. api-${triggers.repo.pullRequestId}-${triggers.repo.sha}. By default, Northflank automatically adds ${args.name} as a prefix or suffix to ensure uniqueness, but you can remove this if needed.
Resource limits
Set smaller resource plans for previews than production to manage costs. For example, you might run a 0.1 vCPU / 256 MB container for a preview API instead of the 1 vCPU / 1024 MB plan used in production.
Cleanup policies
Configure when preview environments are automatically deleted to avoid accumulating idle infrastructure.
Delete on pull request close: The preview environment is automatically deleted when the PR is closed without merging.
Delete on pull request merge: The preview environment is automatically deleted when the PR is merged.
Inactivity period: Delete previews after a set number of days with no new commits. Useful as a safety net to catch long-running previews for PRs that have gone quiet but not been formally closed.
You can enable multiple cleanup policies simultaneously. The preview is deleted when any of the conditions is met first.
Use branch contents
Enable Enable using branch contents to provision the preview environment according to the GitOps file in the repository branch. This means if a PR modifies the preview blueprint definition, the preview will be provisioned according to the updated definition from that branch.
Teardown
Add a teardown specification to define cleanup actions when the preview environment is deleted. For example, you can use teardown to delete OpenTofu resources on external providers. Note that Northflank resources provisioned as part of a preview will already be auto-deleted, and in most cases workflows won't create resources.
Test the preview blueprint
Before relying on automatic triggers, test your preview blueprint manually:
-
Click Run in the blueprint editor
-
Select a commit from the repository
-
Click Create
This creates a preview environment without opening a pull request, allowing you to verify the blueprint works correctly.
Next steps
Manage preview blueprints
Manage active previews, manually create test environments, and configure automatic cleanup.
Configure a workflow
Learn how to use the visual editor or code to configure a workflow.
Run and manage workflows
Run and manage workflows for different environments.
Run migrations
Run database migrations and update your deployments simultaneously when you update your schema.