Getting Started /
note
Northflank recommends using Environments for CI/CD. Pipelines are still supported but may be deprecated in future.
Pipelines on Northflank allow you to create and manage complex continuous integration and continuous delivery (CI/CD) workflows.
By adding your project's resources to a pipeline and creating release flows for each stage, you can automate your releases from development through to production.
Pipelines and release flows allow you to manage building and deploying your code, backing up data and running migrations, promoting deployed images from one stage to the next, and more.
This guide will take you through creating a pipeline, a build service, and a deployment service, and then populating a pipeline stage and configuring a simple release flow to deploy code built on Northflank.
Create a pipeline
To create a pipeline:
- Click here , or choose pipeline from the create new drop-down menu in the top right corner of the dashboard
- Enter a name
- Click create pipeline
Create a build service
You can configure most aspects of a build service after it is created - except the name.
- Click here , or open the create new menu in the top right corner of the dashboard and select service
- Select build
- Basic information: enter a name for your service
- Repository: select the repository from the drop-down list and choose the branch you want to build from
- Repository: enter your pull request and branch build rules, or leave blank to build all new commits. You can set multiple rules, and you can add rules for both pull requests and branches.
- Build options: choose Dockerfile if you have a custom Dockerfile in your registry, or buildpack to automatically build your application. If your Dockerfile and/or build context are not root, specify the relative paths.
- Environment variables (optional): you can set runtime variables and build arguments here, if required
- Resources: set the compute plan to suit your build
- Click create service
Create deployment services
You can configure most aspects of a deployment service after it is created - except the name.
- Click here , or open the create new menu in the top right corner of the dashboard and select service
- Select deployment
- Basic information: enter a name for your service
- Deployment: select Northflank as the source, but do not link the build service
- Environment variables (optional): you can set runtime variables and build arguments here, if required
- Networking (optional): add any required public or private ports
- Resources: set the compute plan and number of instances to suit your deployment
- Advanced (optional): you can configure health checks and a Docker CMD override, if required
- Click create service
Add resources to your pipeline
- Select the pipeline you want to use from the project pipelines page
- Click add items to development
- Find your deployment service, select it, and click add 1 item to add it to the stage. This will make it available in your release flow when you configure one.
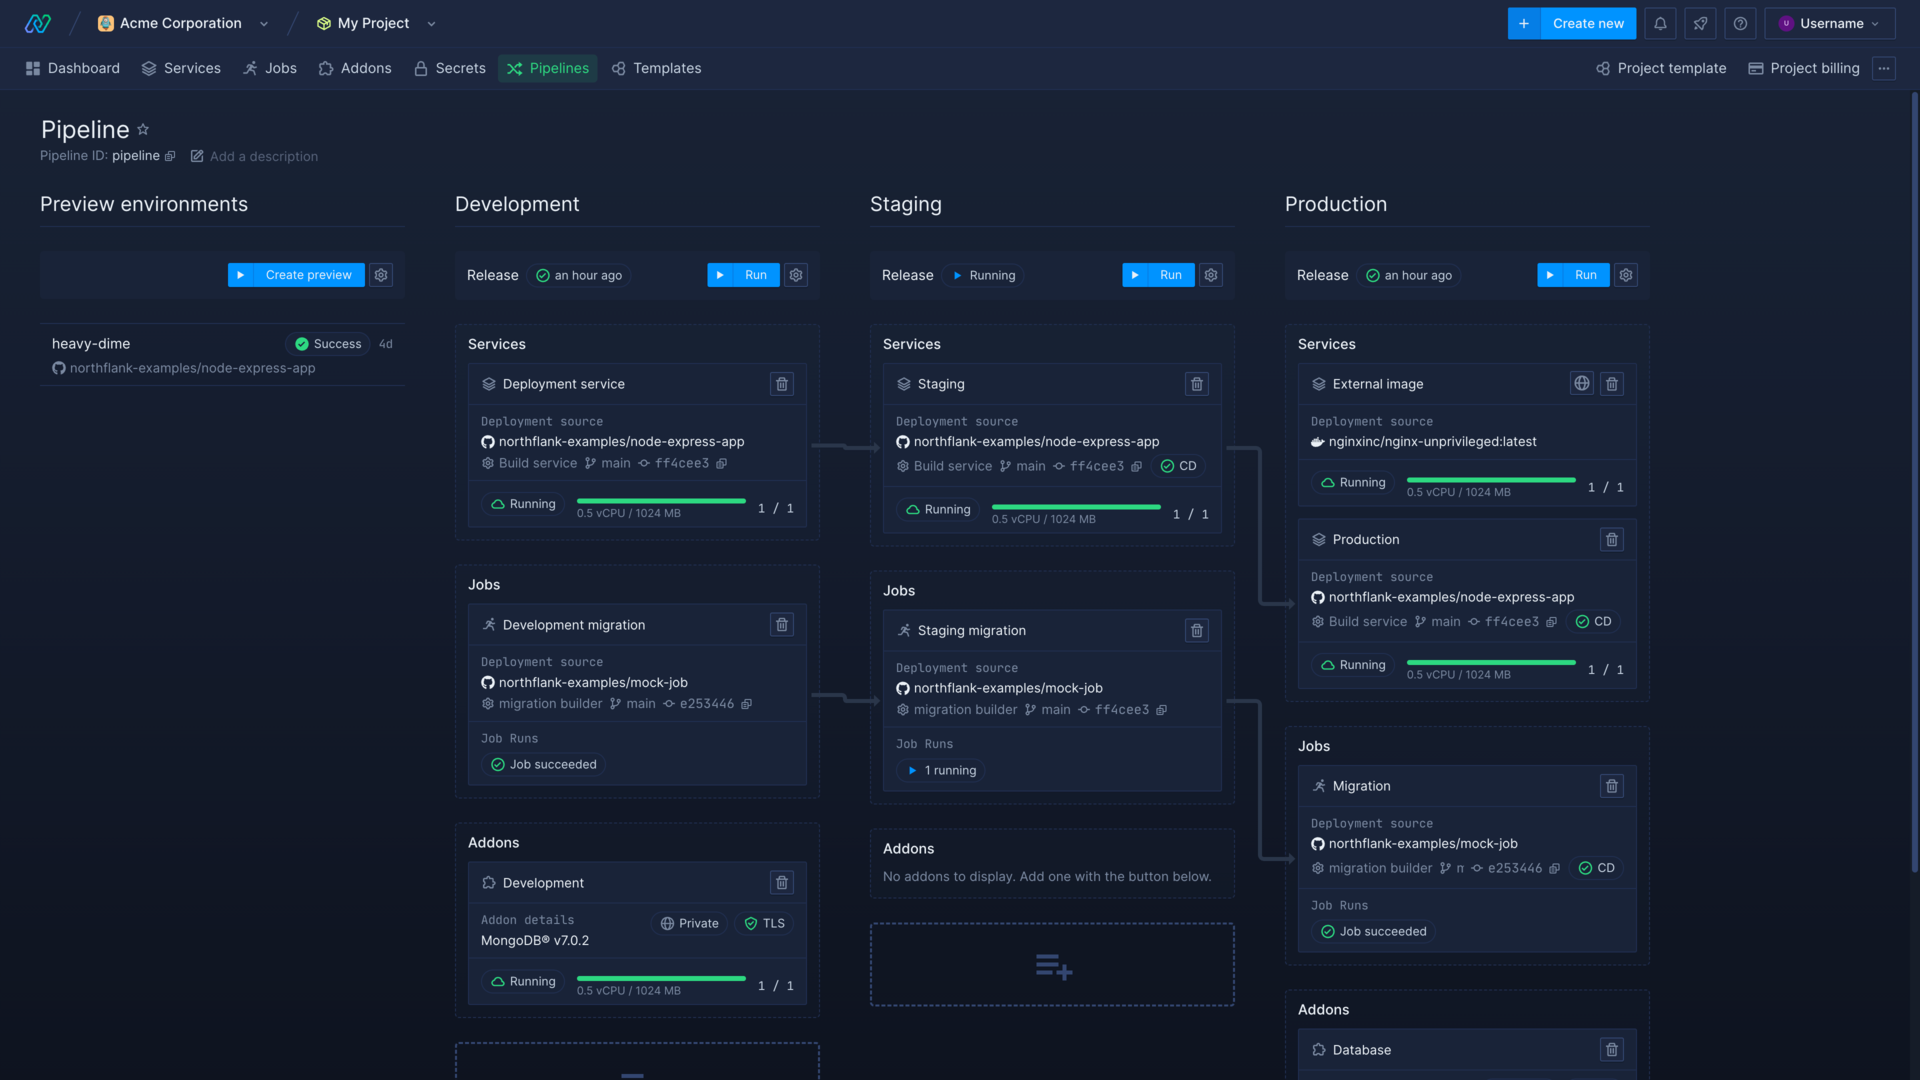
You can add multiple deployment services, jobs, and addons to a pipeline stage.
Removing a deployment service from a pipeline will not unlink its build service or external image, nor pause the deployment service. You can edit or disable the deployment service itself from its own dashboard.
Add a release flow
Now you can create a release flow for the development stage of your pipeline, which you have populated with your deployment service.
- Click add release flow in the header for the development stage
- Select get started with visual editor
- Click and drag a start build node into the sequential workflow
- Click on the start build node to edit it. Select your build service for
service / job, thebranchyou want to build, and leave thecommitfield blank to build the latest commit to the branch, or select a specific commit to build. - Enable wait for completion for the node. This option means that the next node will not run until this one has completed, in this instance the release flow will wait for the build to finish before running the next node. Save node to finish configuring the node.
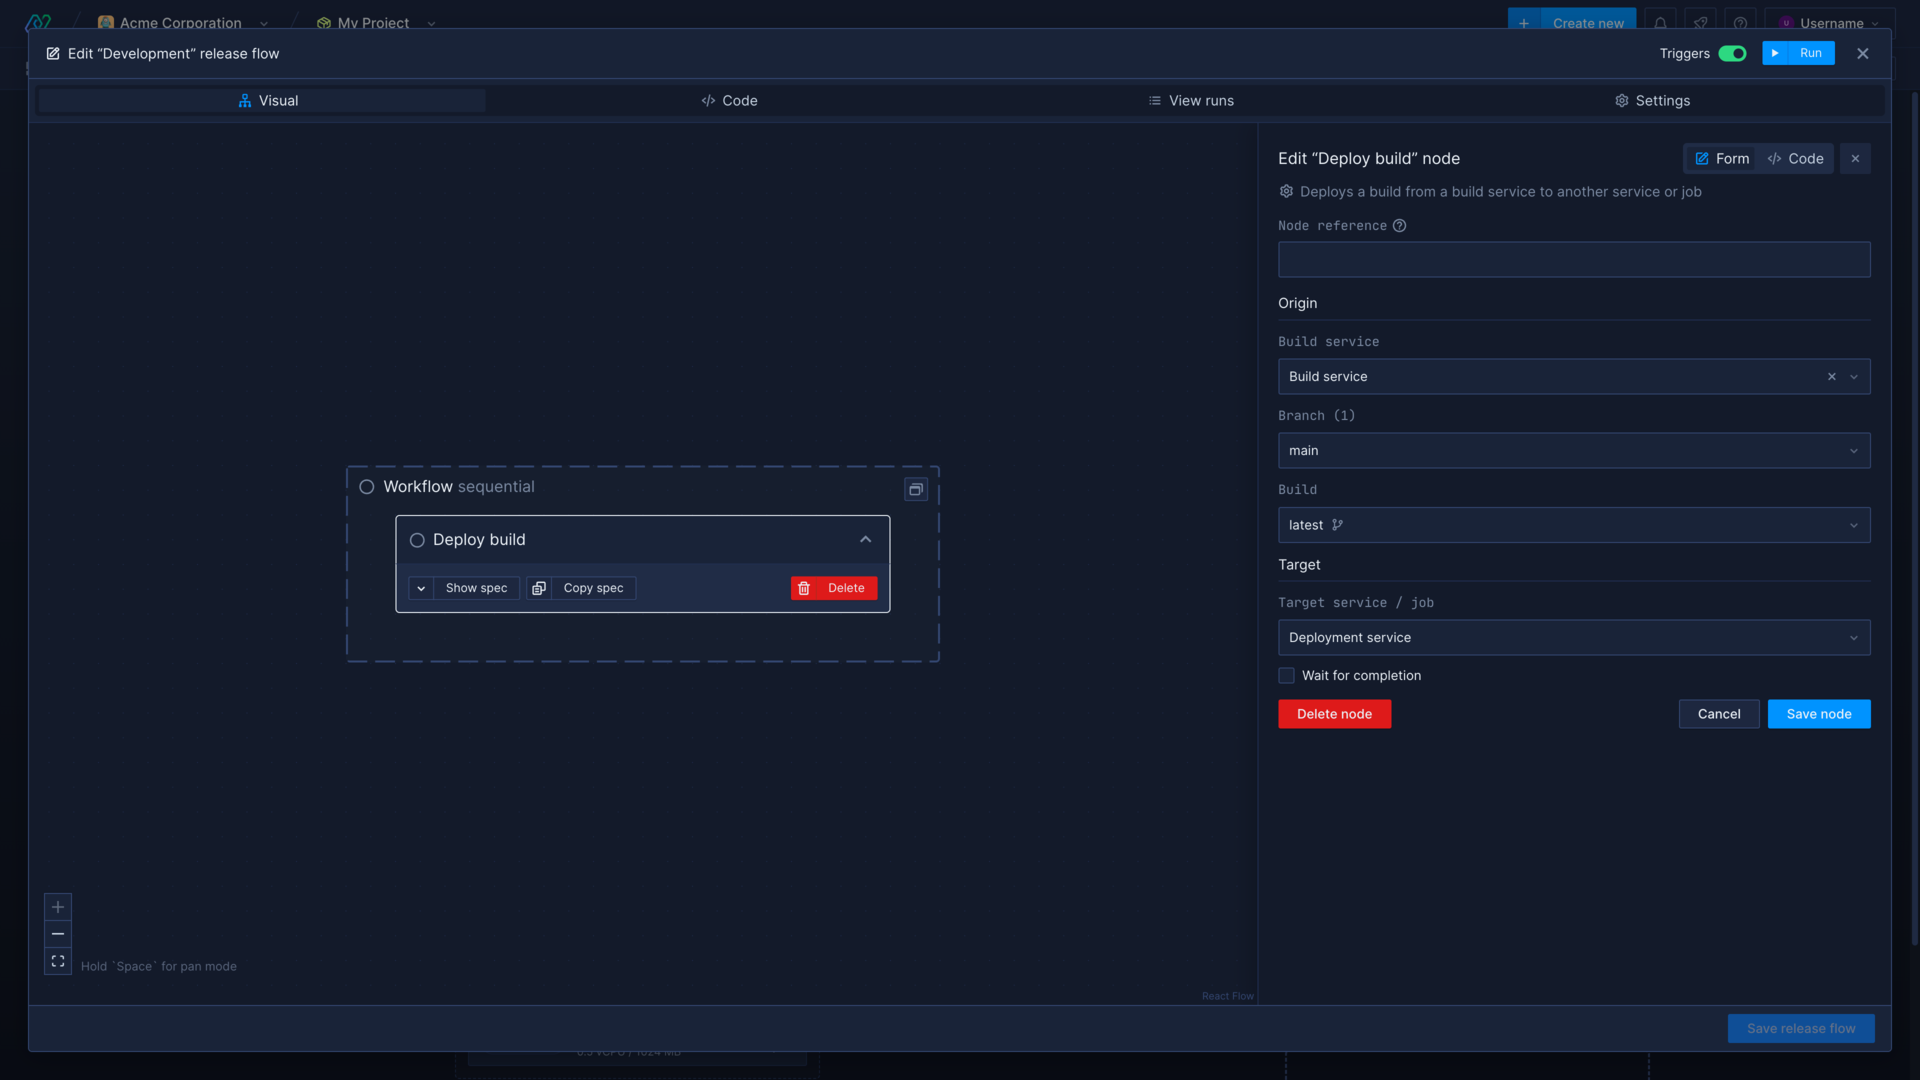
- Click and drag a deploy build node and drop it below the start build node. Click on it to configure the node.
- Select the same
build serviceas you used in the start build node, select thebuildby selecting the branch or PR you want to deploy from, and eitherlatestor a specific build. Select your deployment service as thetargetand save node. - Exit the release flow editor by clicking the close button in the top-right corner
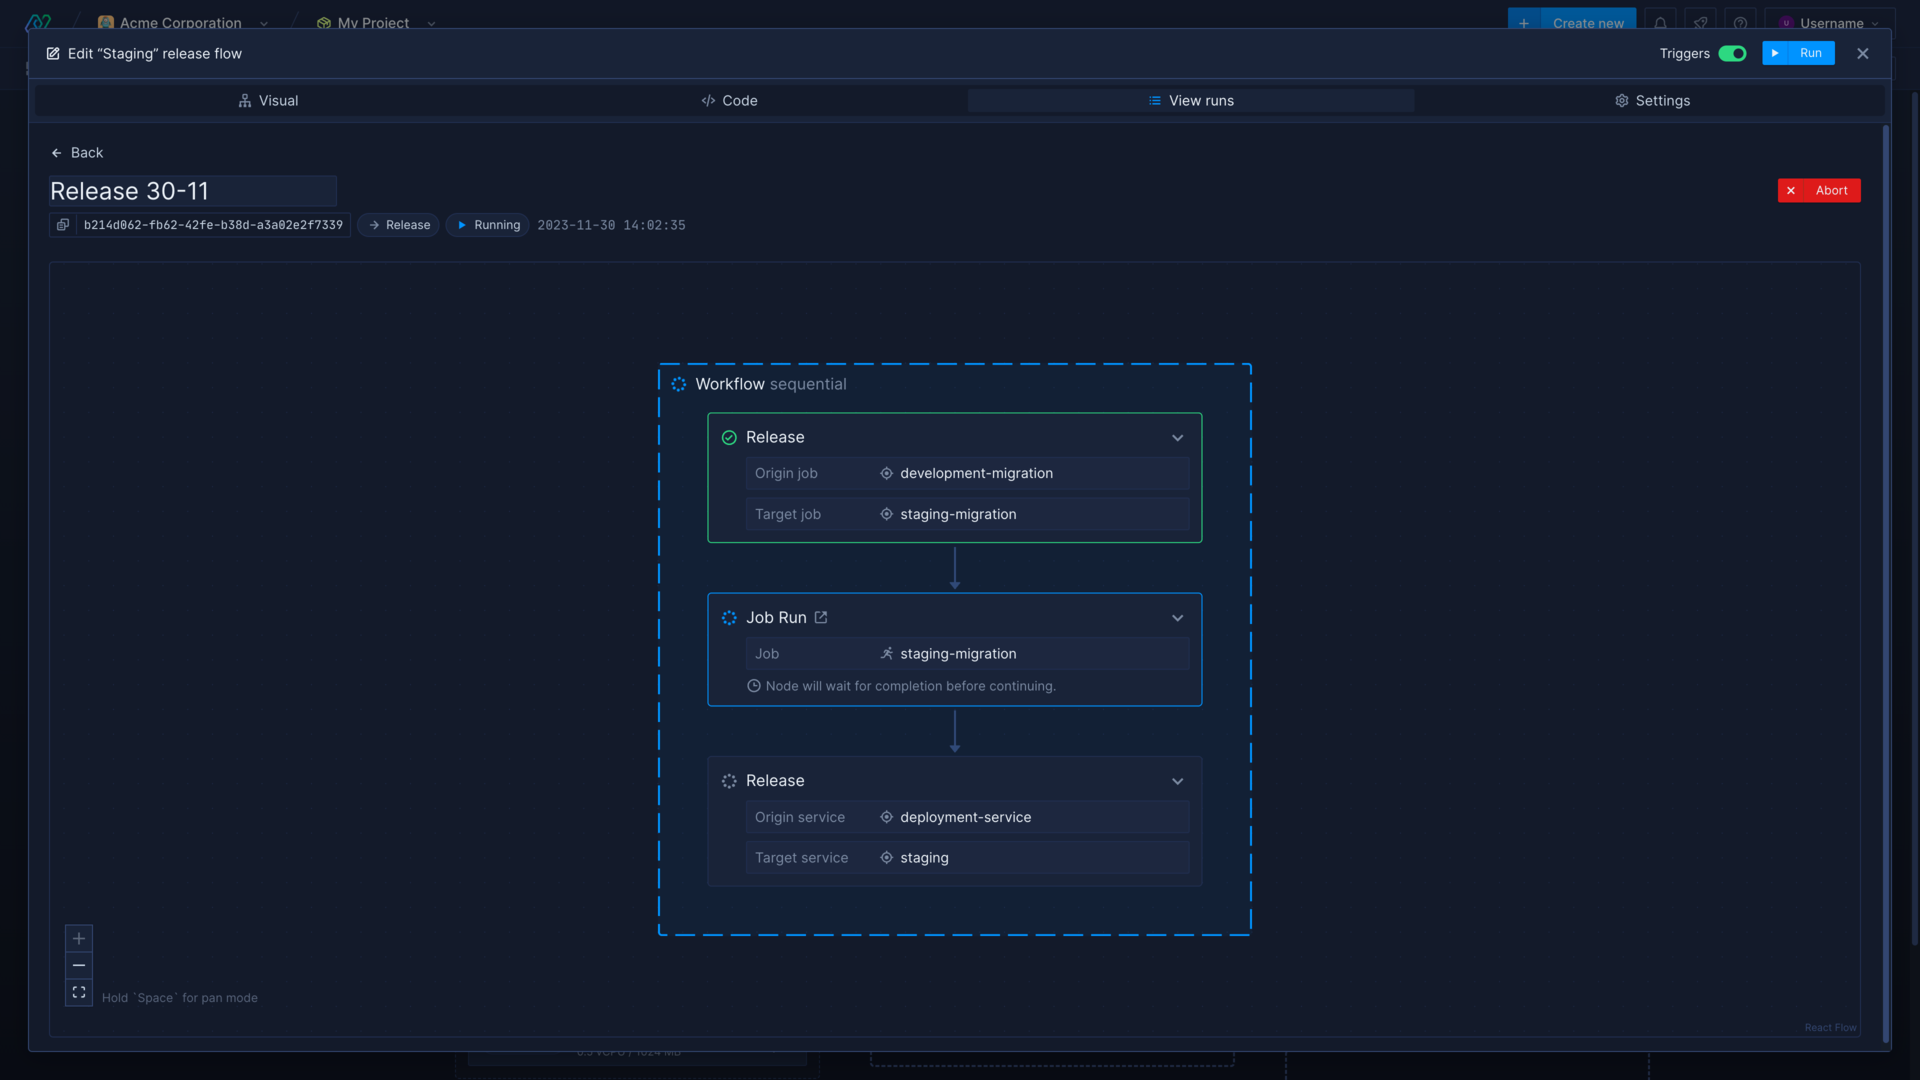
Run a release flow
After you have configured a release flow for your pipeline stage, you can now run it and Northflank will execute the workflow as you have specified it.
- Click run in the header for the development stage
- Add a name for the release and a description. This can be useful to track your releases, so you can quickly identify what is deployed to an environment and to roll back to a previous release if you need to.
- Ignore the expandable menu with the name of your deployment service. In future, you can use this to override the default release flow configuration for one run only, so you can quickly run a release without needing to edit the whole template.
- Click run and watch the release flow
Promote a deployed image
You can configure a release flow to promote images deployed in the preceding stage to the stage that contains the release flow. You can promote any image deployed to a deployment service or job, whether they are built on Northflank or deployed from an external container registry.
You can only select images from the previous pipeline stage to promote.
To deploy images from a previous stage:
- Add your required deployment services and jobs to your staging or production stage
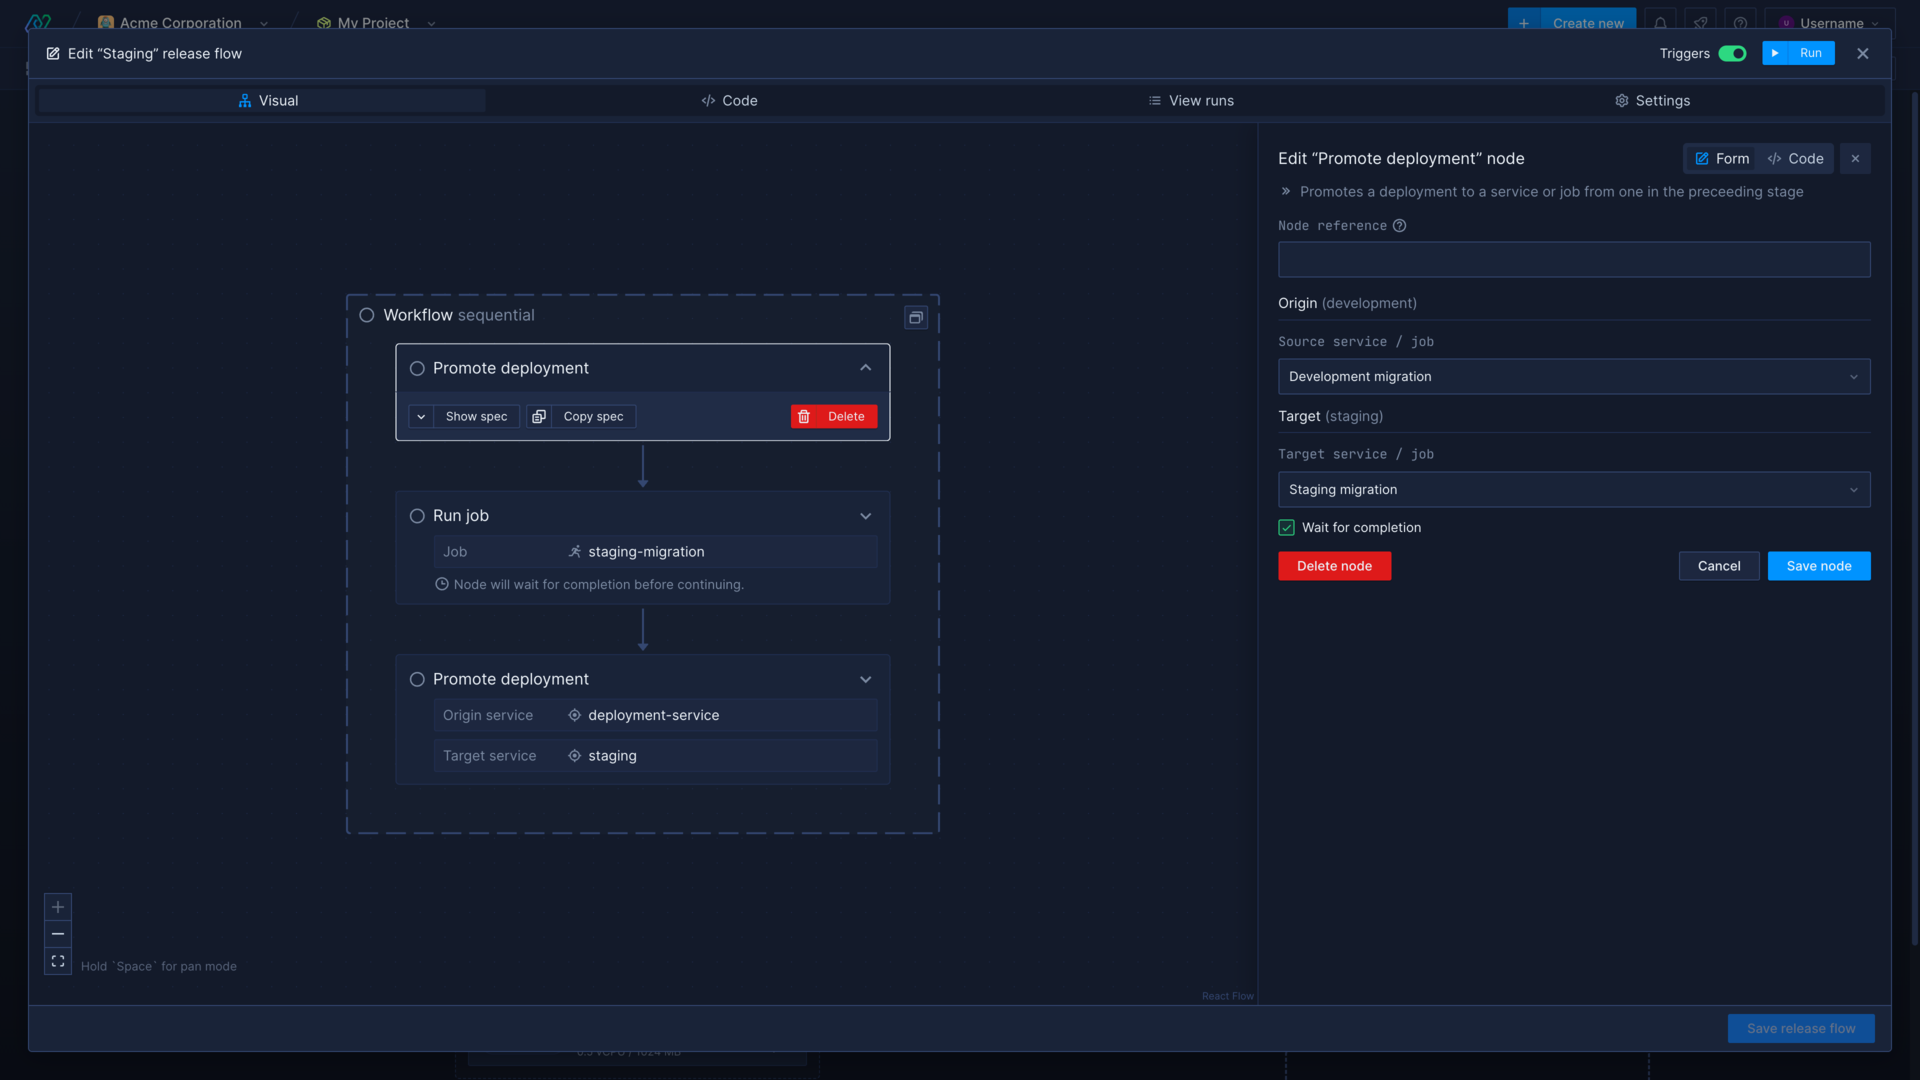
- Open the release flow editor and add a promote deployment node
- Edit the node and select the
origin, which is a deployment service or job from the previous stage - Select
target, which is the deployment service or job in the current stage that you want to deploy the image - Save release flow and run it, the image(s) in your previous stage will be promoted to the current stage
Learn more about using pipelines and release flows on Northflank
Set up a pipeline and release flow
Manage your deployments and release your updates in an intuitive pipeline with release flows.
Configure a release flow
Learn how to use the visual editor or code to configure a release flow.
Run a release flow
Run a release flow and manage releases for your different environments.
Set up a preview environment
Create templates in your pipelines to automatically generate temporary preview environments to view pull requests and branches.
Roll back a release
Roll back a release to a previous version.
Manage CI/CD
Configure continuous integration and continuous delivery on your Northflank services.
Run migrations
Run database migrations and update your deployments simultaneously when you update your schema.
GitOps on Northflank
Use templates and workflows in a Git repository to trigger changes to your config and resources.