Connect your Google Cloud Platform account to manage clusters, access registries, or use other integration features.
To add your GCP account, open Integrations → Cloud providers. In an organization, use Cloud → Provider links. If you already have provider links, select Create provider link. Otherwise, select Add provider link beside your provider.
Use a cross-project service account when it supports your selected features. You can also connect with a service account key.
After connecting the account, continue to registry setup or cluster creation.
Select or create your GCP project
You can use Northflank with an existing Google Cloud Platform project, or create a new one.
New GCP project setup
- Open your GCP console and create a new project, or select an existing one.
- Make sure that billing is enabled .
- Enable the Cloud Resource Manager API .
- If you deploy a cluster with Northflank, enable the Kubernetes Engine API .
Registry access and workload identity do not require the Kubernetes Engine API.
Required permissions
Select the integration features you need before assigning Google Cloud roles. Northflank shows the required roles and permissions for that selection.
For Docker Registries, grant Artifact Registry Reader (roles/artifactregistry.reader). For Docker Registry Push, also grant Artifact Registry Writer (roles/artifactregistry.writer). See Google's Artifact Registry access guidance for role details.
For BYOC cluster deployment, grant Service Account User (roles/iam.serviceAccountUser) and Kubernetes Engine Admin (roles/container.admin), or roles with equivalent permissions. Additional features, such as a custom VPC, require the permissions shown in Northflank. Registry-only integrations do not need these Kubernetes roles.
The list below covers the base cluster permissions. Use the current list in Northflank for your selected features.
iam.serviceAccounts.actAsiam.serviceAccounts.getcontainer.clusterRoleBindings.createcontainer.clusterRoleBindings.deletecontainer.clusterRoleBindings.getcontainer.clusterRoleBindings.listcontainer.clusterRoleBindings.updatecontainer.clusterRoles.bindcontainer.clusterRoles.createcontainer.clusterRoles.escalatecontainer.clusterRoles.getcontainer.clusterRoles.listcontainer.clusterRoles.updatecontainer.clusters.createcontainer.clusters.deletecontainer.clusters.getcontainer.clusters.getCredentialscontainer.clusters.listcontainer.clusters.updatecontainer.configMaps.createcontainer.configMaps.getcontainer.configMaps.listcontainer.configMaps.updatecontainer.customResourceDefinitions.createcontainer.customResourceDefinitions.getcontainer.customResourceDefinitions.updatecontainer.daemonSets.createcontainer.daemonSets.deletecontainer.daemonSets.getcontainer.daemonSets.listcontainer.daemonSets.updatecontainer.deployments.createcontainer.deployments.getcontainer.deployments.listcontainer.deployments.updatecontainer.horizontalPodAutoscalers.createcontainer.horizontalPodAutoscalers.listcontainer.horizontalPodAutoscalers.updatecontainer.mutatingWebhookConfigurations.createcontainer.mutatingWebhookConfigurations.listcontainer.mutatingWebhookConfigurations.updatecontainer.namespaces.createcontainer.namespaces.getcontainer.namespaces.updatecontainer.networkPolicies.createcontainer.networkPolicies.getcontainer.networkPolicies.updatecontainer.nodes.listcontainer.operations.listcontainer.persistentVolumeClaims.listcontainer.podDisruptionBudgets.createcontainer.podDisruptionBudgets.listcontainer.podDisruptionBudgets.updatecontainer.pods.listcontainer.pods.proxycontainer.podSecurityPolicies.createcontainer.podSecurityPolicies.getcontainer.podSecurityPolicies.updatecontainer.replicaSets.listcontainer.resourceQuotas.createcontainer.resourceQuotas.getcontainer.resourceQuotas.updatecontainer.roleBindings.createcontainer.roleBindings.getcontainer.roleBindings.listcontainer.roleBindings.updatecontainer.roles.bindcontainer.roles.createcontainer.roles.escalatecontainer.roles.getcontainer.roles.listcontainer.roles.updatecontainer.runtimeClasses.listcontainer.secrets.createcontainer.secrets.getcontainer.secrets.listcontainer.secrets.updatecontainer.serviceAccounts.createcontainer.serviceAccounts.deletecontainer.serviceAccounts.getcontainer.serviceAccounts.listcontainer.serviceAccounts.updatecontainer.services.createcontainer.services.getcontainer.services.listcontainer.services.updatecontainer.statefulSets.createcontainer.statefulSets.getcontainer.storageClasses.createcontainer.storageClasses.getcontainer.storageClasses.updatecontainer.thirdPartyObjects.createcontainer.thirdPartyObjects.getcontainer.thirdPartyObjects.listcontainer.thirdPartyObjects.updatecontainer.validatingWebhookConfigurations.createcontainer.validatingWebhookConfigurations.getcontainer.validatingWebhookConfigurations.listcontainer.validatingWebhookConfigurations.updatecontainer.volumeSnapshotClasses.createcontainer.volumeSnapshotClasses.getcontainer.volumeSnapshotClasses.update
Add your account with a cross-project service account
A cross-project service account lets Northflank access your Google Cloud project without a service account key that you manage. Northflank creates a service account, and you grant that account access to your project.
You will need the following to get started:
- A Google Cloud project
- Permission to grant the required roles in that project
- For cluster deployment: sufficient quotas to deploy your cluster
For Artifact Registry access, select Docker Registries and, for project builds, Docker Registry Push. Select BYOC only if this integration also manages clusters.
- Open Integrations → Cloud providers. In an organization, use Cloud → Provider links.
- Open the GCP provider link form .
- Under Basic information, enter a Name. Select the features you need under Desired features.
- In Credentials, select Cross-project service account.
- Enter your Google project ID.
- Select Create provider link.
- On the new provider link's Edit tab, copy the Service account email from Credentials.
- Open the IAM page in your Google Cloud project.
- Select Grant access. Enter the copied email as the principal.
- Assign the roles shown for your selected features in Northflank.
- Save the assignment in Google Cloud.
- In Northflank, select Verify all permissions under Credentials.
Google Cloud can take time to apply new permissions. An operation can fail before those changes apply.
Wait for the updated permissions before you retry an operation.
After access is available, use the integration for your registry or create a cluster.
Add your account with a service key
You can integrate Google Cloud with a service account key. Use a cross-project service account when it supports your selected features to avoid managing a long-lived key.
You will need the following to get started:
- A Google Cloud project
- Permission to create service accounts and service account keys
- Permission to grant the required roles in that project
- For cluster deployment: sufficient quotas to deploy your cluster
For Artifact Registry access, select Docker Registries and, for project builds, Docker Registry Push. Select BYOC only if this integration also manages clusters.
- Open Integrations → Cloud providers. In an organization, use Cloud → Provider links.
- Open the GCP provider link form .
- Under Basic information, enter a Name. Select the features you need under Desired features.
- In Credentials, select Service account key. Review the required roles.
- Open IAM & Admin → Service Accounts in your Google Cloud project.
- Create a service account with a name and description.
- Assign the roles required for your selected features.
- Open the service account's Keys tab. Create a JSON key.
- Copy the downloaded JSON into Service account key (keyfile.json) in Northflank.
- Make sure that Google project ID matches your project.
- Select Create provider link.
Google Cloud can take time to apply new permissions. An operation can fail before those changes apply.
Wait for the updated permissions before you retry an operation.
You can update the key and Google project ID in the integration.
Keep access to existing resources when you change these values. If you change the project while it still contains Northflank clusters, Northflank cannot manage those clusters. Deleting clusters directly in Google Cloud can leave unused resources.
Check your quotas
To successfully deploy a cluster on GCP using Northflank you must have the required resources available to your account for your desired region.
Check the node types you wish to deploy and ensure your account has sufficient quotas for your required node type, vCPU, and disk type for your desired regions.
You can manage your Google quota settings from your quotas page on the IAM and admin page of your Google Cloud project. You can filter the list by resource and region.
For example, to increase the number of node pools you can deploy on Google Cloud using the n2-standard-4 node type in the region europe-west2, filter the quota list with region:europe-west2 and n2_cpus, select the quota from the list, and click edit quotas.
Create a cluster
Open Clusters in your team. In an organization, open Cloud → Clusters. Click Create cluster, or Add cluster for your first cluster.
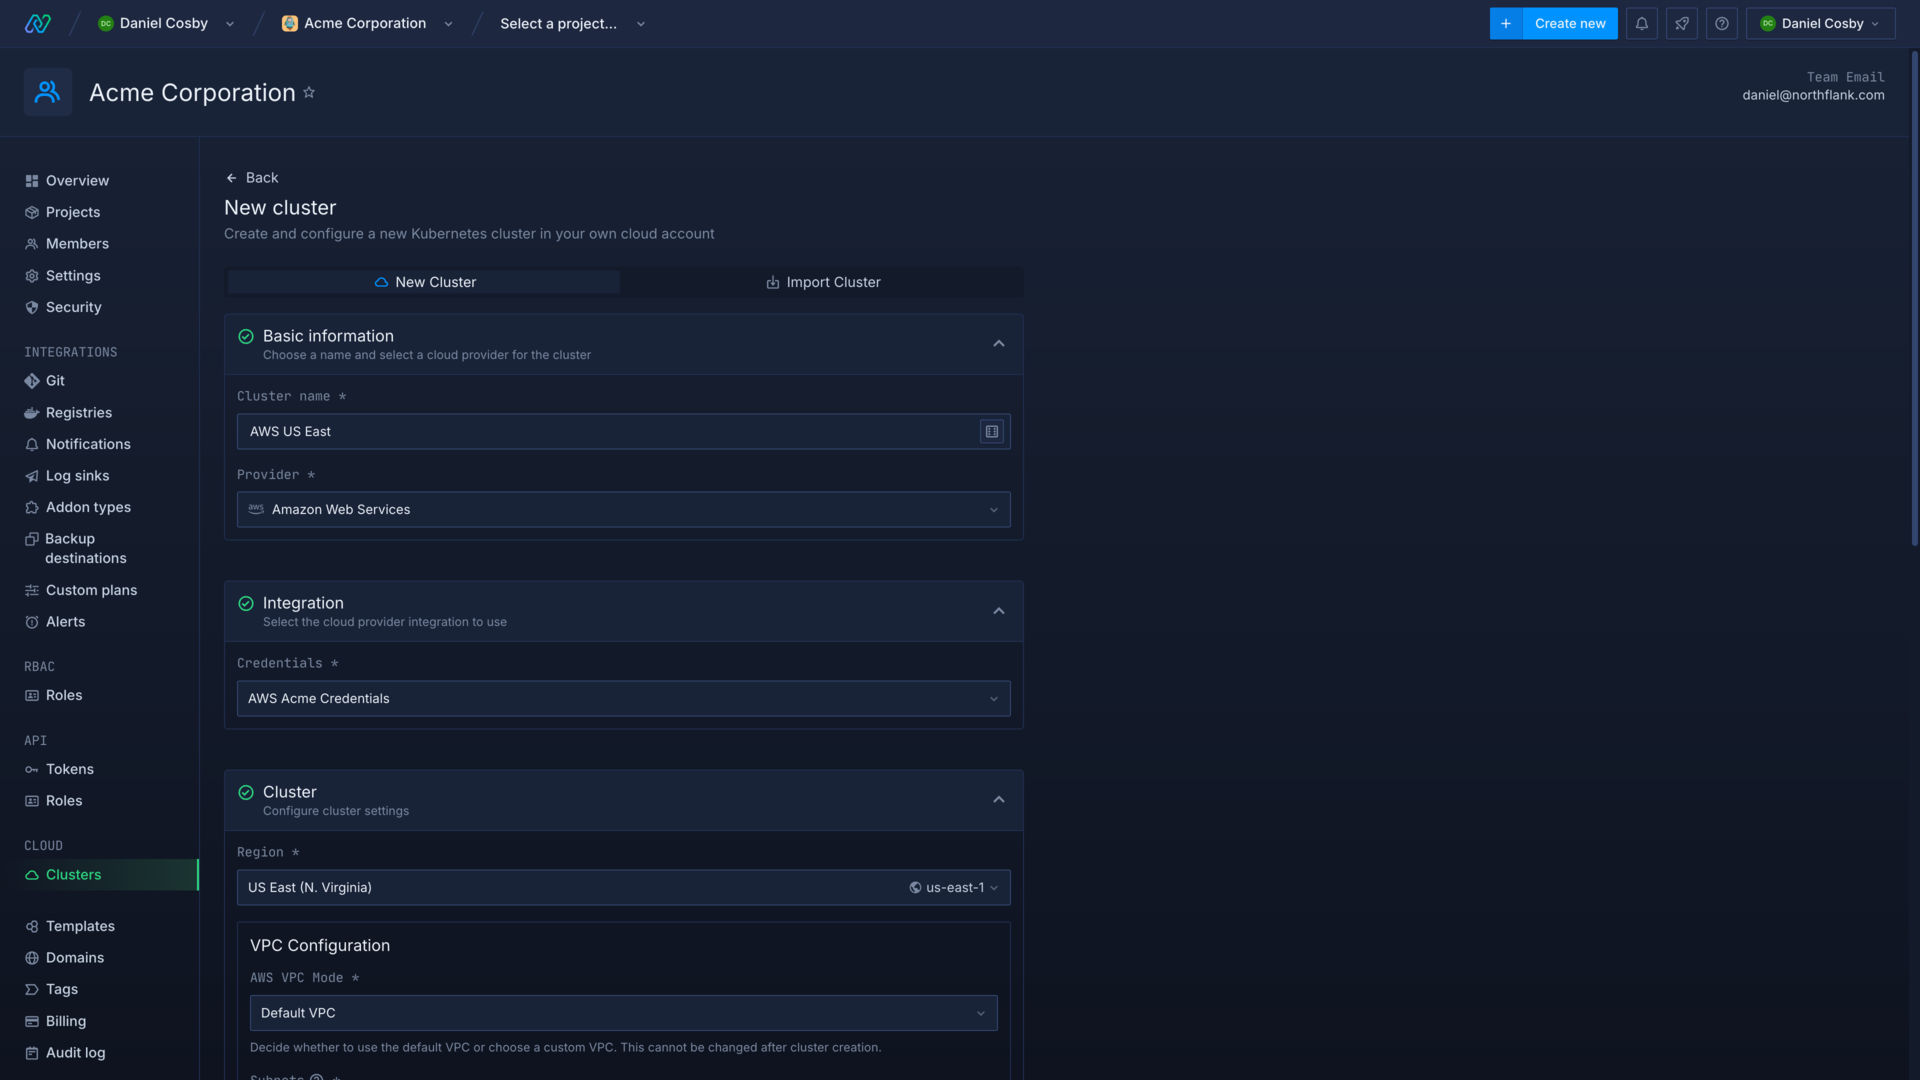
Enter a name for the cluster and select GCP as the cloud provider. Choose your integration credentials and select the region to deploy in.
The Google project ID field will be automatically filled based on the provided credentials.
Configure node pools
You can now configure the node pools for your cluster. Node pools can also be added, deleted, and updated after creating your cluster. Click add node pool to add another pool.
Each cluster requires at least one node pool, and a combined minimum of 8 vCPU and 16GB memory across all node pools.
Each node can schedule up to 256 pods (minus system pods). The actual number of pods per node will usually be limited by resource requests and request modifiers for smaller nodes.
Cluster networking limits
The number of workloads that can be deployed to a GCP cluster is limited by the available number of pod and service IP addresses, allocated by CIDR block.
Northflank configures GCP clusters with a CIDR block of /14 for pods and a CIDR block of /20 for services, which means you will be able to deploy up to 4000 services, jobs, and addons to your cluster before facing networking constraints.
See deploy and scale node pools for more information on configuring nodes and node pools.
Configure advanced options
After adding your initial node pools you can configure advanced options for the cluster, such as build infrastructure and resource request modifiers.
When you create the cluster Northflank will begin installing system components in node pools according to their capacity. This may take up to 20 minutes.
Deploy to private nodes
Private GCP nodes have no public IP addresses, which prevents direct connections from the internet to the nodes.
To use private GCP nodes, select Enable private node IPs in the node-pool form. The corresponding API field is gcp.enablePrivateNodes. Private nodes require Cloud NAT on the subnet for internet egress.
Node privacy and workload ingress are separate choices. Workloads on private nodes can still receive traffic through a public ingress load balancer.
Eligible GCP clusters also support private ingress. See Public and VPC ingress for availability, configuration, and client connectivity requirements.
Next steps
Configure your Kubernetes cluster
Deploy node pools
Deploy workloads to your cluster
Run GPU workloads