You can create and configure Northflank templates to manage your team integrations, projects, and resources.
You can create a new template from the templates page in your team dashboard, or from the templates page in a project. You can then define the template using the visual or code editor, or copy the resources from an existing project.
For the specifics of creating and configuring release flow and preview environment templates, see the relevant pages in the release section.
To add an existing template from a Git repository to your team, create a new template and enable GitOps.
You can configure a template's settings on the template edit page, to run a template automatically when it's updated, set the concurrency policy, and add secrets.
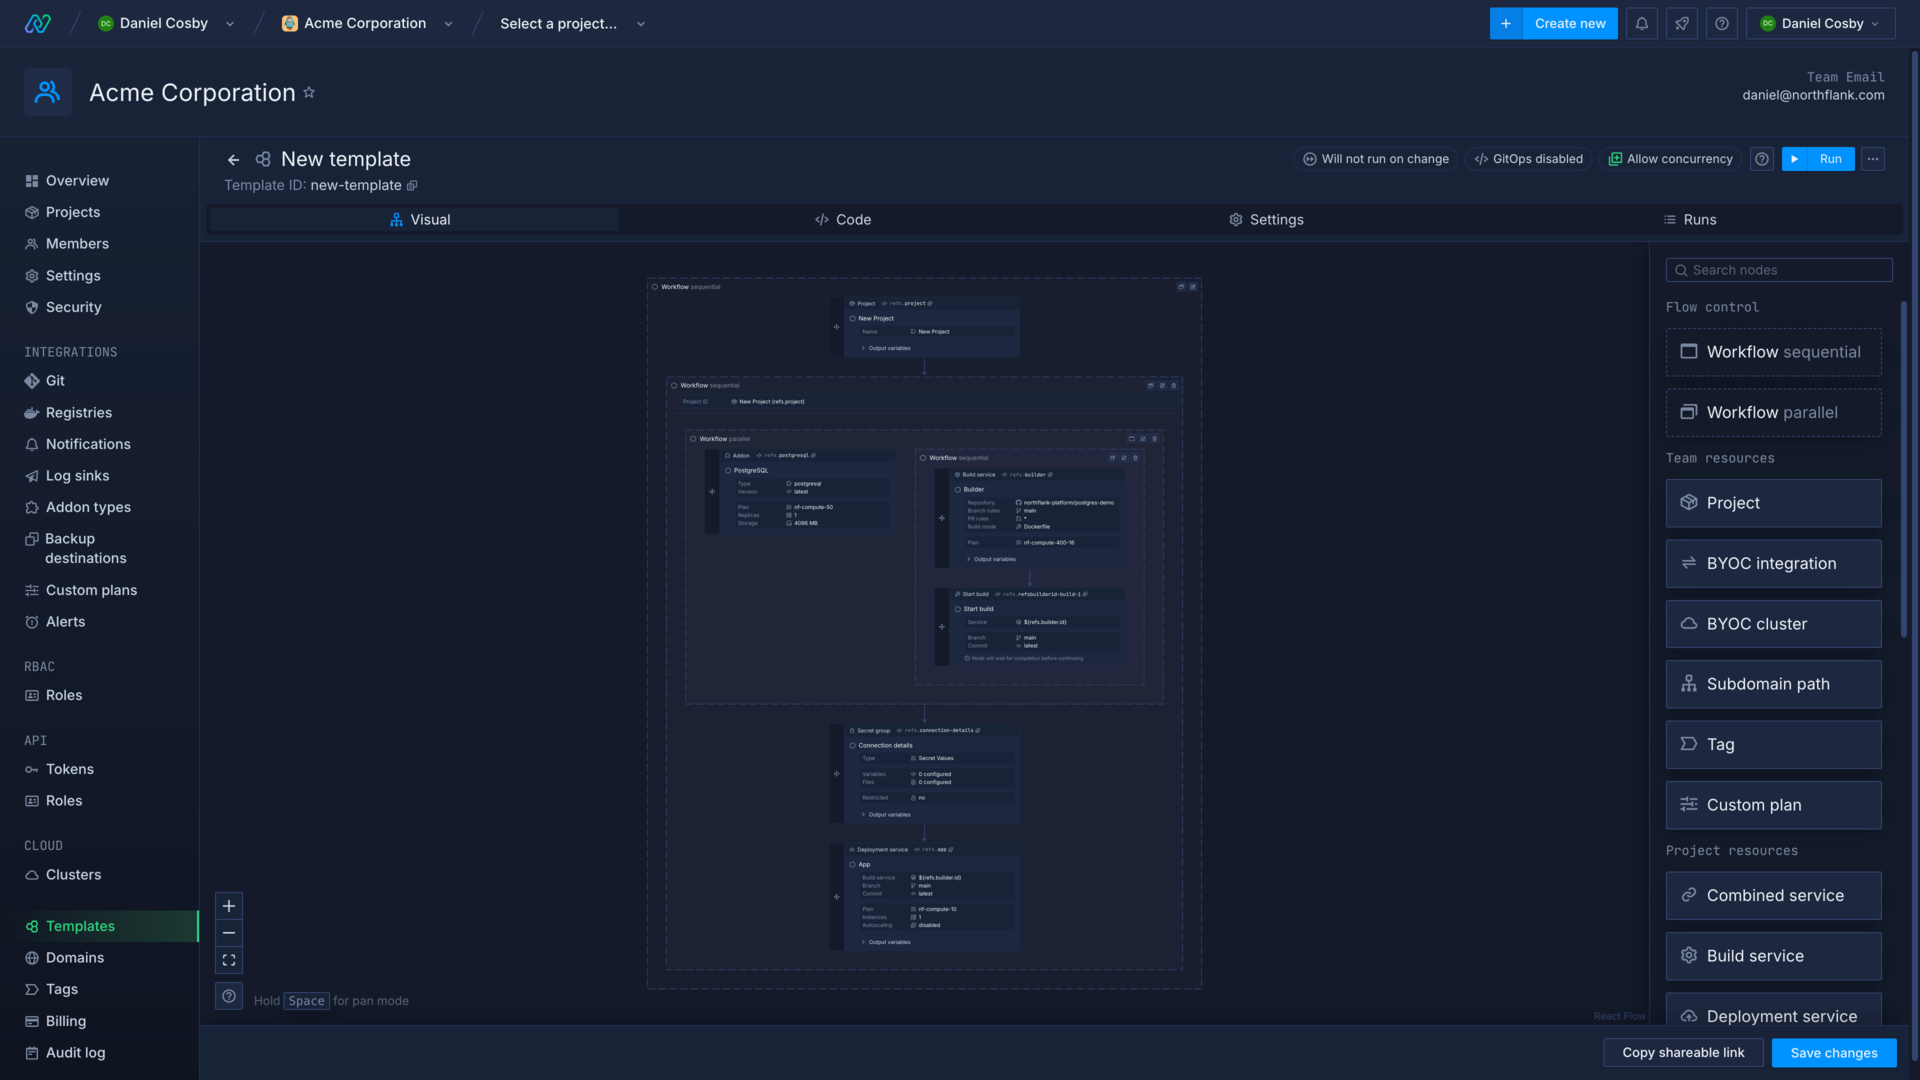
Use the visual editor
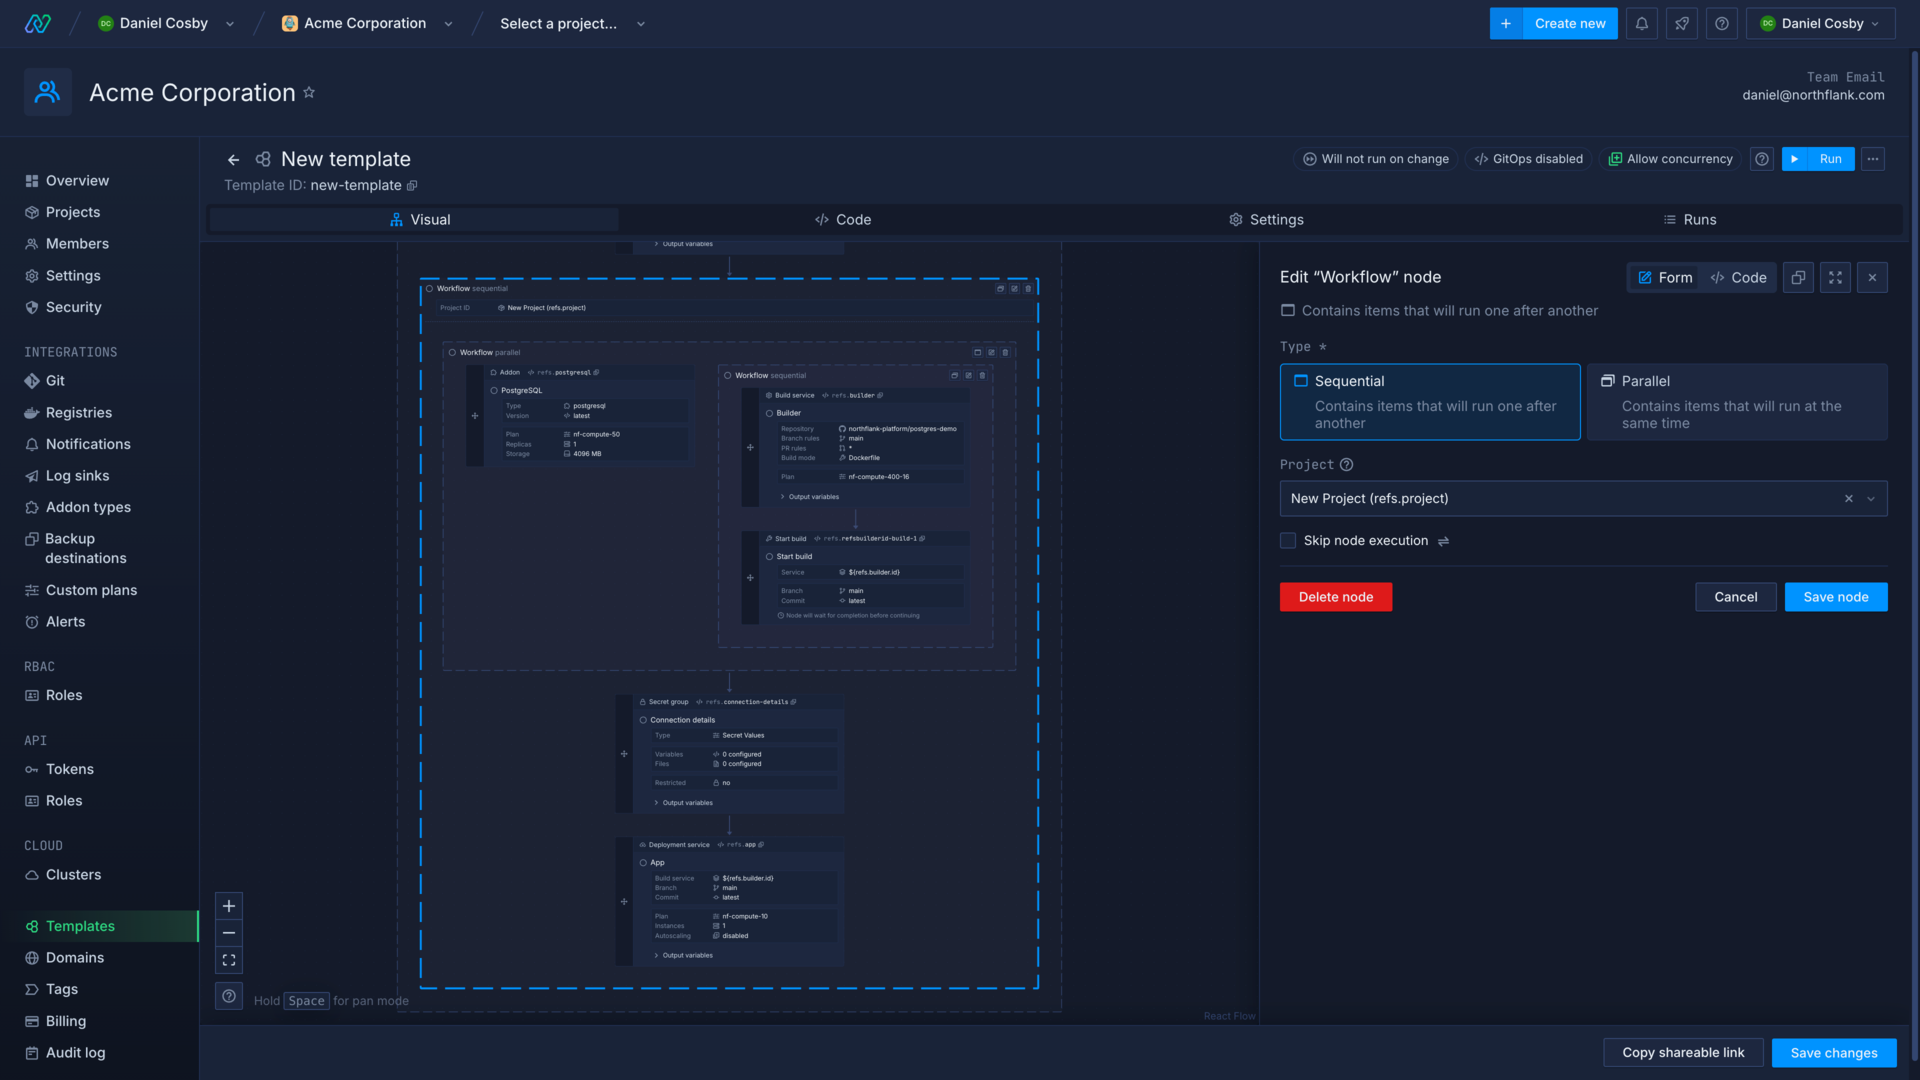
The visual editor allows you to drag and drop nodes in the order you want them to run. You can see your template's entire flow and the key configuration details of nodes at a glance in the visual editor.
Navigation
You can move around the viewport by scrolling. A normal scroll moves the viewport vertically, and either a horizontal scroll on a trackpad or shift and scroll will move the viewport horizontally. You can also move around the viewport by dragging the mouse while holding the space key. Trackpad pinch gestures as well as control/command key and scroll wheel will zoom the viewport, as will the and buttons. Press to re-centre the view on the template contents.
Edit workflows and nodes
To re-arrange workflows, click and drag anywhere within the workflow that isn't a button or node. To re-order nodes, click and drag the move area of the node.
You can click the switch button in the workflow node to change to a parallel or sequential flow.
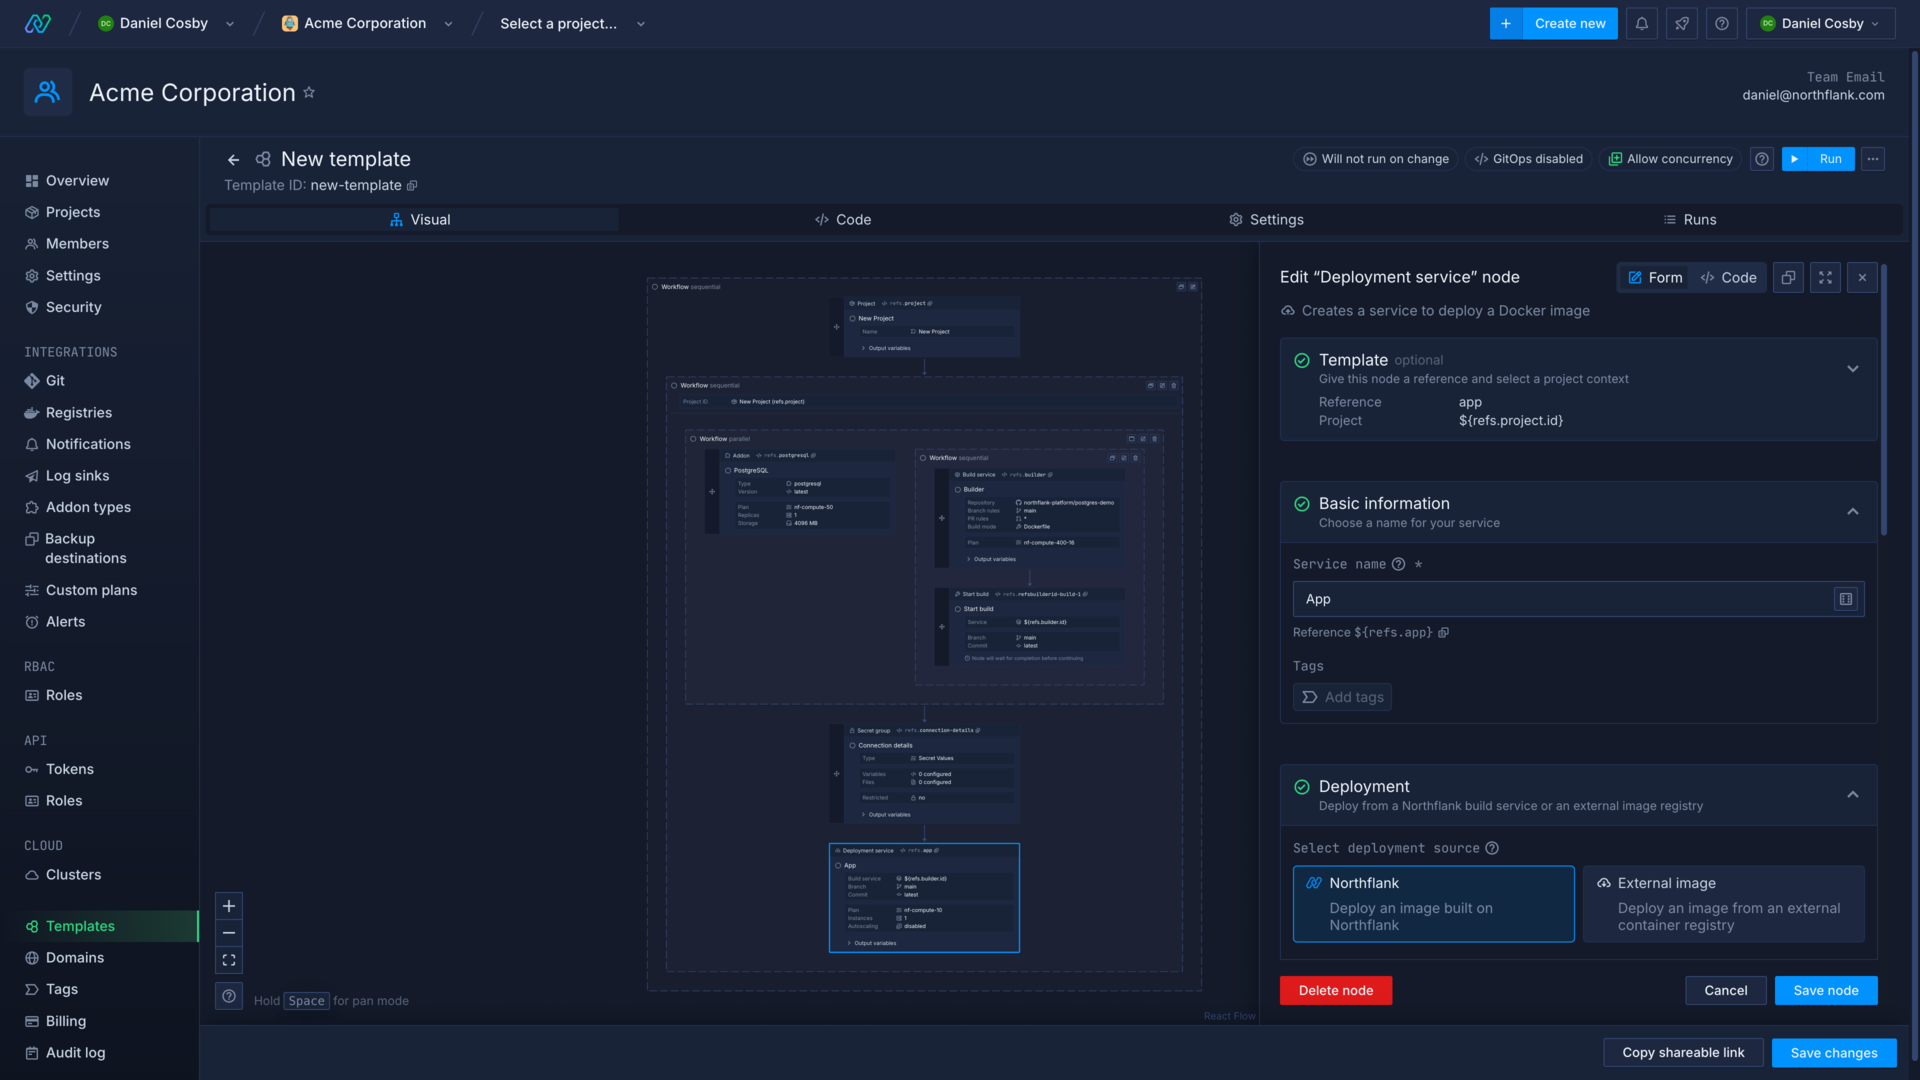
You can edit an individual node by clicking on it. You can configure a node using the form, or switch to code to directly edit the JSON for the individual node. Editing the code directly is useful to paste in resource specifications from your existing projects, or other sources. You can expand the node edit form which is particularly useful on smaller screens.
The write a template section covers more specific details of workflows and nodes, and how to make templates for different use-cases.
Click create template or save changes to save your template.
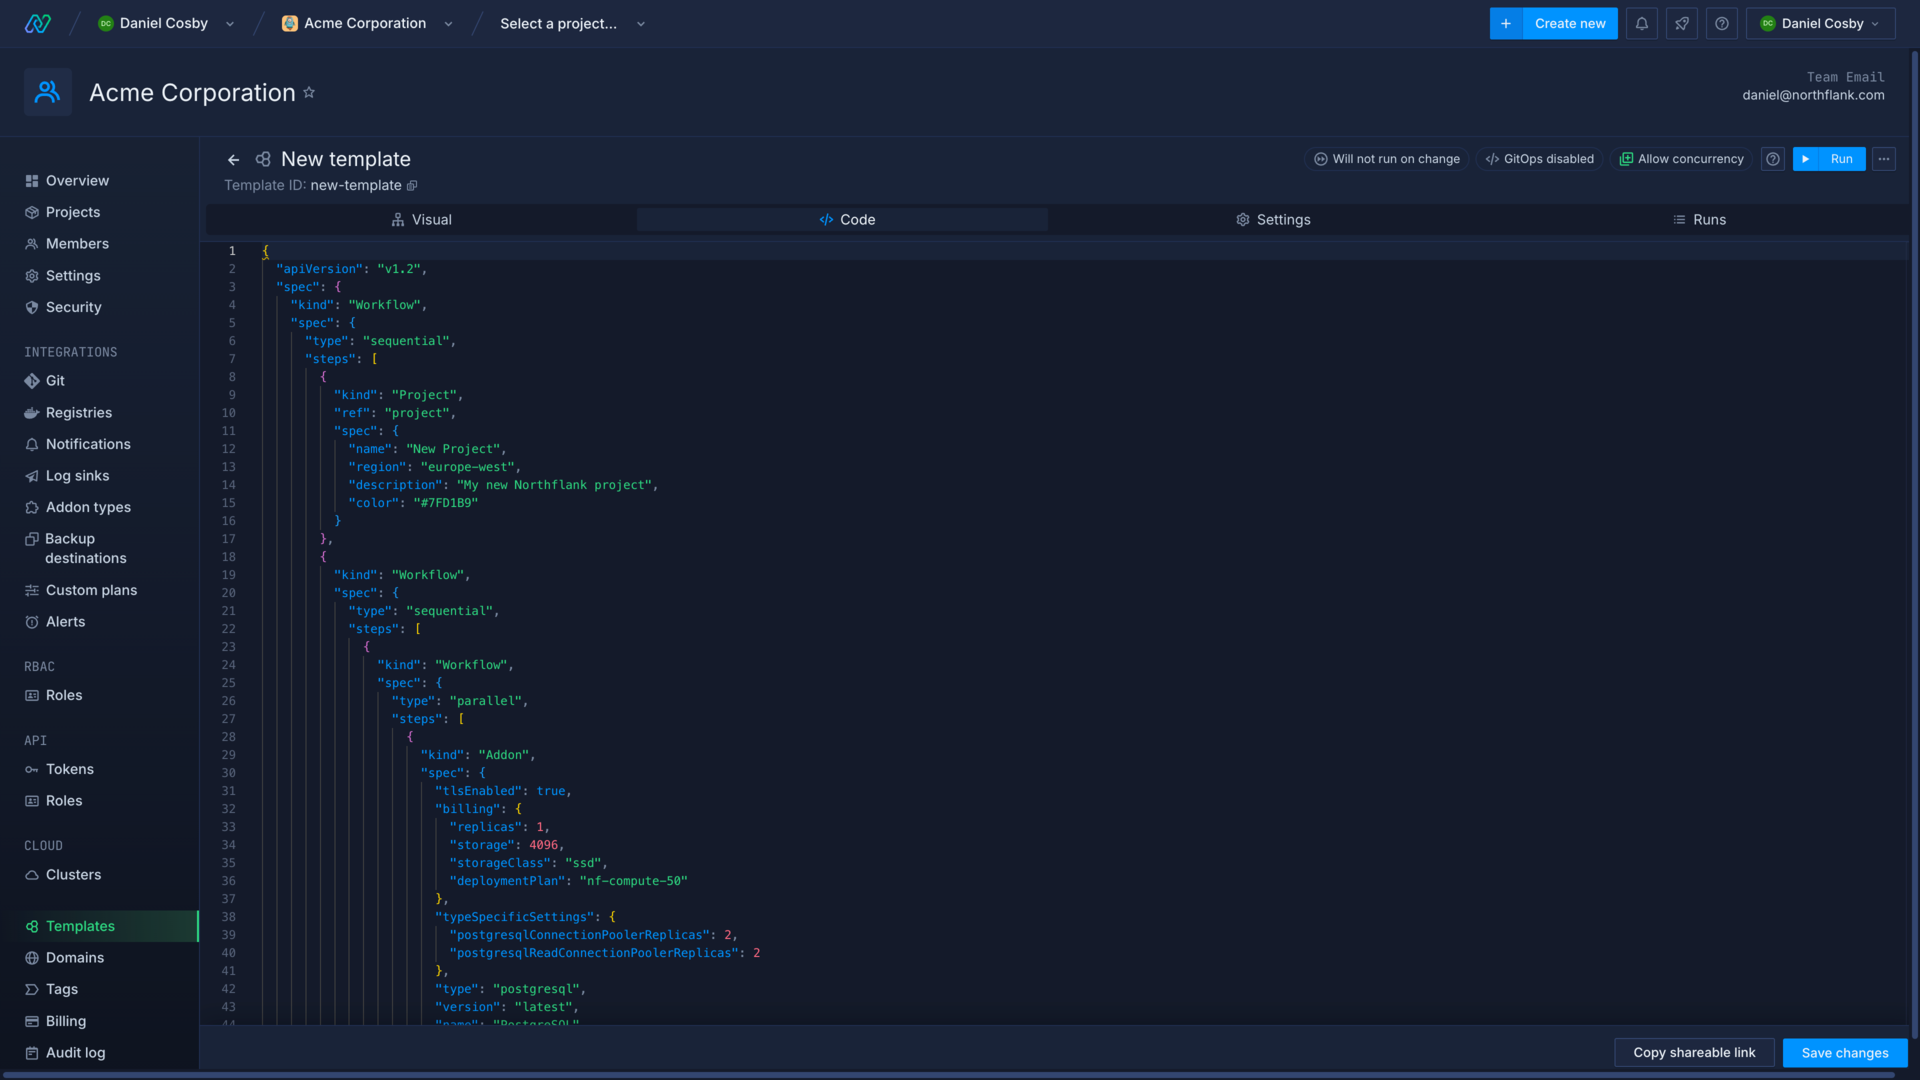
Edit a template as code
Template code consists of JSON that defines resources and actions to be performed in workflows, as well as information about the template itself.
You can enter the content of your template using the Northflank code editor by selecting the code view. The editor includes code hints, autocompletion, and error checking to help you include required properties in the correct format.
You can also use access the schema to edit templates in your IDE by including the relevant $schema field in the root of the template object:
| Template type | Schema |
|---|---|
| Template | "$schema": "https://api.northflank.com/v1/schemas/template" |
| Release flow | "$schema": "https://api.northflank.com/v1/schemas/release-flow" |
| Preview environment | "$schema": "https://api.northflank.com/v1/schemas/preview-env" |
You can view the required specifications for individual nodes, and for an entire template in the API docs.
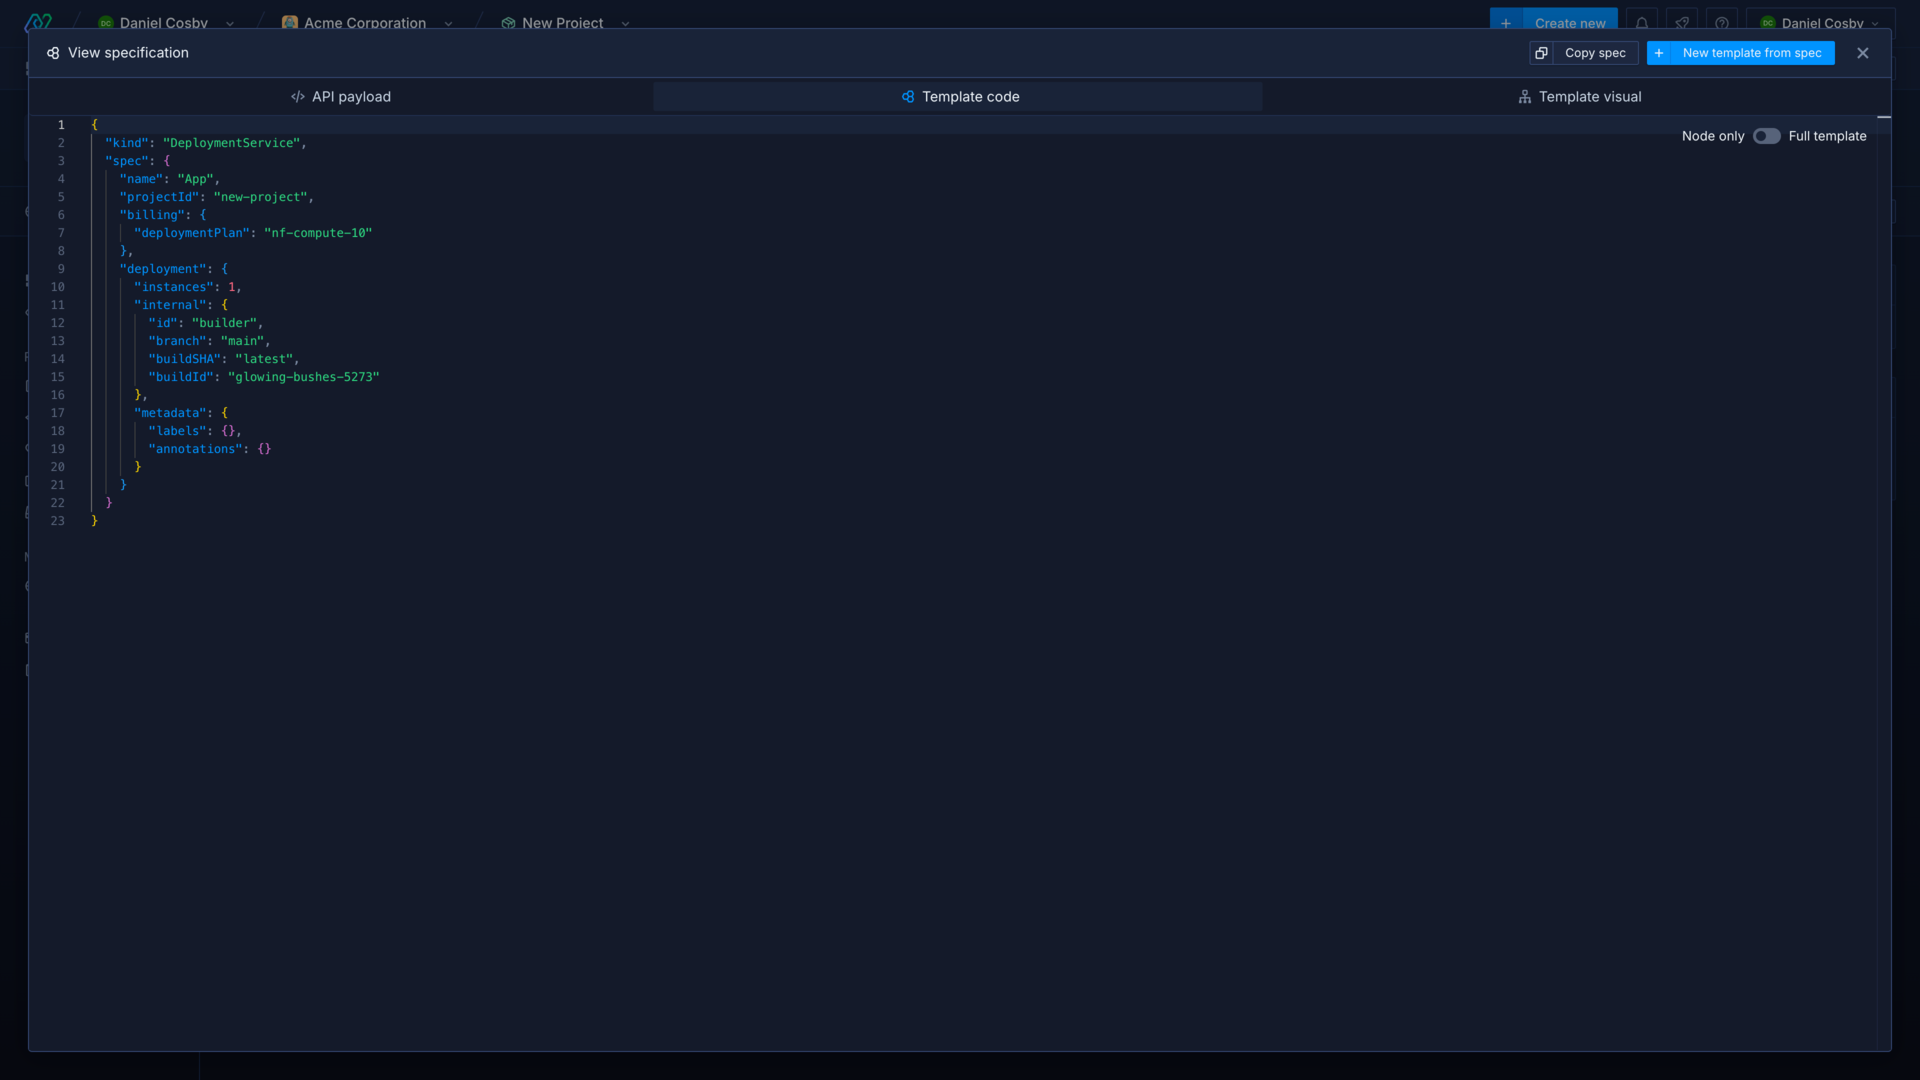
To see the full specification for a template (excluding argument overrides) you can click view specification from the template options , or you can enable GitOps to view it in your repo.
Create from an existing project or resource
You can create from your existing resources and projects in the Northflank application by clicking new template from spec while viewing a specification.
Create a template from a project
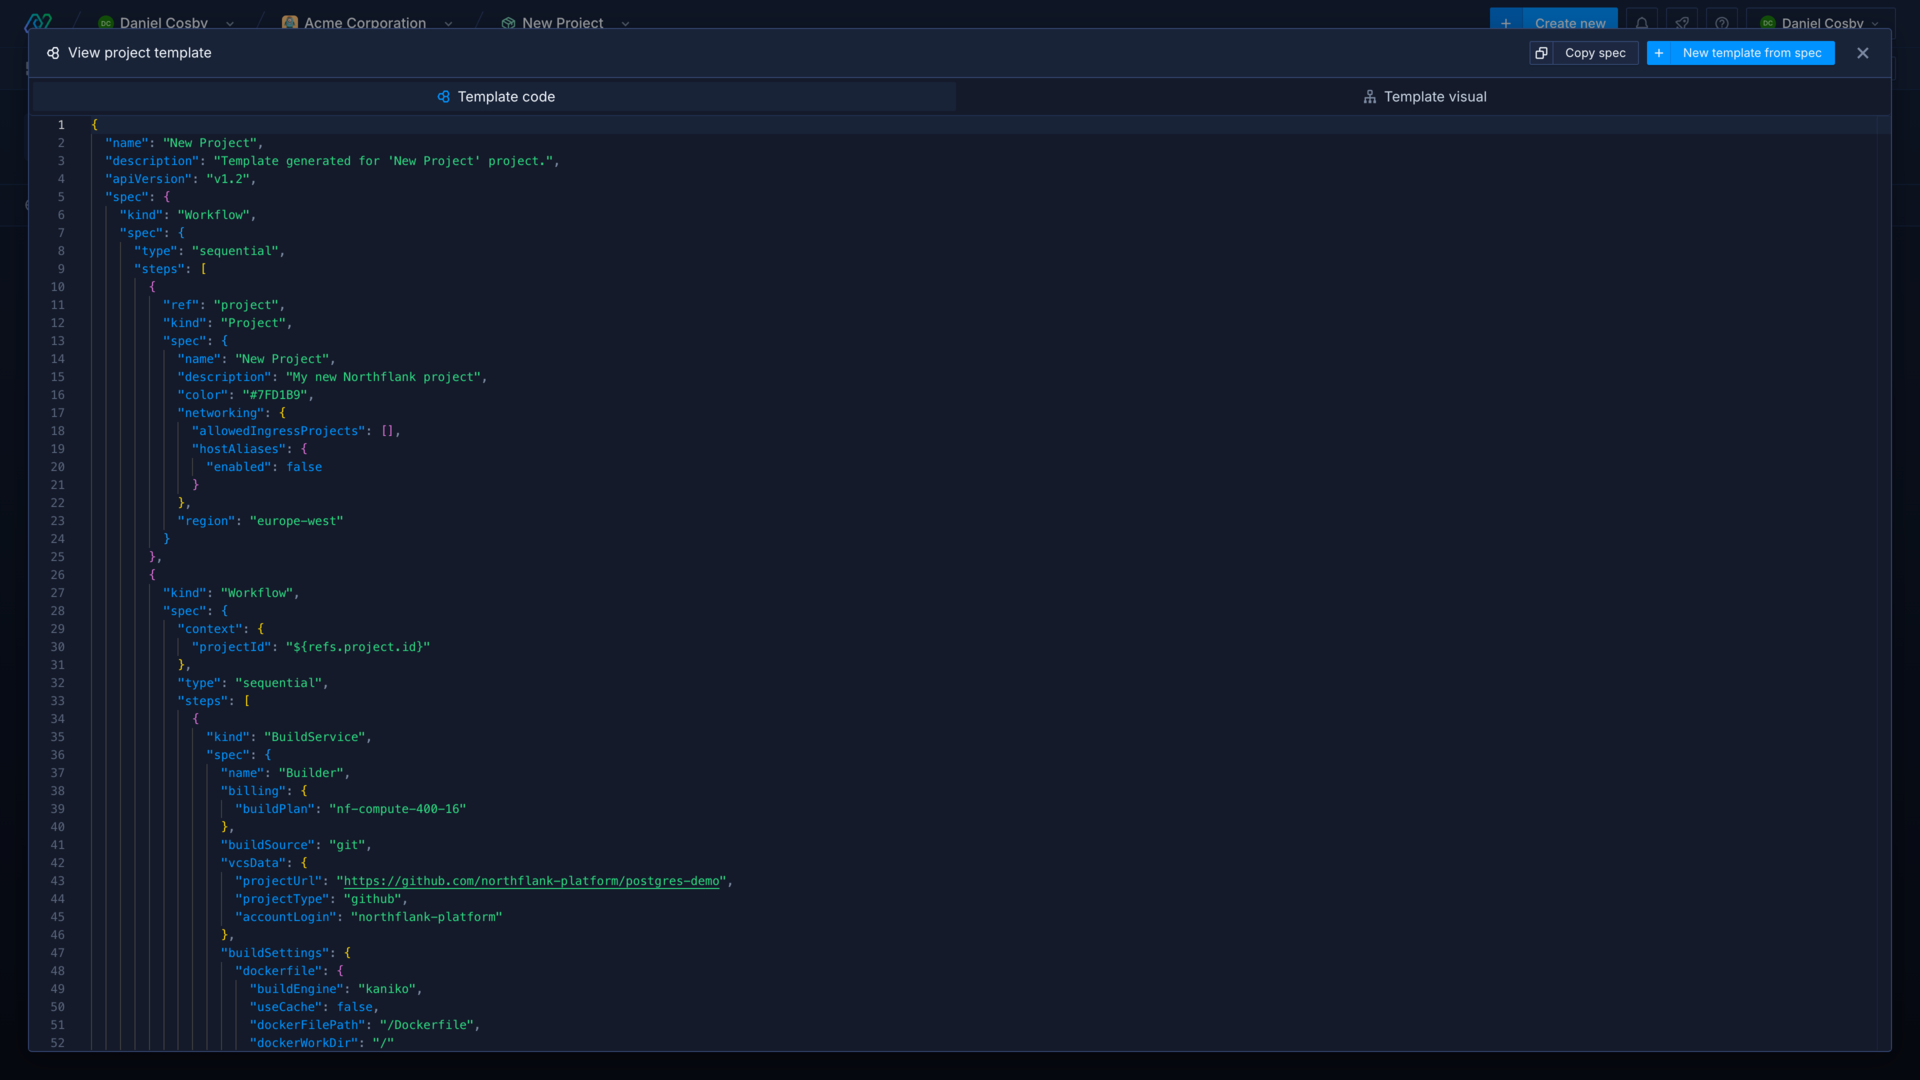
Click the project template button in the project header to get the template for an entire project. You can switch between viewing the template code and the visual representation of the project, and view the specification for an individual resource by clicking on a node in the visual editor.
Click new template from spec to create a new template from the specification. Northflank will generate a template for your project based on your project's existing resources and their current configurations, and will group resources in workflows and order them in a logical way.
You may need to re-order workflows and nodes, edit their configurations, or add new nodes to your template to deploy your project successfully.
Create a template from a resource
To view the specification for individual resources, such as services, addons, jobs you can click the options button in the resource's header.
Select view specification and ensure the view is on template code. Toggle between node only to copy the specification into an existing template, or full template which will give you a full template specification including the resource.
Click new template from spec to create a new template containing only this resource. If it's a resource from within a project it will have the project context set on the node.
Set project context
Every node for a project-level resource must have a project context. You can either set the project context directly in the resource node, or the node can inherit the project context from a parent workflow. You can create and update resources across multiple projects by setting different contexts for workflows or nodes.
Learn more about setting project contexts.
Run your template automatically
You can enable run a template automatically so that any changes made to the template will trigger a template run, whether it's updated in the Northflank UI, via the API, or changed in the Git repository (if GitOps is enabled).
This is convenient if you want to manage your resources via templates, as triggering a run automatically will mean your resources will be updated to reflect the template specifications on change.
warning
Enable GitOps for your template
You can enable GitOps to sync the template with a Git repository. You can make changes to your template by committing changes to it in the repository or by editing it on Northflank, and the changes will be propagated to the other platform automatically. This allows you to maintain your templates alongside your codebase, or in a separate infrastructure repository.
Enable GitOps and select the repository and branch that contains, or will contain, the template code. Enter the path to the template relative to the repository root. For example /template.json will look for a file called template.json in the repository root, while /platform/backend.json will look for a file called backend.json in the directory platform.
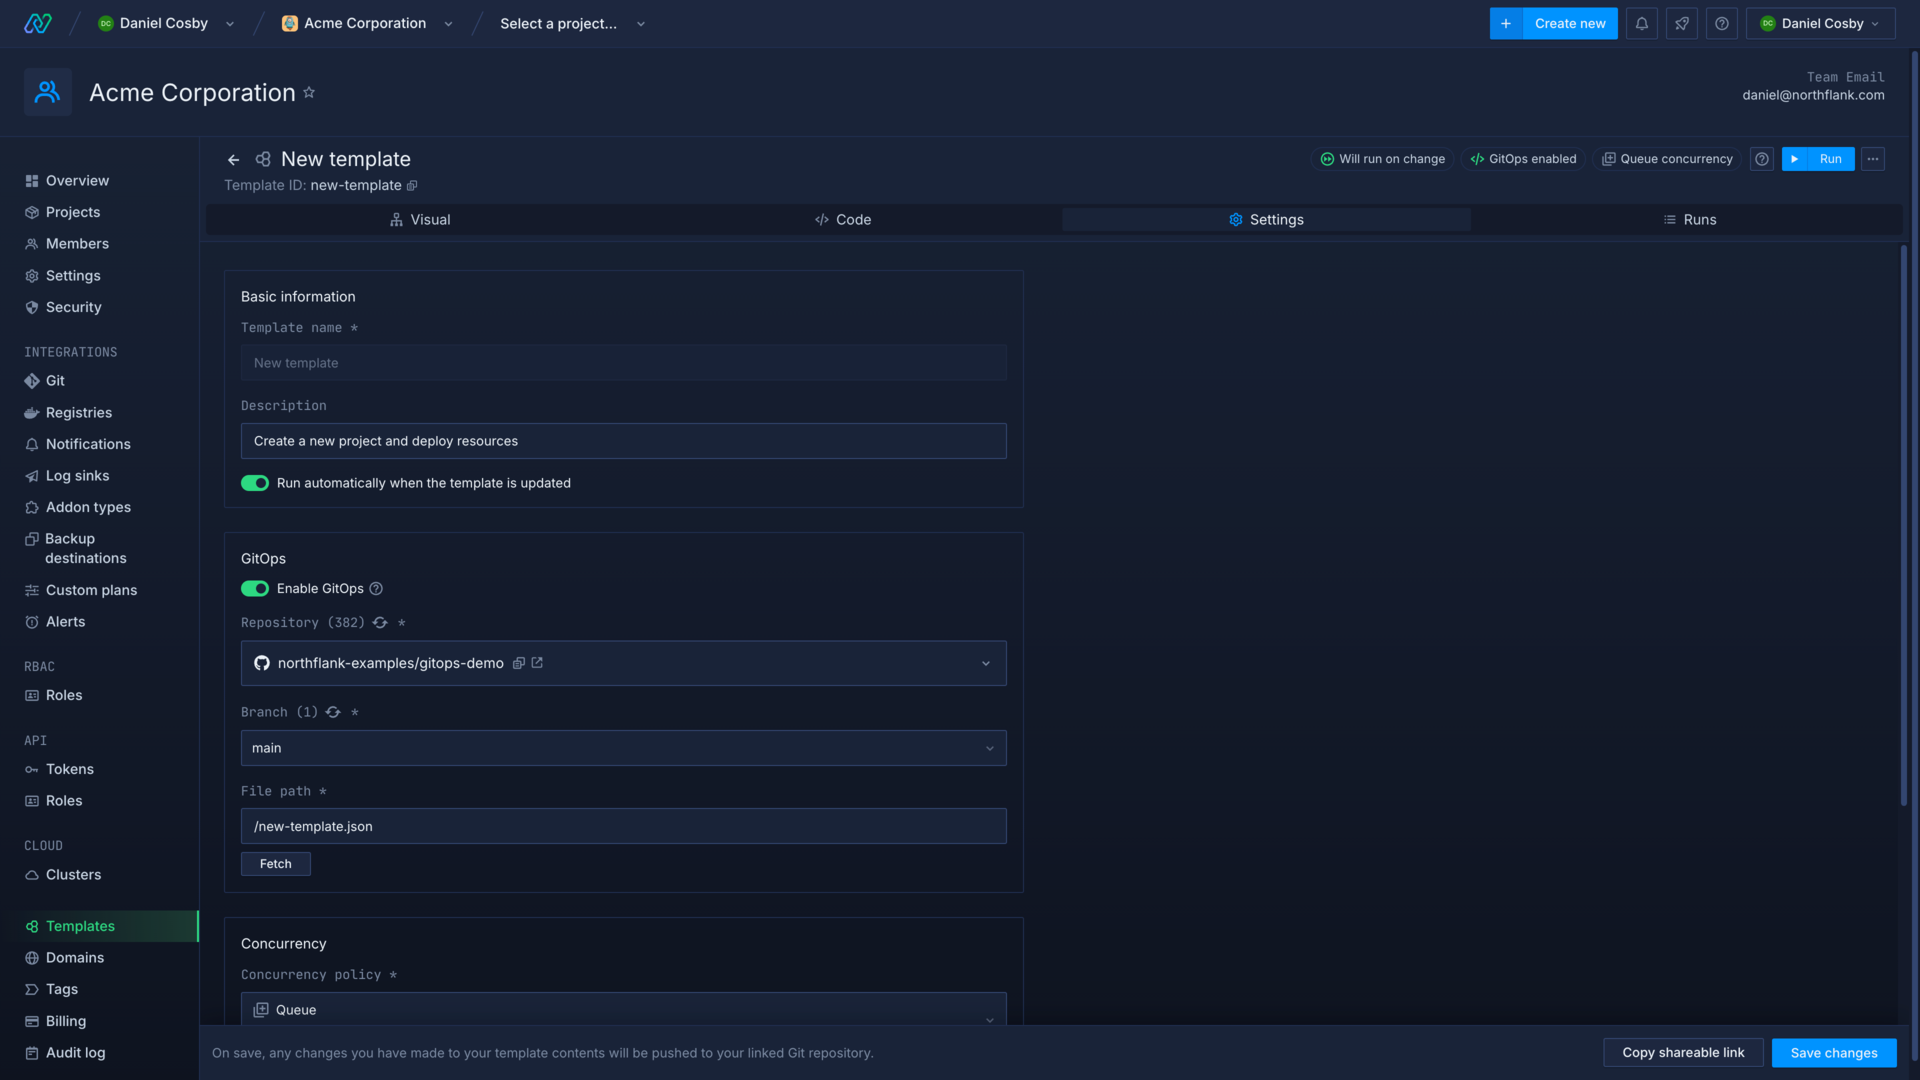
If a template file already exists at the path, it will be loaded into the editor. If no file exists, one will be created with the template specification defined in the editor.
It is not necessary, but it is recommended, to save the template file with the format json so it can be recognised by IDEs and text editors.
Configure template run concurrency
You can choose how a template will behave if it receives more than one request to run at the same time, or receives a request to run while a run is still in progress.
- Allow (default): multiple template runs can be executed in parallel, with no restrictions
- Queue: each time a template run is triggered it will be added to a queue, and runs will be executed sequentially in order of creation
- Forbid: if a template is currently pending or running any run requests will be ignored
You may want to queue or forbid simultaneous runs to ensure that resources are not updated with conflicting configurations.
Provide secrets securely to a template
You should not include any secrets, such as API keys, passwords, or other sensitive data in your template. Instead, you should provide the values as argument overrides, which are stored securely on the Northflank platform, encrypted at rest. It's good practice to define argument keys in your template without values, or with placeholder values, to make it clear what arguments are required in the template if you plan to share it or are working in a team.
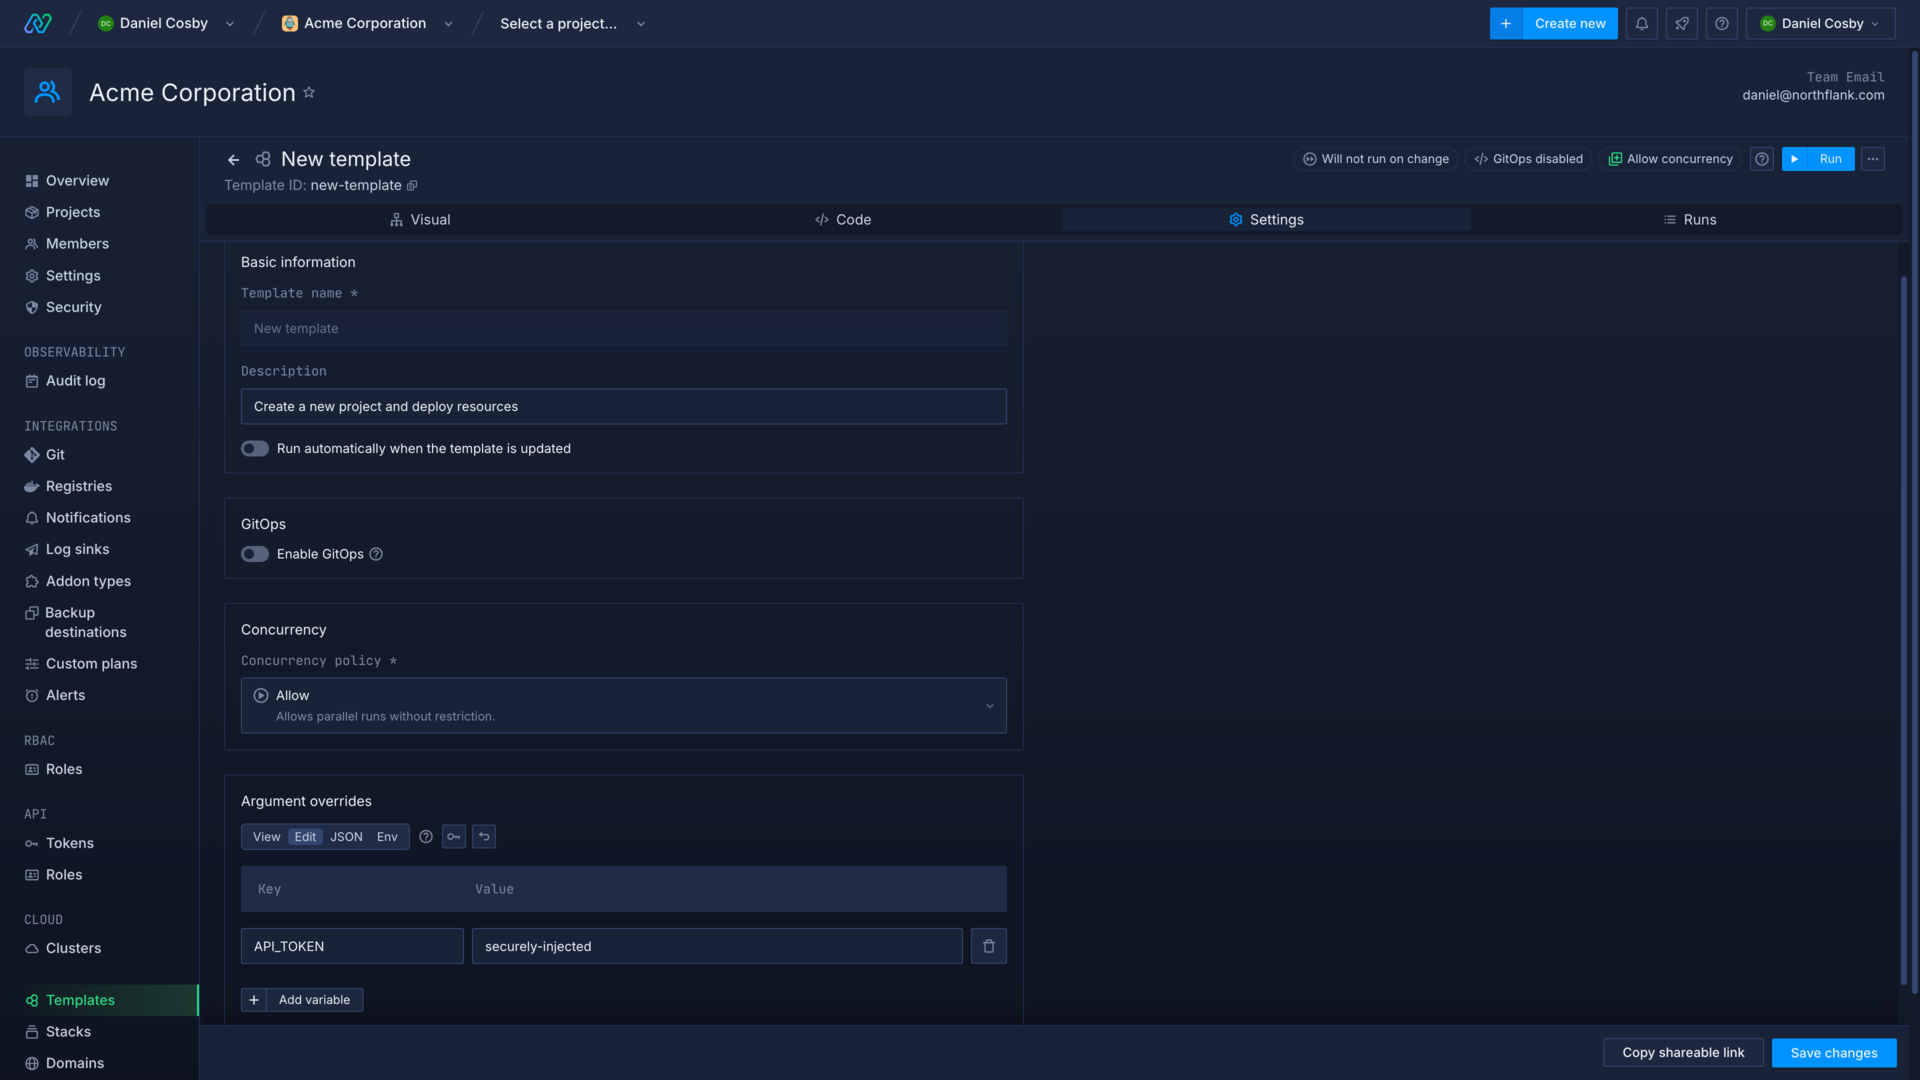
You can configure argument overrides for a template on its settings page, or via the argumentsOverride object in the template code, which will override any arguments with the same key. If the key specified in the overrides object does not exist in the arguments object, it will be inserted.
Secret file encoding
Generally, secret files should be provided as a base64-encoded string. Secret file content provided as plain text via the UI will be converted to base64 when it is stored securely on the Northflank platform.
You can specify how Northflank will handle the data value for your secret file using the encoding field when it is mounted to the container. If you specify utf-8, Northflank will decode base64 content to utf-8. For example, you can use this to provide JSON, YAML, or other configuration files as a base64-encoded string, which can then be decoded for use in your container.
If you select base64 encoding, Northflank will mount the file as base64 content without decoding it.
Provide secret files in templates
You can provide secret files in service, job, and secret group resource nodes, in the relevant field for the resource in the template specification.
To use arguments, references, or functions in a secret file you must provide the content as a plaintext string so that they will resolve correctly when the template runs. You can then wrap the content in the toBase64 function to encode the content as base64. For example:
{
  "files": {
    "/config": {
      "data": "${fn.toBase64(args.CONFIG_SECRET)}",
      "encoding": "utf-8"
    }
  }
}
The argument or reference will be evaluated and the content of the secret file will be saved as base64. Northflank will then decode the data content to utf-8 when it is mounted to the container.
Access your templates
There are two ways to access your templates in the Northflank UI, either from your team dashboard, or from within a project.
Your team templates page will display all templates created within your team, regardless of any projects they may be related to. The template page within a project will only show templates that create or reference that project.
These separate views are only to make it easier to navigate to relevant templates as all templates are stored on the team.
Next steps
Write a template
Learn how to structure a Northflank template, define workflows, create resources, and perform actions.
Run a template
Run templates manually or automatically.
Share a template
Share templates with your team or the public.
GitOps on Northflank
Use templates and workflows in a Git repository to trigger changes to your config and resources.
Update a template
Update a template and resources within a project.