This walkthrough will take you through the steps to build and deploy your code in one simple service.
Combined services are a self-contained continuous integration and continuous delivery system.
It's as easy as choosing a branch from a Git repository to automatically build and deploy from.
Combined services cannot be added to a pipeline as they act as a self-contained pipeline. If you want to create a more complex workflow, the set up a pipeline walkthrough will take you through all the steps.
Create a combined service
All aspects of a combined service can be configured after creation - except the name.
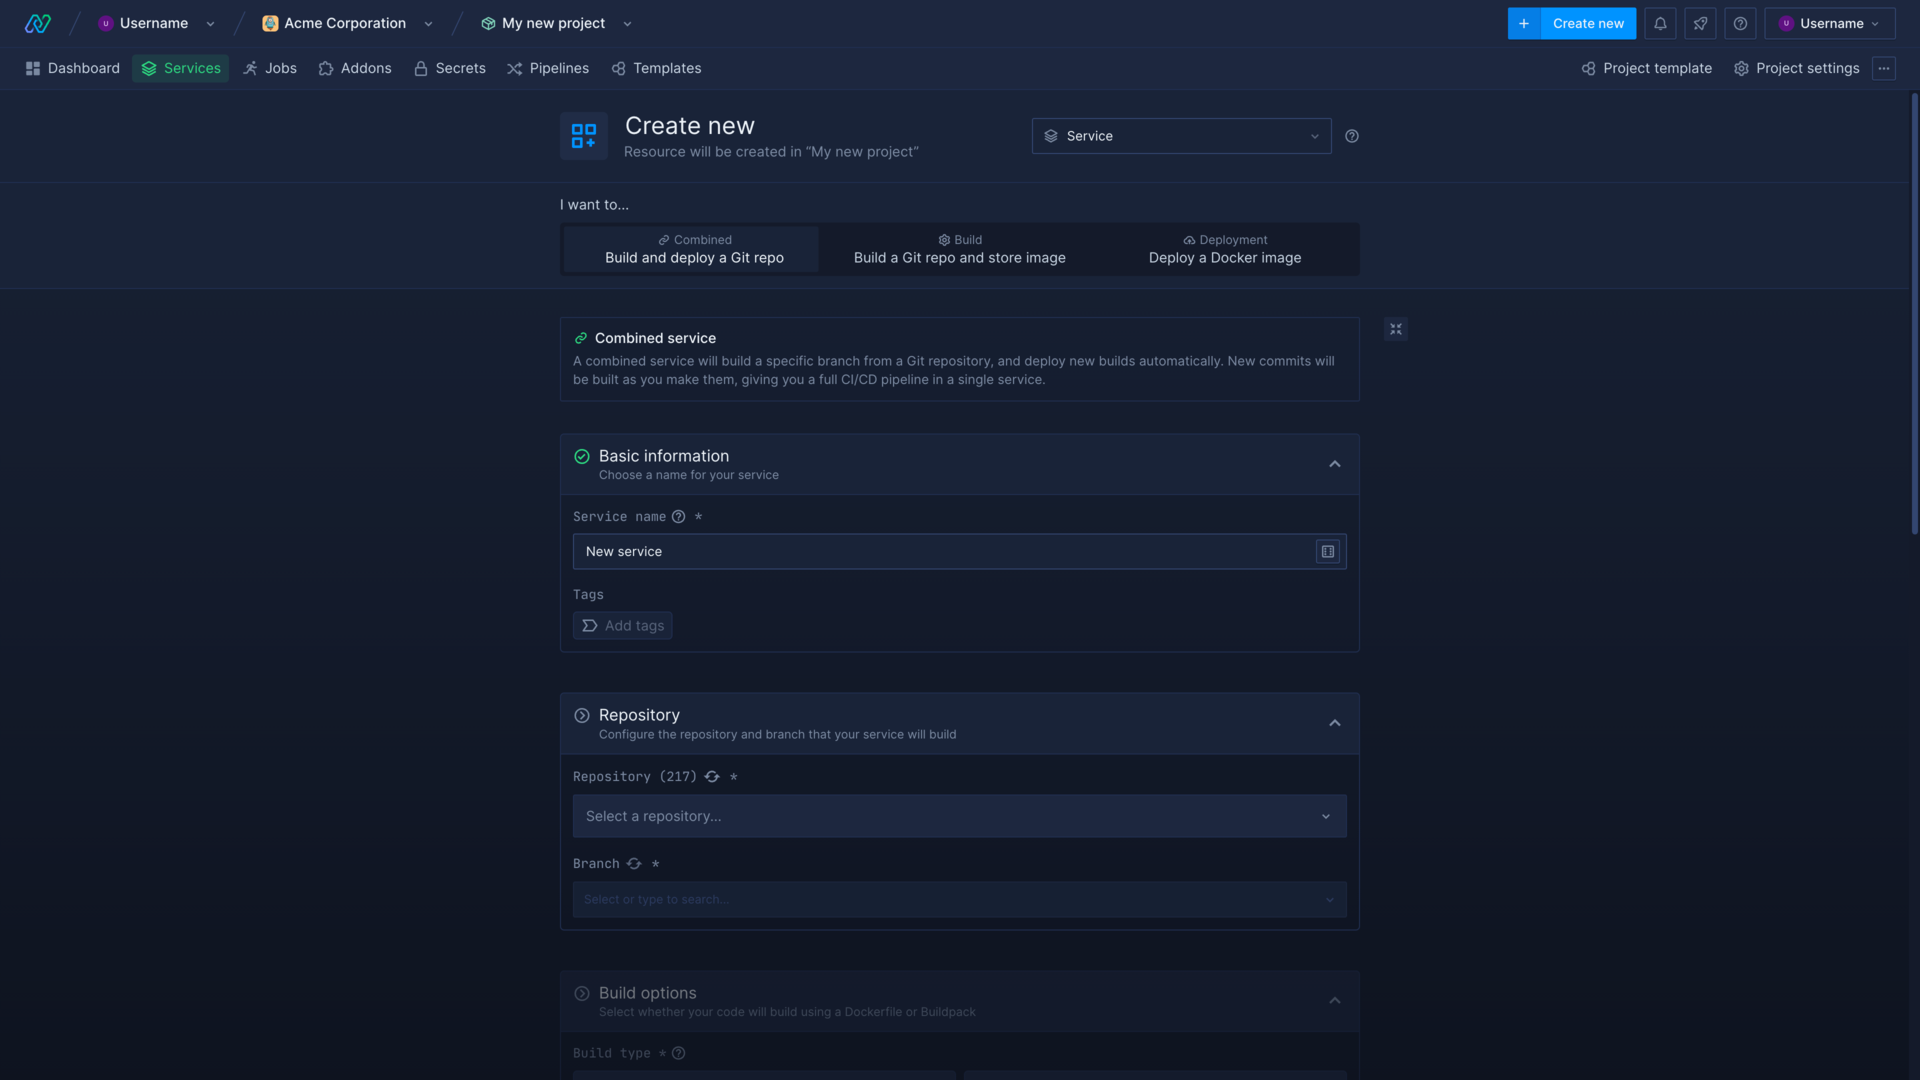
- Click here , or choose service from the create new menu in the top right corner of the dashboard
- Select combined
- Basic information: select combined service and enter a name
- Repository: select the repository from the drop-down list and choose the branch you want to build from
- Build options: choose Dockerfile if you have a Dockerfile in your registry, or buildpack to automatically build your application. If your Dockerfile and/or build context are not root, specify the relative paths.
- Environment variables (optional): you can set runtime variables and build arguments, or add secret files in advanced
- Networking (optional): Northflank will automatically detect and add ports exposed in your Dockerfile, or add a public port for buildpacks. You can create a service with no ports. Networking will be covered in more detail later in this walkthrough.
- Resources: leave the resources as the default values for now, this walkthough will cover scaling later
- Advanced (optional): you can configure health checks, a Docker CMD override, and add a persistent volume
- Click create service
Service dashboard
You will be taken to your new service's overview after creating it, you can find your service again by clicking on the services icon in the project menu on the left.
Your combined service will immediately start to build the latest commit to your branch.
Your combined service has CI/CD enabled by default and will automatically build and deploy the latest commits to your linked repository branch.
Combined service controls
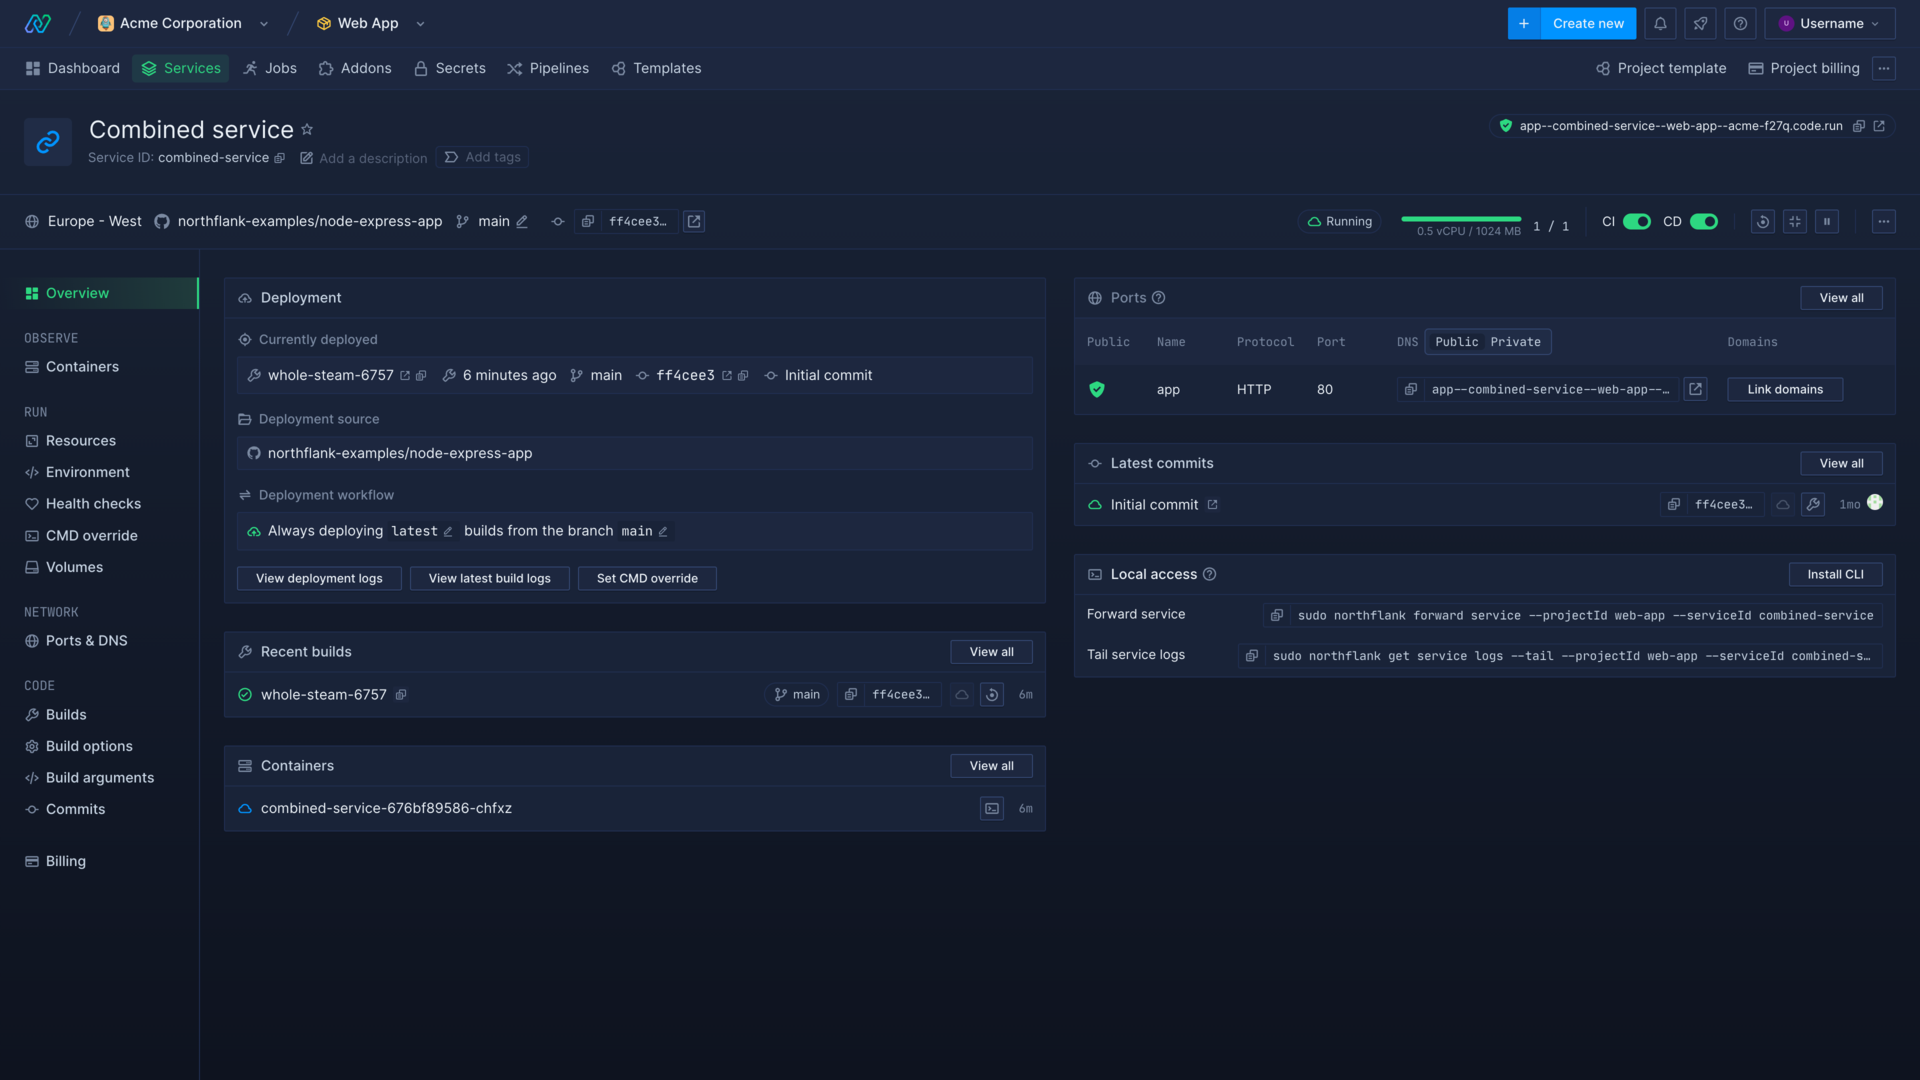
The service header displays some useful details of the service at a glance:
- Public DNS
- Service region
- Git repository
- Repository branch
- Currently deployed commit hash
- Active containers and their status
You can manage your service using the controls found at the top of the dashboard:
- You can toggle CI (continuous integration) to enable or disable the automatic build of the latest commit to the repository, branch, or pull request.
- You can toggle CD (continuous delivery) to enable or disable the automatic deployment of new builds to your service. All instances will be redeployed with the new build. If you also have CI enabled, your service will automatically build and deploy the latest commits from your tracked branch.
- You can trigger a restart to automatically replace the running containers with new instances. An old container will not be halted until its replacement is confirmed running.
- You can scale the amount of instances up or down by entering the desired amount and saving.
- You can pause to disable CI/CD and scale the service to 0 instances or resume
Service overview
The service overview contains real-time information on:
- Recent builds by the service
- Latest commits to the linked repository branch
- Active containers and their status
- Any configured public and private ports
- Local access, which includes commands to connect to the service on your machine via the Northflank CLI
Configure your service
This walkthrough will take you through two commons tasks to configure a deployment: exposing a public port and increasing the resources available to your service.
Add a public port
Northflank can automatically detect and configure ports exposed in your Dockerfile, however you may sometimes need to manually add or edit ports.
Your Dockerfile should expose the port(s) configured in your application/service. For example if you have an Express.js application configured to listen for requests on port 3000, your Dockerfile should include EXPOSE 3000.
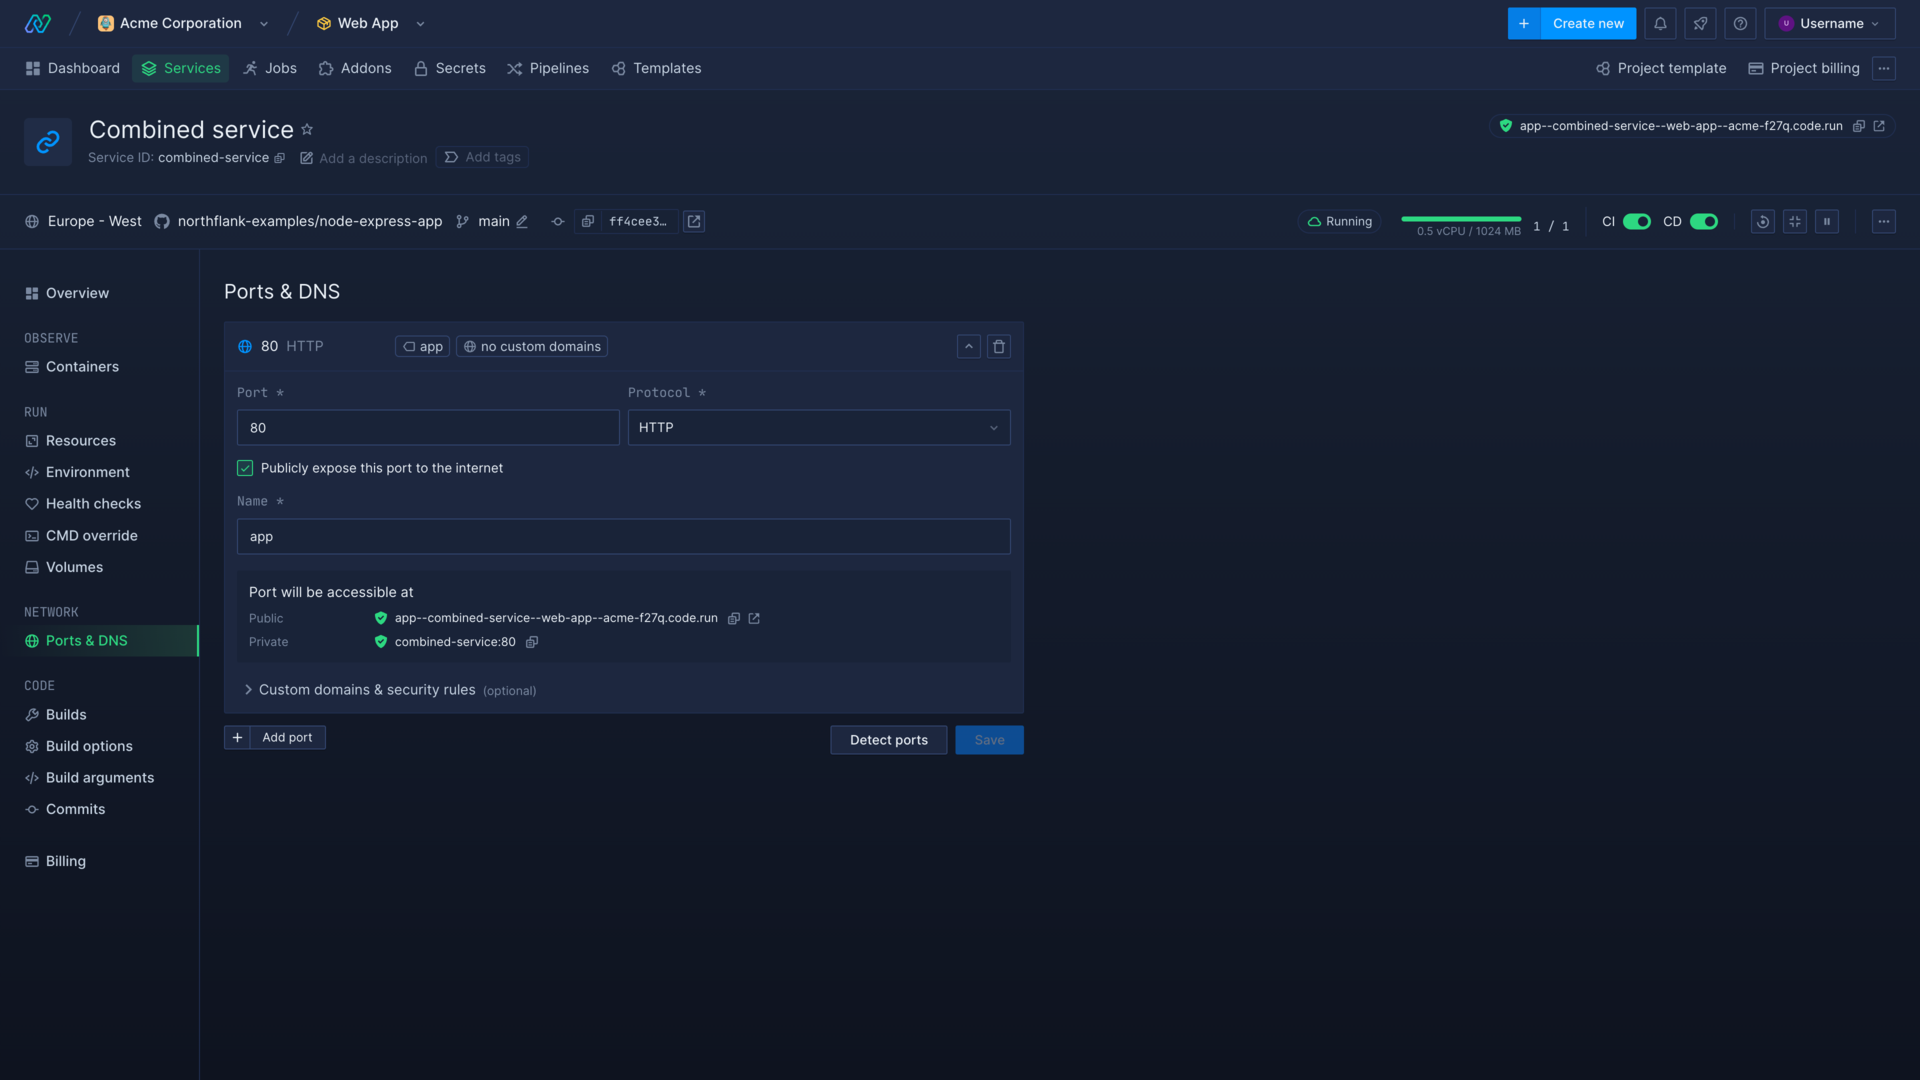
- Go to the ports & DNS page in your service
- Click add port
- Enter the port to expose (between 1 and 65,535)
- Choose HTTP as the protocol (public ports only support HTTP/S)
- Select publicly expose this port to the internet
- Enter a name for the port (this will form part of the unique DNS generated by Northflank)
- Save changes to start using the newly configured port
Northflank will automatically generate TLS certificates for your public ports using Let's Encrypt .
If the website or service is inaccessible, check that the correct ports exposed by your application and Dockerfile.
Increase your service's resources
The resources dedicated to your services will determine how they perform under load.
To build your code faster or run intensive applications you may need to increase the compute plan (CPU and memory) of your service.
If you expect or experience a high volume of traffic to your deployment, you should scale up the number of instances. Northflank will automatically load-balance incoming traffic to your instances to ensure maximum availability.
You can quickly scale the number of containers your deployment is running from the service header controls, but you can scale your service and increase other resources from the resources page.
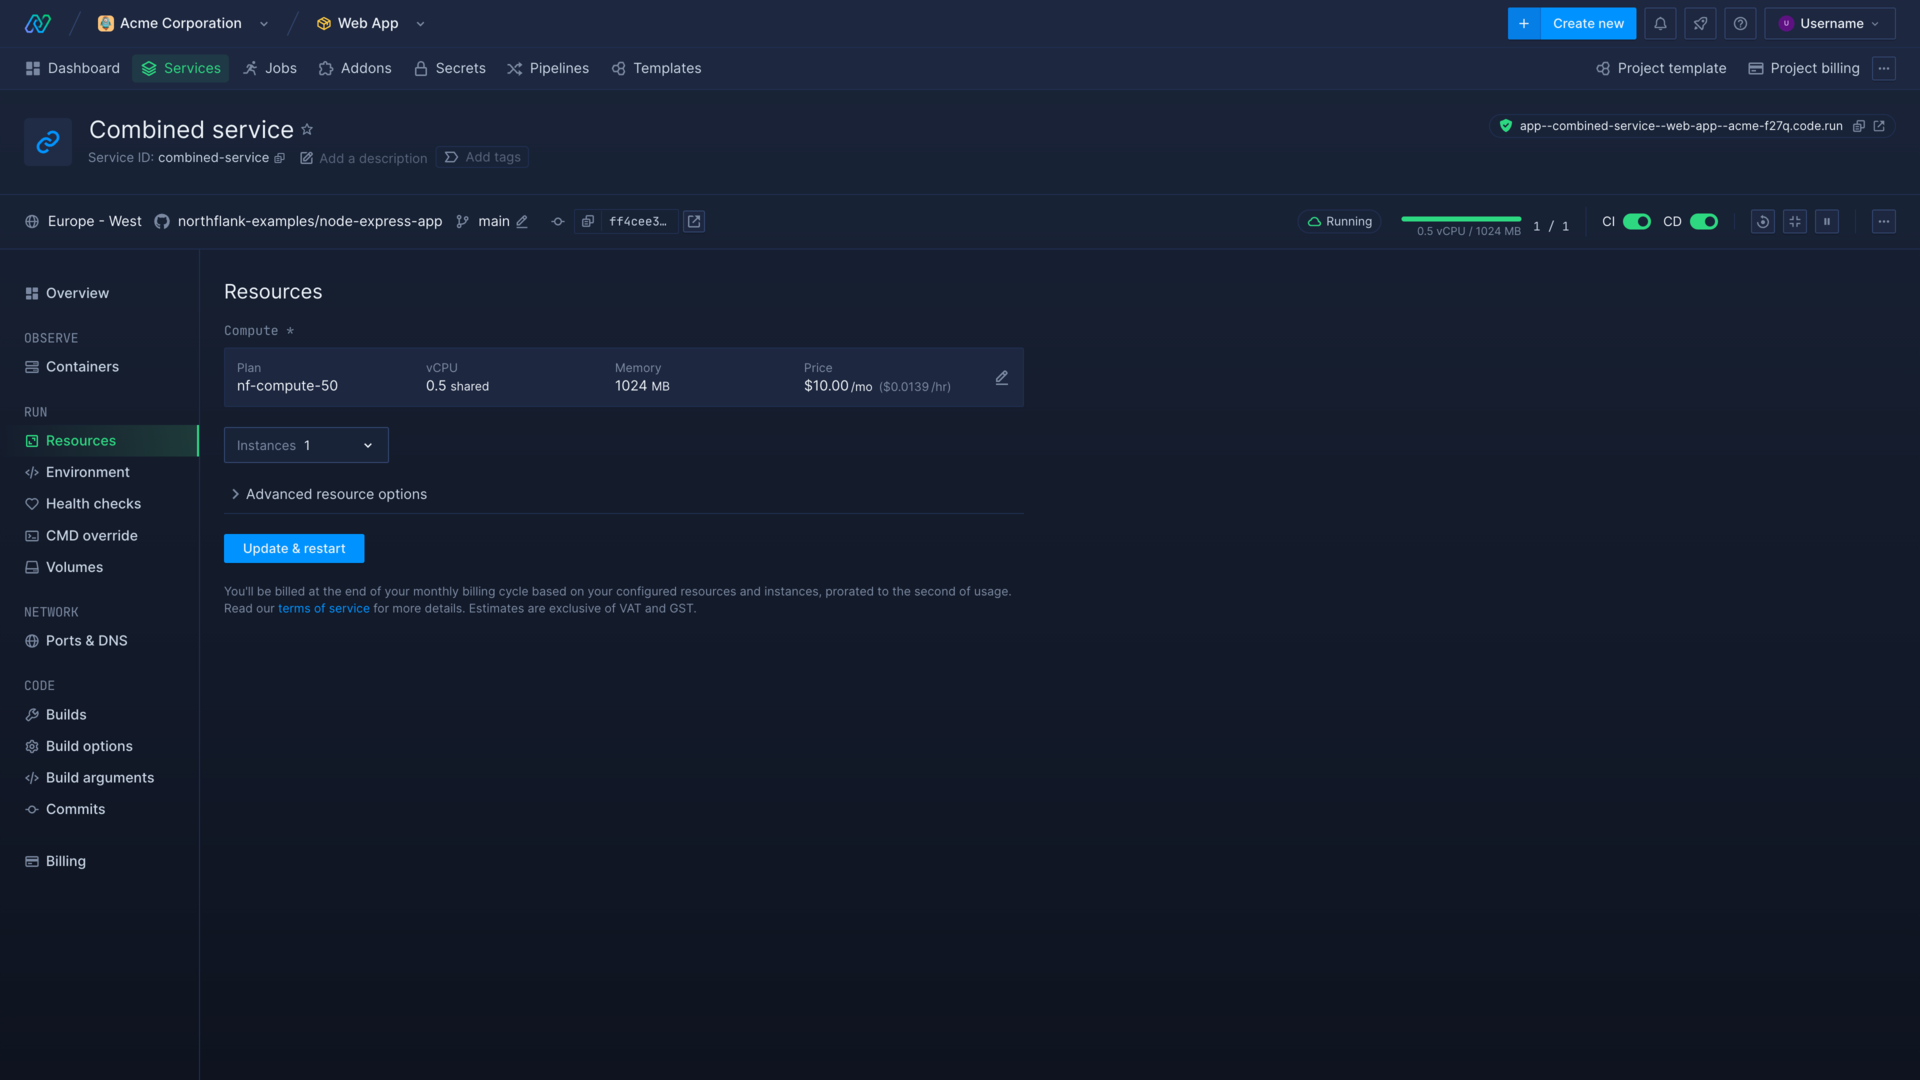
- Go the resources page in your service
- Select a new compute plan with a combination of a higher share of a vCPU, or a dedicated CPU, and higher memory
- Increase the number of instances
- Update & restart your service to deploy more instances with the selected resources
If you’re trialling Northflank with a Developer Sandbox plan, you’ll need to upgrade your plan to scale up your resources.
Next steps
Now you have built and run your first service on Northflank, made it available online via a public port, and increased the available resources and number of containers running your application.
Next you can learn about the other features and options available on your services, or learn how to create and manage development pipelines to enjoy a seamless devops experience.
Set up a pipeline
Manage your workflow and release your code in an intuitive pipeline.
Add and verify domain
Add your domain name to your Northflank account and link it to a public port.
Configure health checks
Monitor the uptime and success of your deployed services and builds to ensure your code runs correctly and is always available.
View logs
View detailed, real-time logs from builds, deployments, and more.
Deploy a database
Create a database to use with your Northflank deployments.
Inject secrets
Set build arguments and inject runtime variables into running deployments.