Production Workloads /
Release for production
After you have created your development environment on Northflank to build, deploy, and preview your applications and microservices, you can use the features explained in this guide to release production deployments smoothly and with zero downtime.
Northflank's features allow you to:
- Release quickly
- Deploy with zero downtime
- Add health checks to make sure requests can be served
- Run migrations and other jobs automatically
- Roll back and restore easily
This guide will help you understand how Northflank handles deployments and the different ways of releasing for production on Northflank, so you can choose the most suitable method for your project. Each topic provides links to in-depth documentation on the relevant features.
Release strategies
The right release strategy for your project will depend on its complexity. You can release by:
- Manually selecting an image to deploy (suitable for single-service applications)
- Using CI/CD to automatically build and deploy your latest commit (suitable for smaller projects)
- Manually triggering a release flow, or run on Git push (good option for all projects, best for complex projects that require backups, migrations, multiple deployments)
Zero downtime
You can deploy your release with zero downtime by correctly configuring health checks to ensure that your code is ready before traffic is served to it. How Northflank handles your deployments depends on how many instances your service is scaled to.
Manage your production environment
You can ensure your production environment has the correct environment variables and build arguments available using secret groups and tags.
Secret groups can contain connection details for addons, passwords, tokens, keys, and other sensitive data. You can also create configuration groups to manage non-sensitive data, and assign roles to your team members accordingly.
You can create groups that contain the relevant secrets for your different environments, and restrict them based on tag, or by specific resources.
Tags are a useful way to identify and manage resources in different environments, you can quickly add or remove multiple groups of secrets and configuration details from resources by adding and removing tags.
Deploy a release manually
Northflank allows you to manually deploy a release from a commit built on Northflank, or a specific image from a container registry.
In a combined service you can select a build from the combined service to deploy. In a deployment service you can select a specific build from a build service in the same project, or choose an image from an external container registry to deploy
You can manually deploy your release by selecting the specific build or external image to deploy via the deploy build button in the service header. You can select the specific build to deploy in the list of all builds, or search by branch or pull request. This will disable CD for the service, so new builds will not be automatically deployed.
You can also use the edit deployment modal to select a new image from an external container registry to deploy, using the image tag for the specific version to release.
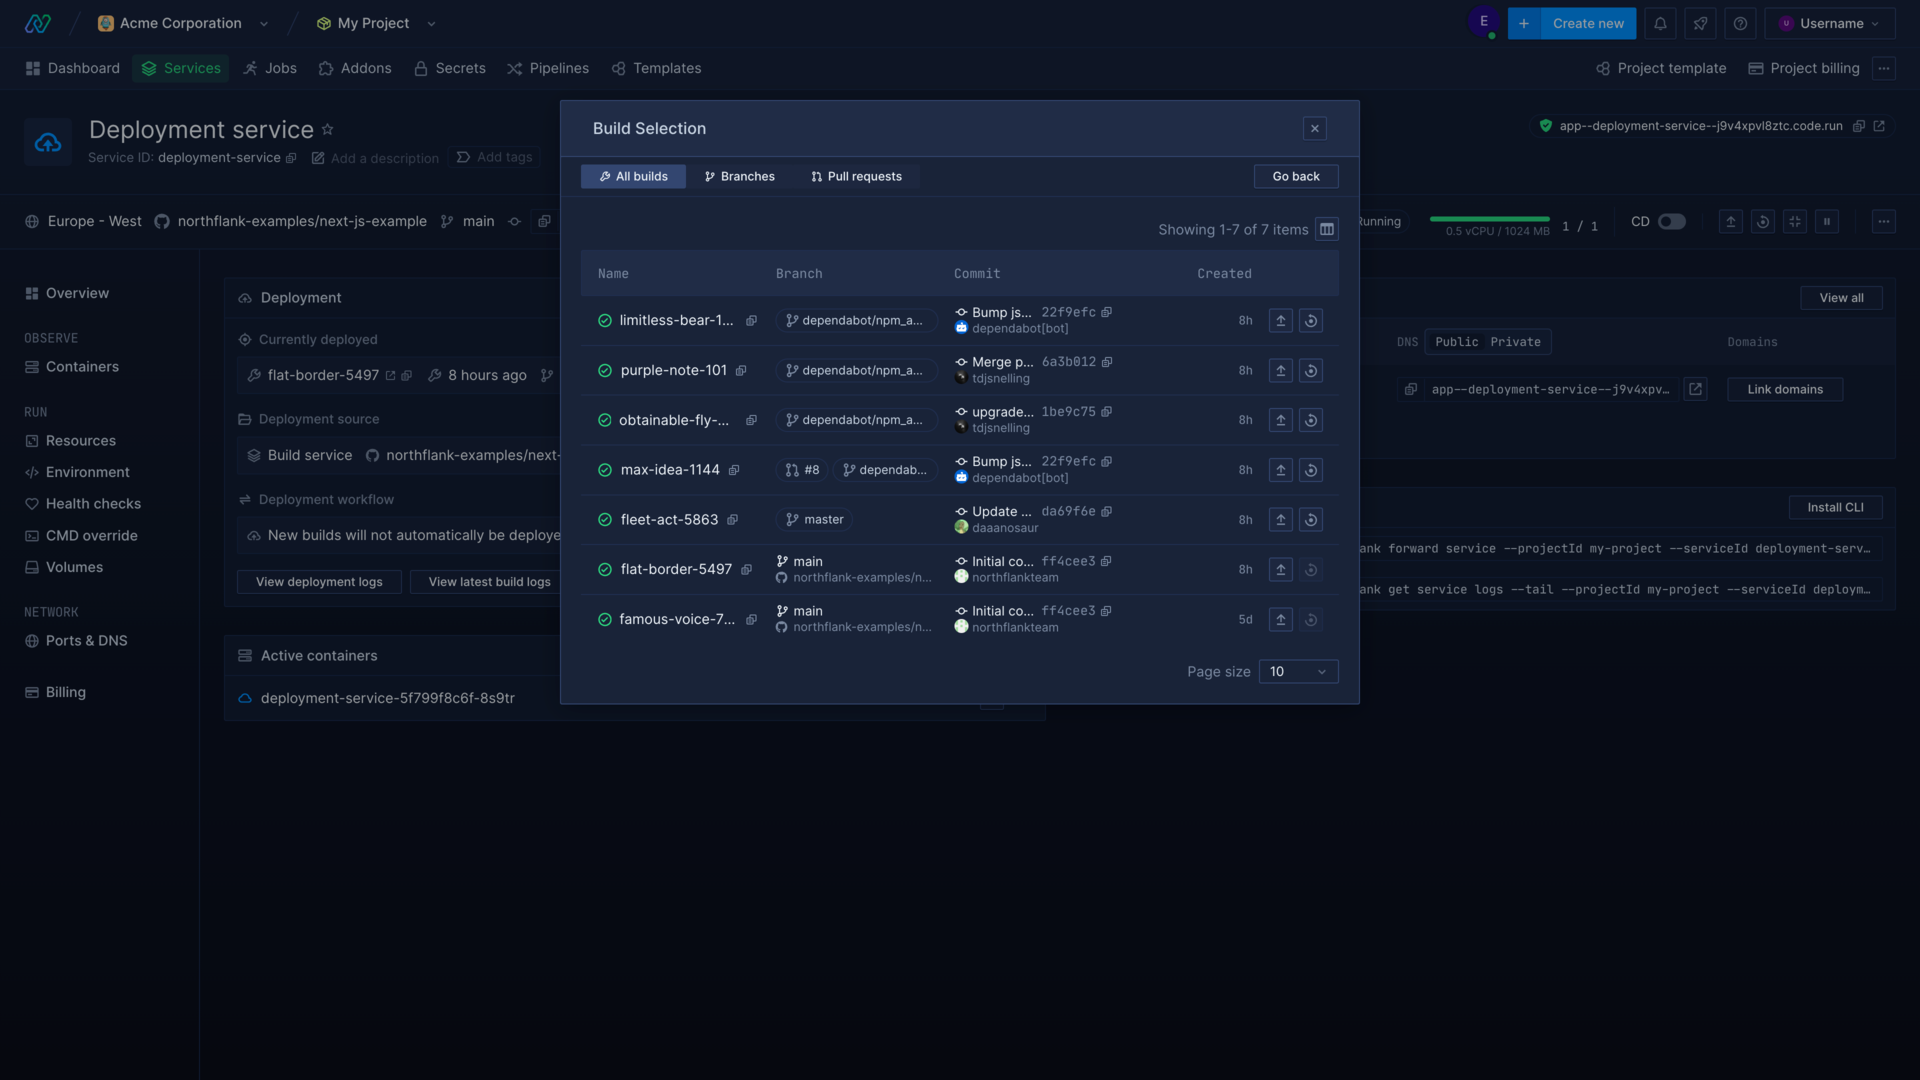
If you have any migrations, you can also deploy and run these manually via a job.
This method is best for projects with only one or two resources to deploy your release to.
To revert a release you can simply select your previous stable release build. If you have run a migration, you will also need to revert it.
When deploying manually you should consider running multiple instances, and/or configuring health checks to ensure no downtime for your service.
Learn more
Use CI/CD to release automatically
You can configure continuous integration and continuous deployment in different ways to manage your deployments automatically. This method is best suited for deploying releases for smaller projects.
Continuous integration will monitor the git repositories that you select, and build commits to any monitored pull requests or branches.
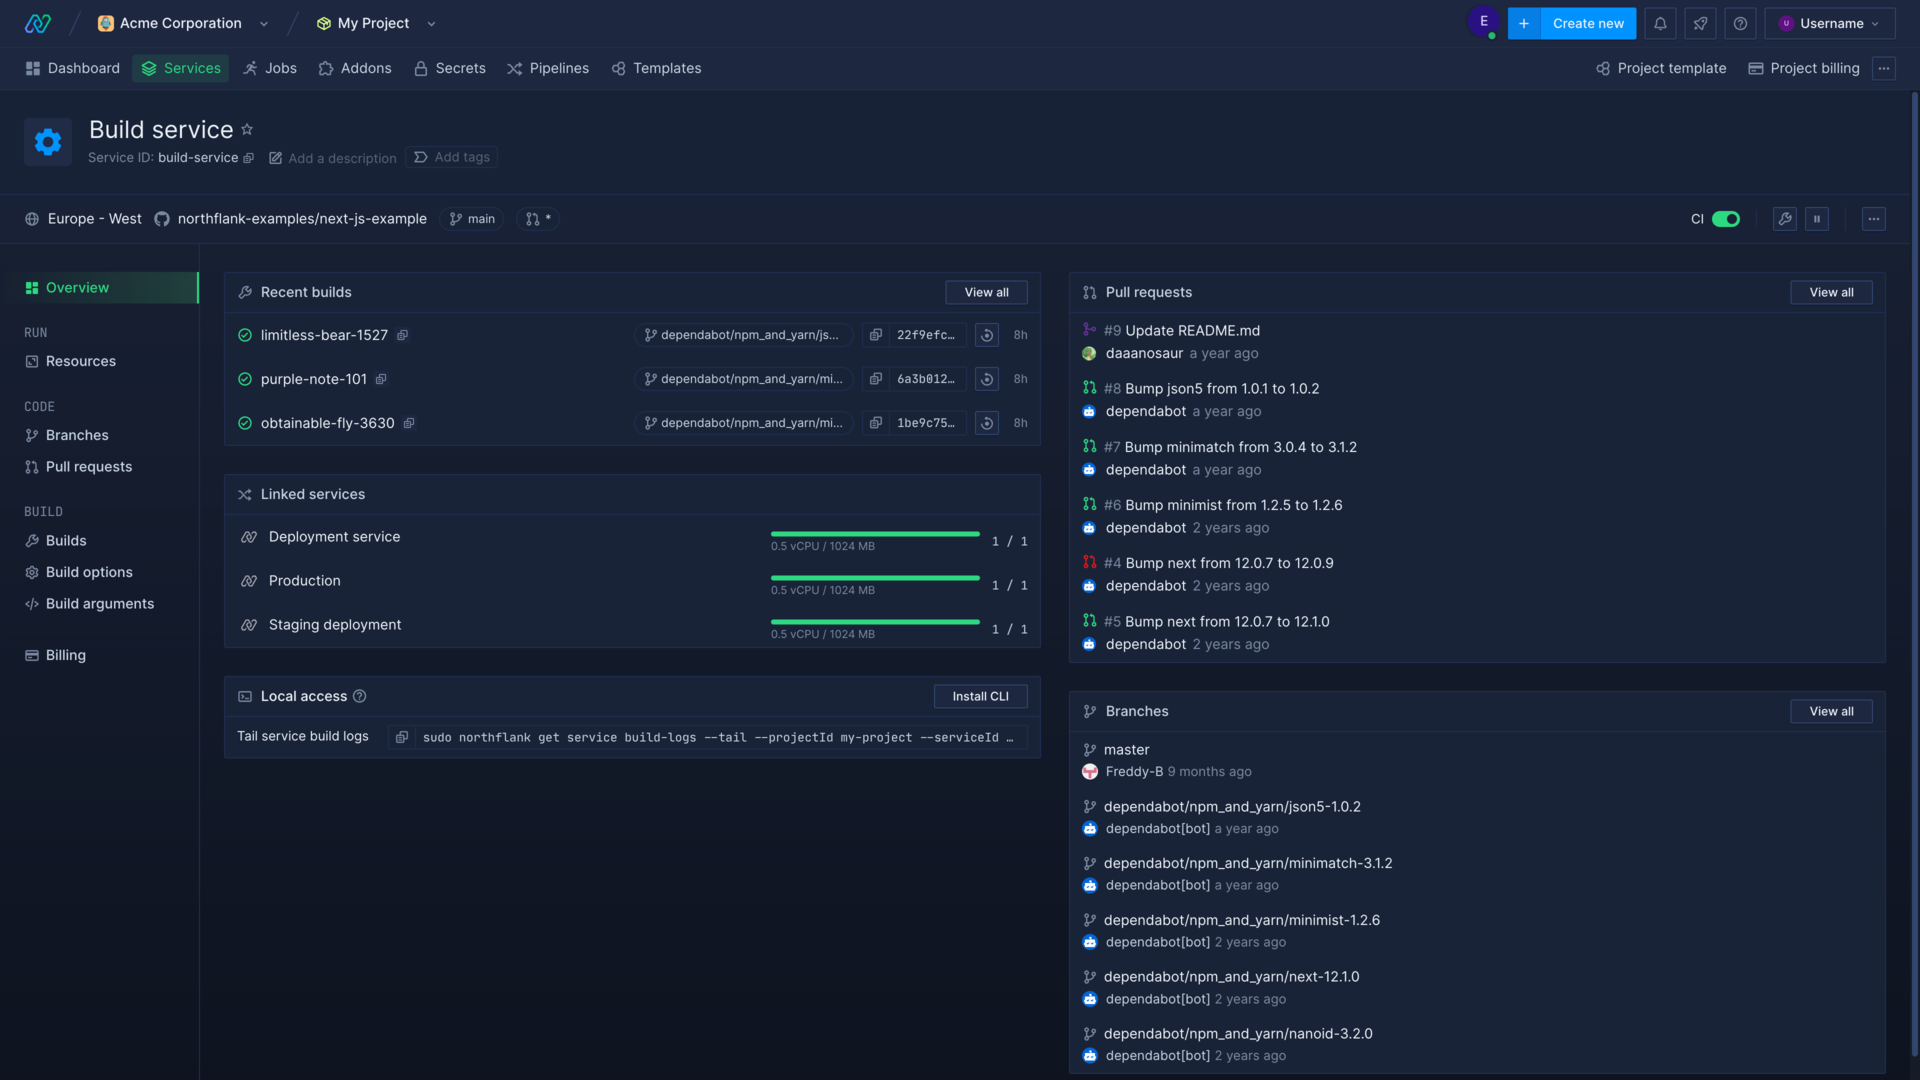
Continuous deployment will then deploy the latest build from the linked source, which can either be a Northflank build service or an external container registry.
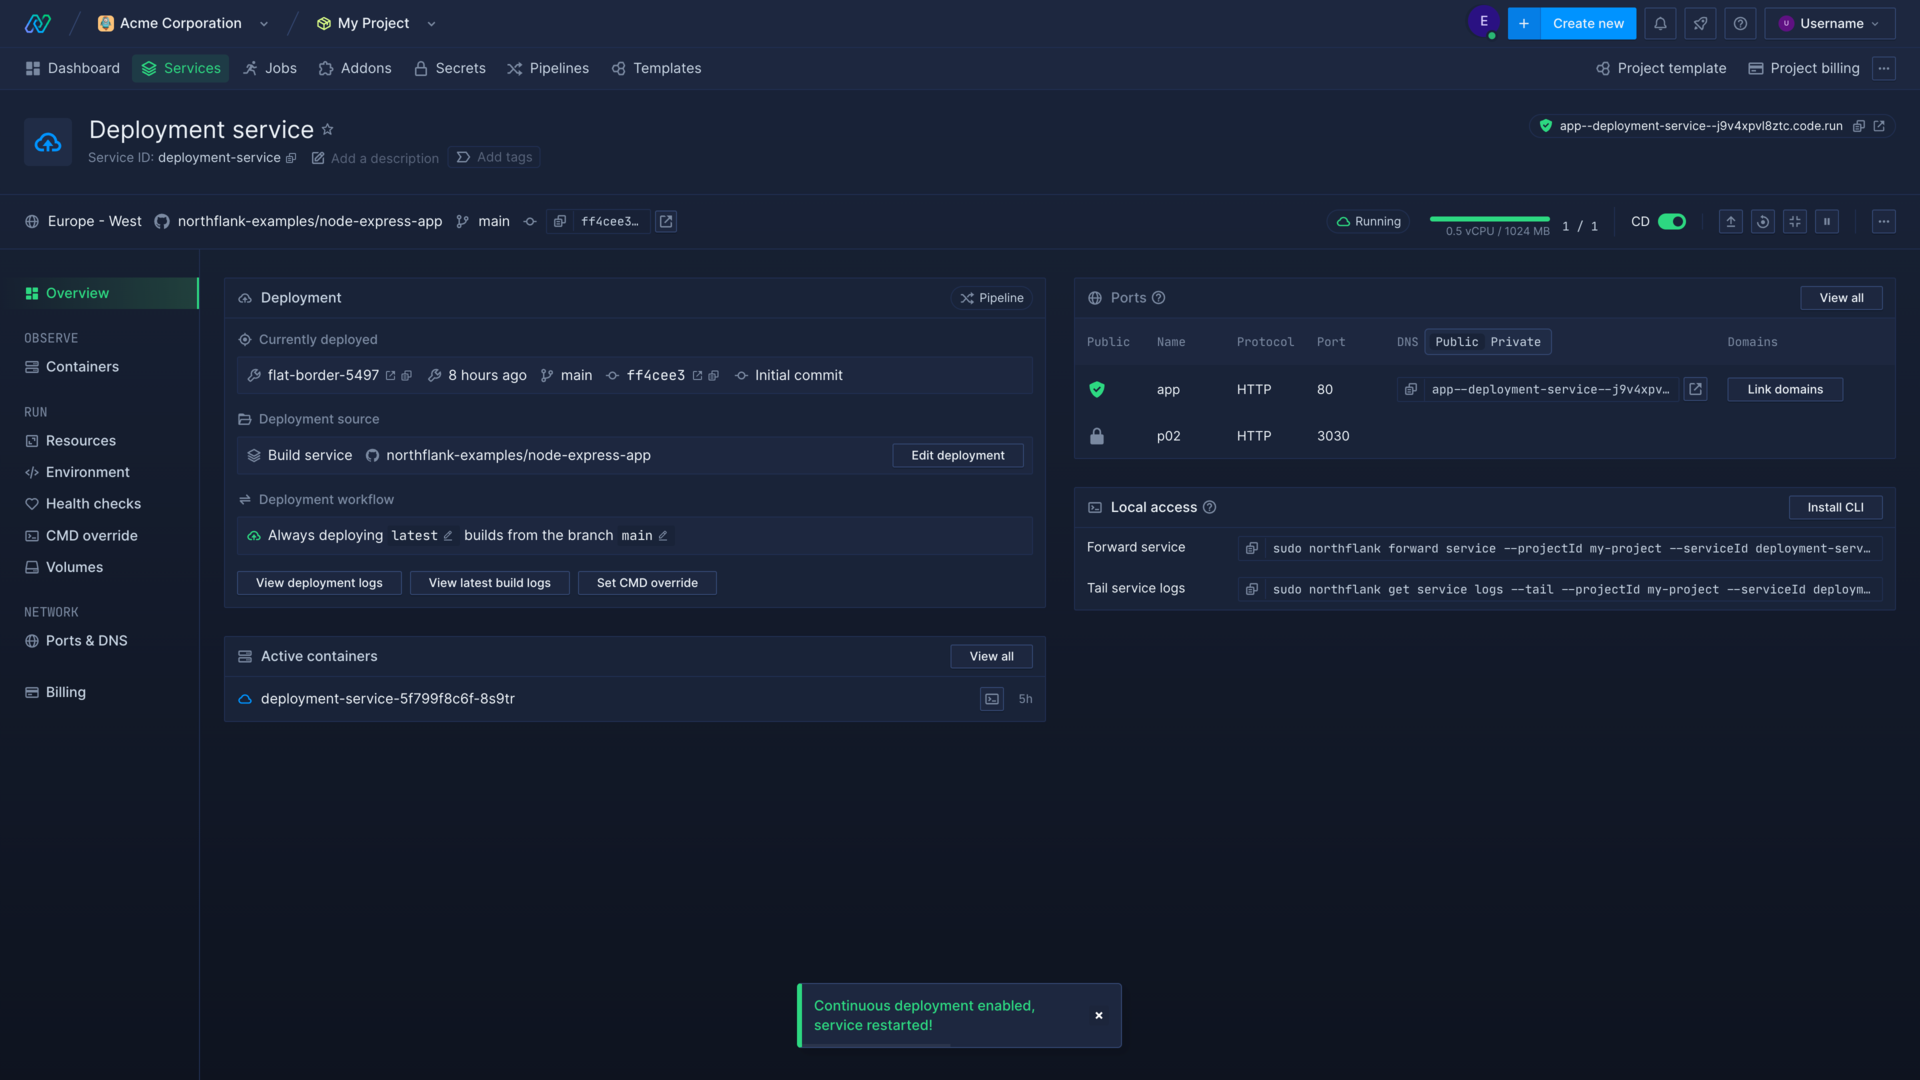
You can either use a combined service, which will build from one specific repository branch, and then deploy the built image in one service, or use separate build and deployment services for greater configuration options.
Using a build service and separate deployment services allows you to build once and deploy to multiple services and jobs.
Learn more
Manage CI/CD
Configure continuous integration and continuous delivery on your Northflank services.
Build a specific directory
Specify the build context to build only specific directories from your repository.
Trigger a build on changes to specific files or directories
Add path rules to monitor or ignore specific files and directories in a repository for continuous integration build triggers.
Skip CI builds with commit messages
Add strings to your commit messages that will stop Northflank CI from automatically building commits pushed to your repository.
Use a release flow to deploy a release
Your release workflow may consist of many different complex tasks, from backing up databases and running migration jobs, to promoting a specific build to a range of microservices.
You can manage all aspects of your release with Northflank’s release flows and automate your routine deployment tasks.
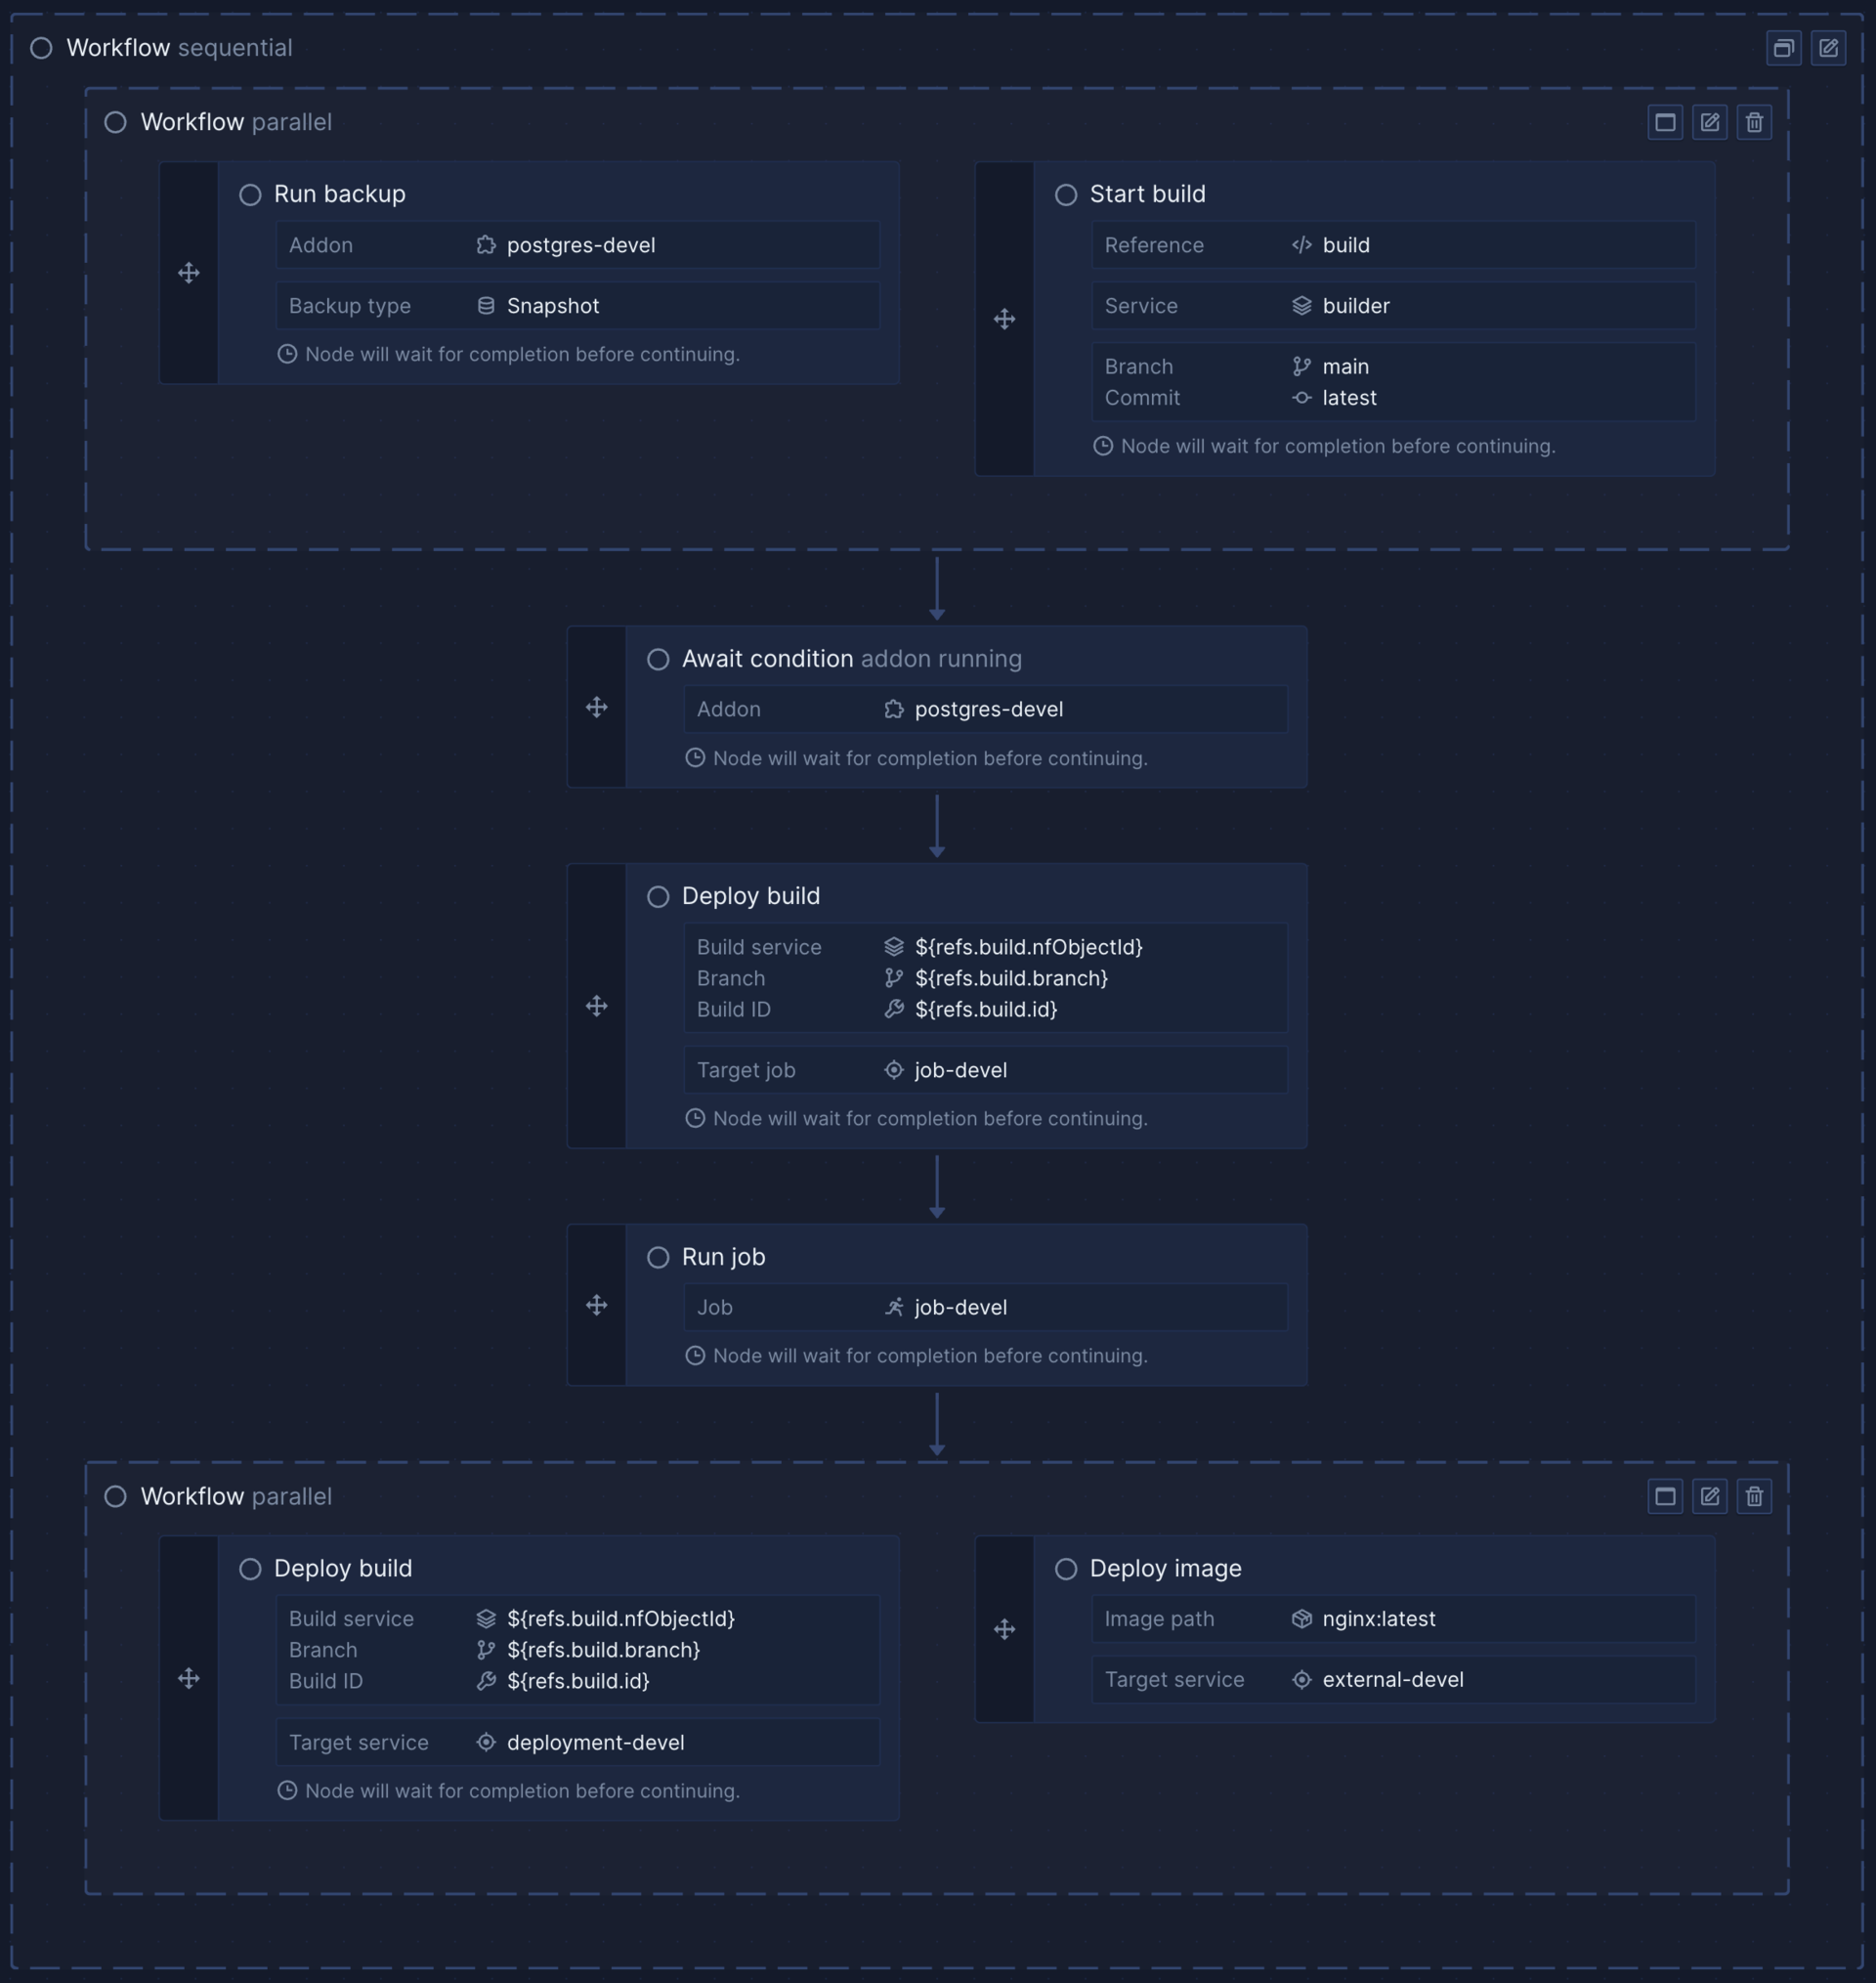
Release flows consist of nodes that execute different actions, which can run in parallel or sequentially. Your entire release workflow can then be run at the click of a button, or triggered by webhook or git push.
Set up a release flow
You can create a release flow for each stage of a pipeline, to cover development, staging, and production. In a pipeline you can add deployments, jobs, and addons into stages, for each part of your development lifecycle.
You can create a release flow either as code, or by using the visual editor to arrange and configure your workflow tasks.
Run releases
Release using git push
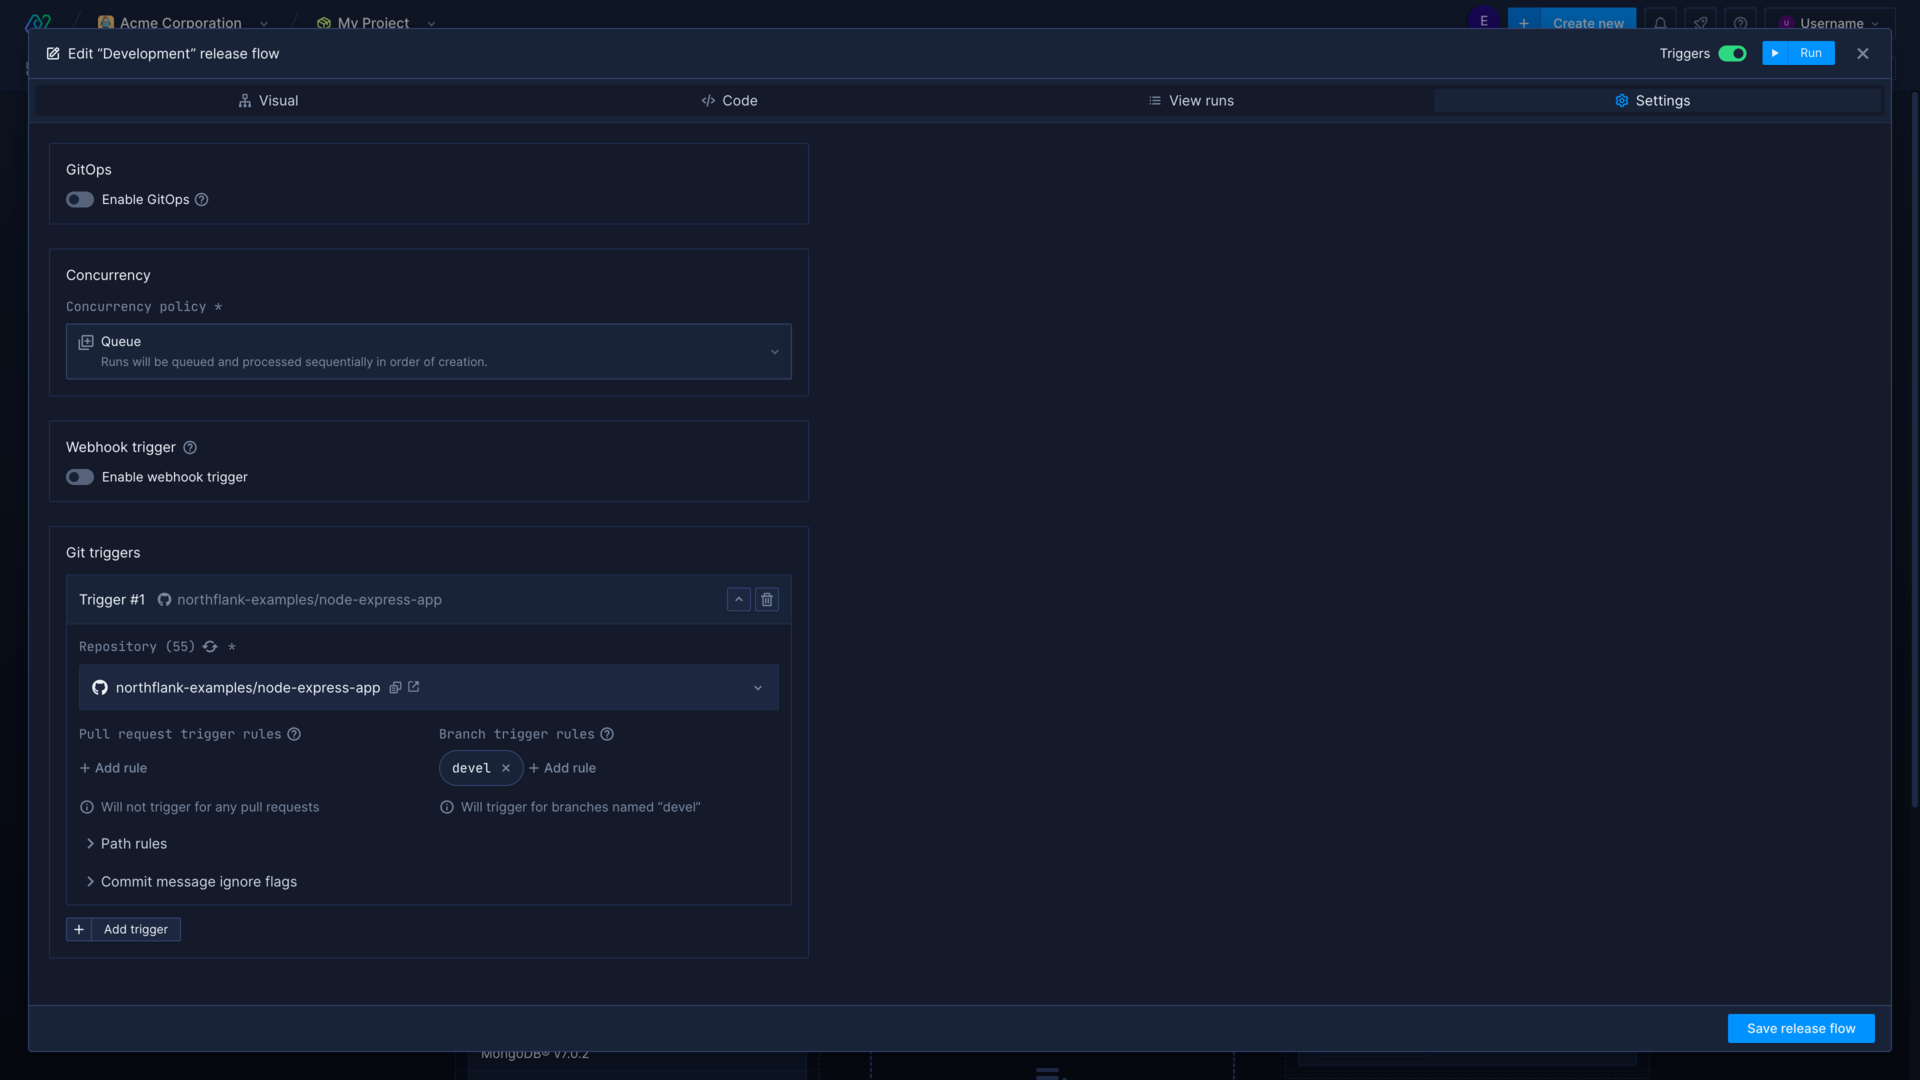
You can trigger a release flow run on git push by configuring one or more git triggers in the release flow settings. This will run the release flow when changes are pushed to a watched branch or pull request.
You can also enable GitOps to store and update your release flow as code in a git repository, which can also run your release flow if a git trigger is configure to watch it.
Release via promotion
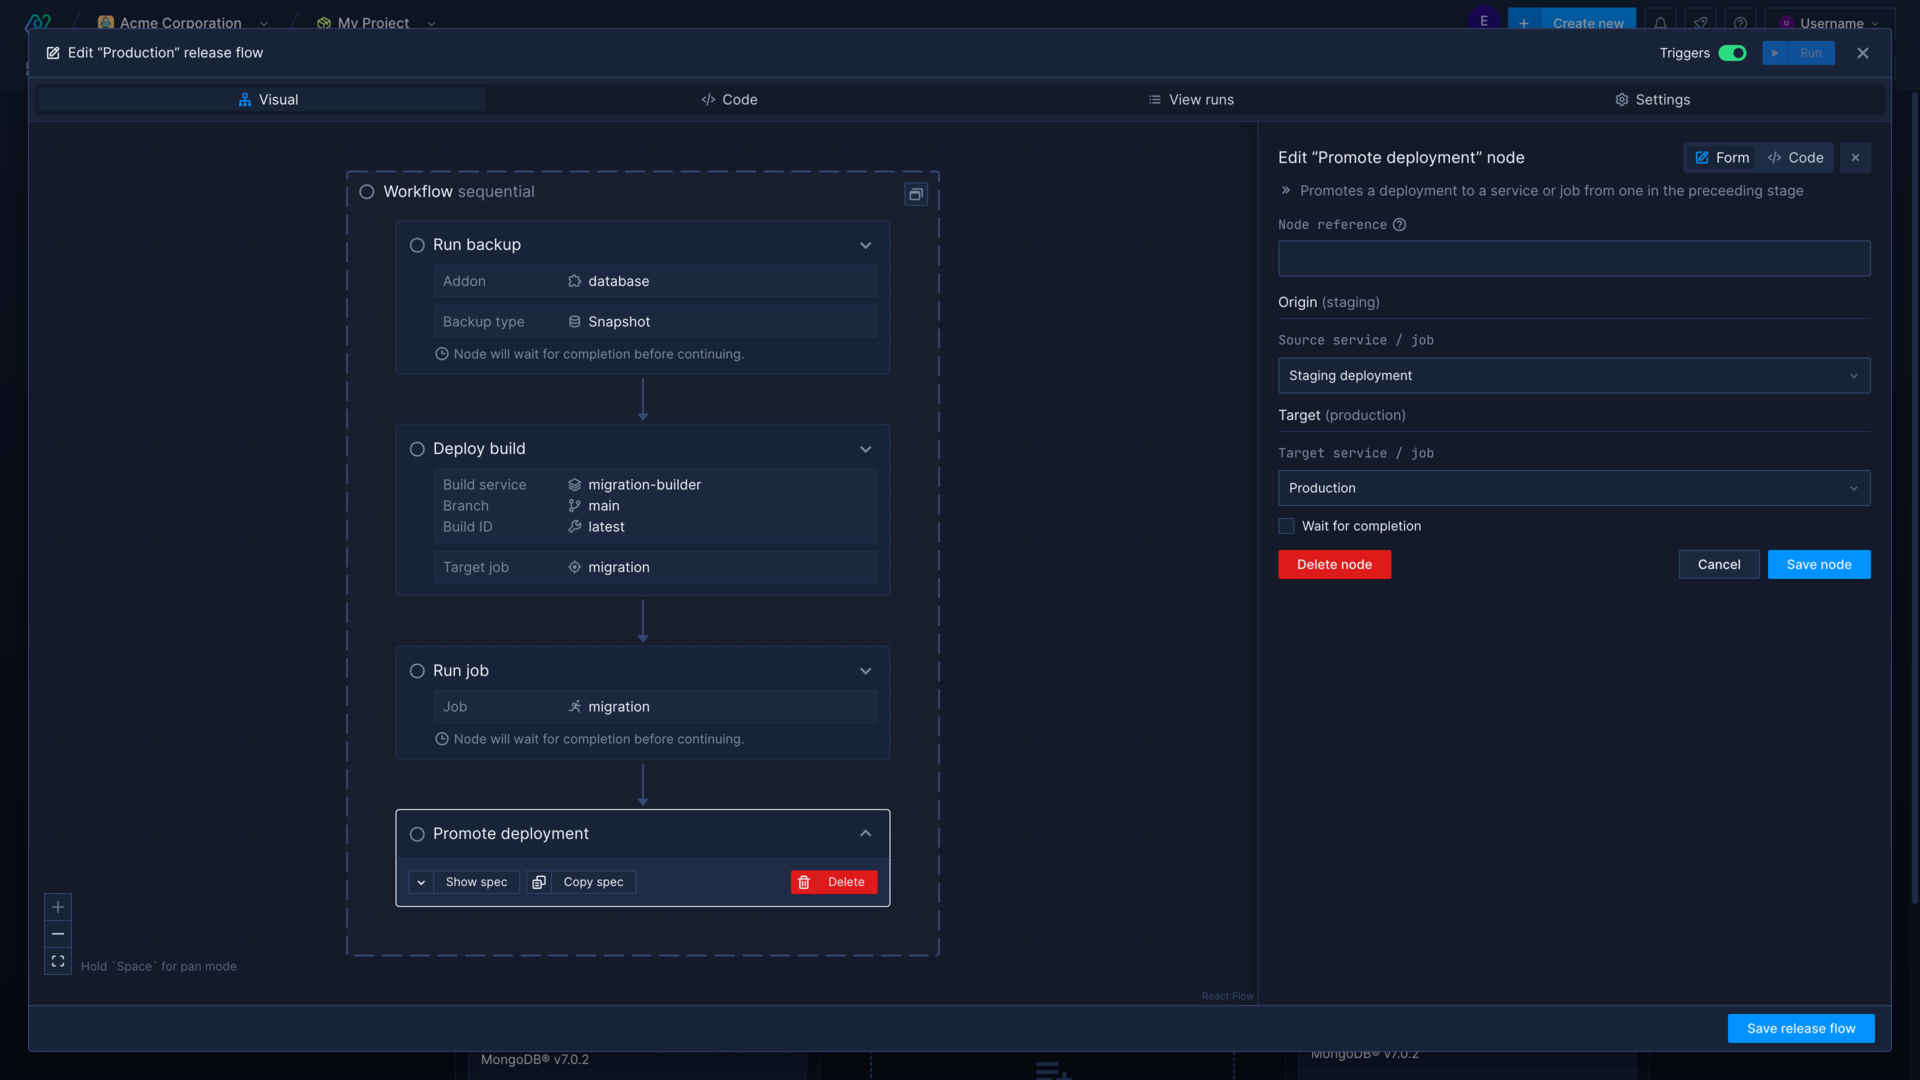
You can configure your release flow to promote the deployed images from a previous stage in the pipeline when you run the release flow. Use the promote deployment node to select an origin (service in the previous stage) and a target (service in the current stage).
Using this method you can configure the release flow to run automatically when changes are made to a certain branch, or even specific files. For example, you could run your production stage release flow when your main branch receives new commits.
Release via manual selection
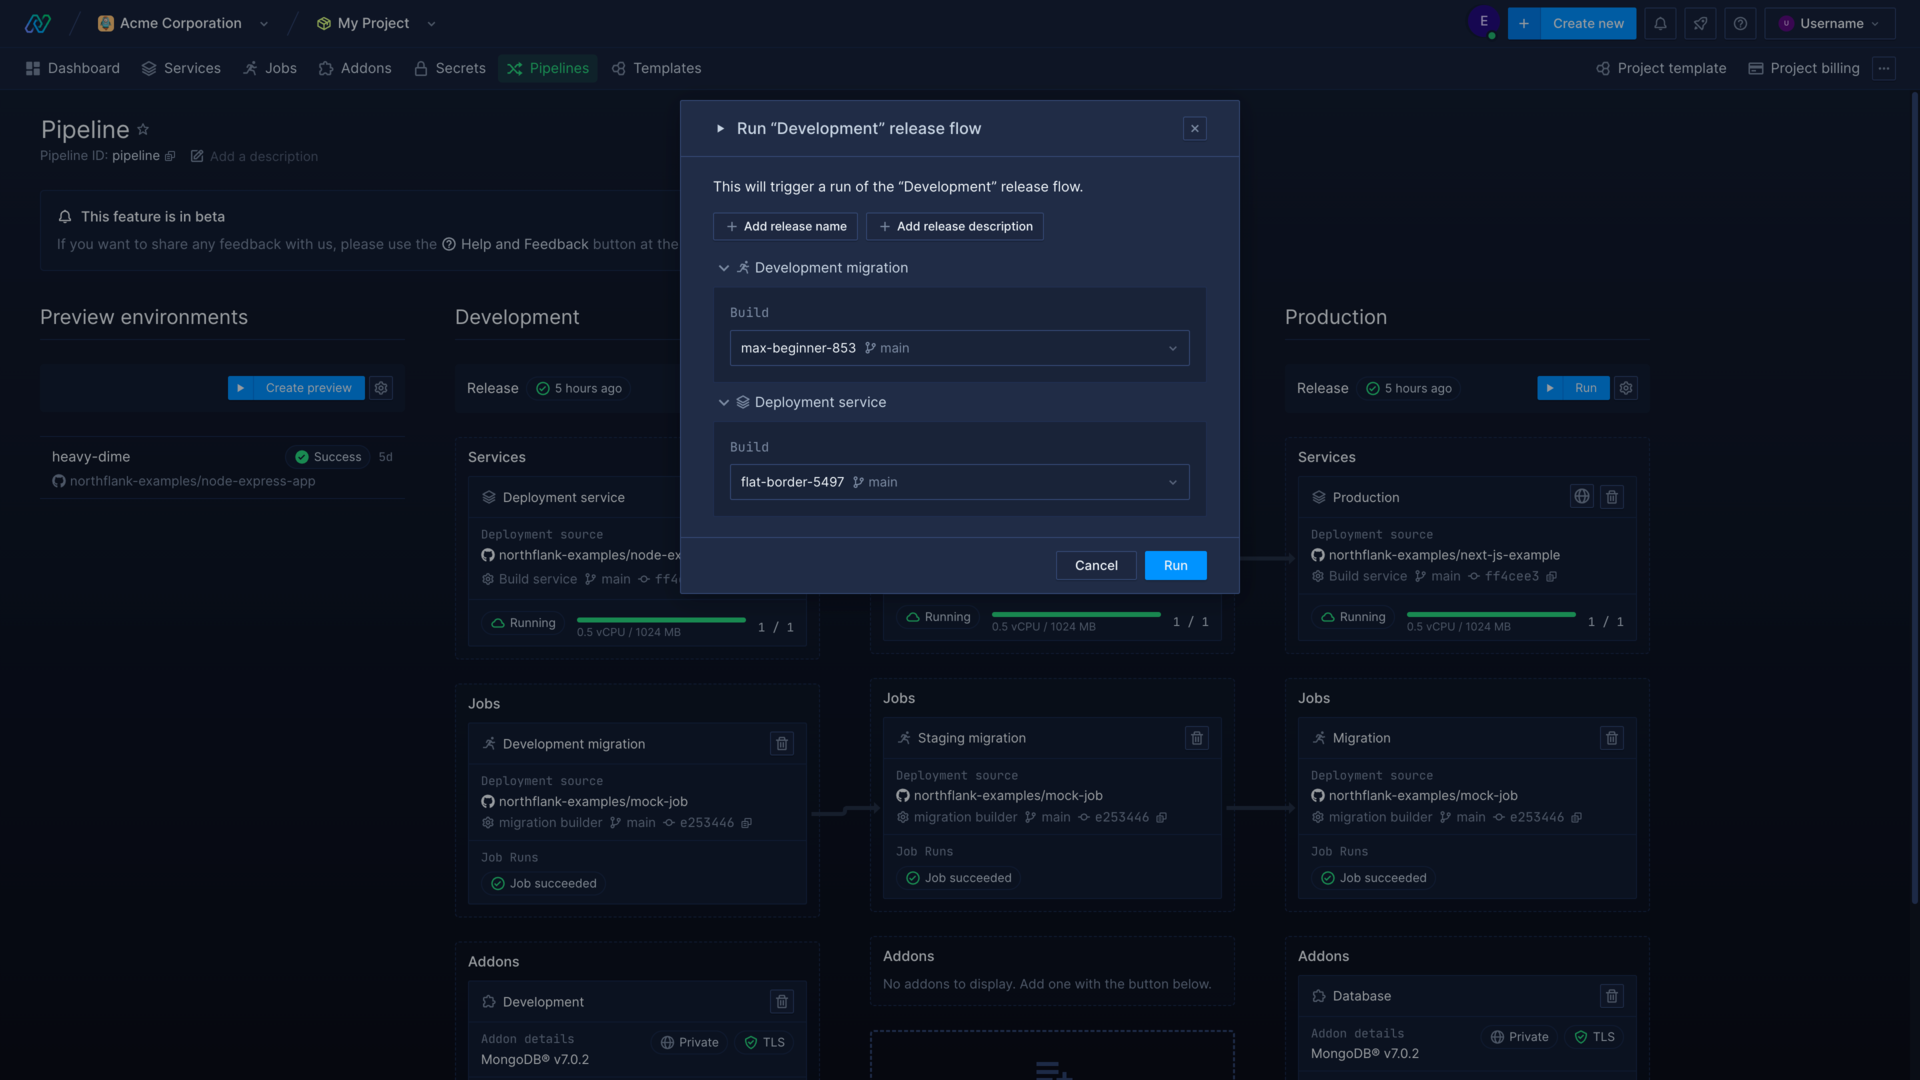
If you deploy your release by deploying a build rather than promoting a deployment, then you can override the default configuration in the confirmation modal when you run a release flow.
This modal allows you to select a specific build for each service or job in your release flow that deploys from a build service.
Roll back
You can roll back to a specific release by opening it from the list of past release flow runs. Rolling back a release will return your pipeline stage to the state it was in after the selected release flow run.
Deployments to services, builds, etc, will be reverted to those deployed or promoted in the selected release flow run. This will not undo any changes such as a database migration, which you will need to restore manually.
Learn more
Set up a pipeline
Manage your workflow and release your code in an intuitive pipeline.
Configure a release flow
Learn how to use the visual editor or code to configure a release flow.
Run a release flow
Run a release flow and manage releases for your different environments.
Roll back a release
Roll back a release to a previous version.
Run a migration during a release
When you make changes to your database schema you may need to update your application and change your production database simultaneously.
You can handle database schema migrations on Northflank in various ways:
- By configuring a release flow, which automatically runs a migration and then promotes the deployment only when the migration is successful (recommended)
- Using a job triggered by CI
- Restarting your deployment with command overrides
- Executing commands in a container's shell
We recommend using release flows to automate your migration process, especially for production deployments, as this makes the process easy and ensures the migration has run before deploying your updated application.
In a release flow you can back up your database, run a migration with a job run or execute a command, and then deploy your new release after the migration has run successfully.
Learn more
Configure your deployments for zero downtime
When it comes to putting your applications into production you want to ensure that you can deploy your new releases with no downtime.
Northflank handles deployments differently depending on how many instances your services have, and you can adapt your strategy according to your setup. Generally ensuring zero-downtime during deployments will require the use of health checks to ensure requests can be served by healthy containers.
Single instance deployments
If your service is configured to run one instance, when you trigger a new deployment a new container will be started. When the new container is marked as ready the old container will be terminated.
You can add a health check to avoid dropped network requests while deploying your new release. The container may be marked ready before your code has initialised inside the container, but using a readiness probe will ensure that your service has initialised successfully before new traffic is routed to a container.
The existing container will continue to serve traffic until the new container is marked as ready and its readiness probe passes. The existing container will now be marked for termination, and you have successfully configured zero-downtime deployment using a health check.
If your deployment has an attached volume it can only be scaled to one instance, and it will only start a new container once the original has been terminated.
Multiple instance deployments
If you have multiple instances for a service then they will be replaced in a rolling redeployment, which means your containers will be replaced one by one, with an old container marked for termination when a new container is marked as ready.
This means traffic can continue to be routed to running containers while deploying new ones. However, this will have the same issue as redeploying a single instance, containers can be marked ready by Northflank before your code has initialised in the new container.
To counter this, you can configure a health check with a readiness probe to ensure your application in the new container is ready to respond to requests.
If you require fine-grained control over the redeployment method your services use, please contact support@northflank.com to request access to the rollout strategy feature.
Health checks
Configuring a readiness probe is the best method to ensure that containers in your service are healthy and ready to serve requests during release. However, an incorrectly configured readiness probe can terminate your containers before they have a chance to initialise. Read more on adding health checks below.
Upgrade and scale databases with no downtime
You can configure your addons to ensure high-availability, which allows you to update or scale them without losing access to your data. High-availability strategies differ depending on the addon, and you may need to configure your application to work with read replicas.
Spot instances on your own cloud
If you’re deploying on your own cloud you may have configured cheaper spot instances to use for development and testing.
Deploying on a spot/preemptible node pool means that your containers could restart at any time. You should make sure your applications can be interrupted and resumed without issue to take advantage of cheaper computing in off-peak hours, otherwise your production workloads should not be deployed with spot instances.
Add health checks for a deployment
Health checks make sure that your containers are healthy and ready to serve traffic before requests are routed to them, and that any containers that become unhealthy are replaced.
By default, containers on Northflank will be marked as ready as soon as the container has successfully initialised, but the platform has no way of knowing if the internal process is running as intended. You will receive a warning in the Northflank application if the container is continually restarting, as this indicates an issue with the deployed application, but to ensure that your containers are ready to serve your users you can configure one or more health checks.
Correctly configuring your health checks is important, as incorrectly configured probes can cause downtime for your deployments. For example, a readiness probe will stop a container receiving traffic until it passes, and liveness probes can kill containers if the container has not had a chance to initialise before the test is run.
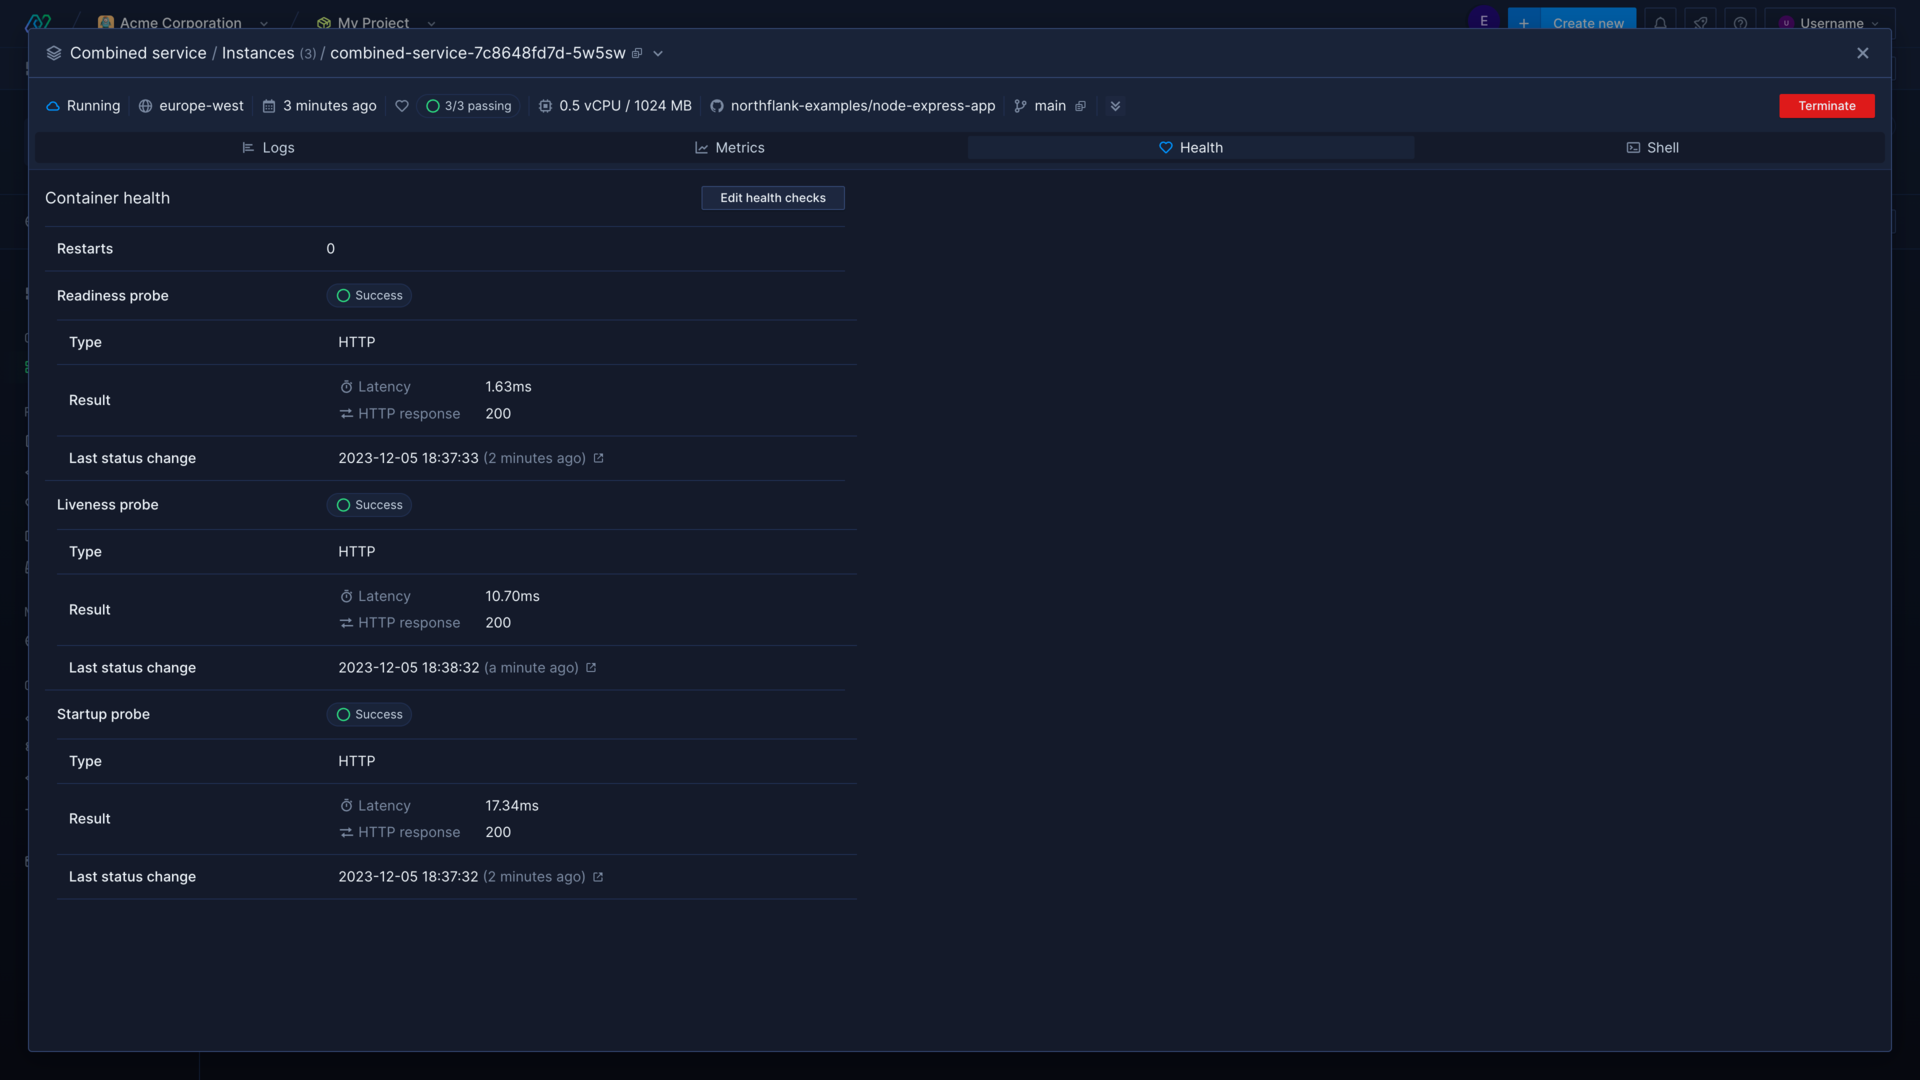
You can add a readiness probe to test if a container is ready to receive traffic after initialisation. Until the check passes old containers will not be terminated, and no traffic will be directed to the new container. If the check fails the container will be replaced.
You can use a liveness probe to ensure your containers remain healthy. A liveness probe will check the given endpoint in intervals to ensure the response is ok. If a liveness probe fails, the failing container will be marked for termination and a new one will be deployed.
Probe configuration
Probes can either check a HTTP endpoint, a TCP endpoint, or run a command in the container.
For each health check you can configure advanced options, which determine how soon, how often, and how many times the probe will run, as well as setting a threshold time for success.
Your exact probe configuration will depend heavily on the applications you are running, and on the configured resources. If you use less resources to run your development environment, consider that your production environment may initialise your application quicker.
If your readiness and liveness probes prove to be too aggressive, you can change the configuration, or add a startup probe, which will delay other health checks until it passes.
You should configure a startup probe for any applications that take longer than 30 seconds to become available to serve traffic after a container is deployed, or that have a varying startup time. Startup probes enable you to use a different command and different initial delays from your other probes, and can help you create efficient health checks to test your containers at the right times, so failing containers can be replaced as soon as possible.
Probe endpoints
The image deployed to your container for a service must be configured to successfully respond to the path, command, or port tested in your health checks. You may, for example, configure a web application to return a 200 OK response to a path specifically for health checks or run a simple shell command that returns a 0 exit code.