Workflows on Northflank allow you to automate your release process for each environment, from development through to production.
You can create workflows to deploy and promote builds, back up databases, run migrations, and manage infrastructure. Workflows can be automatically run using Git or cron triggers, and work alongside CI/CD for individual services and jobs.
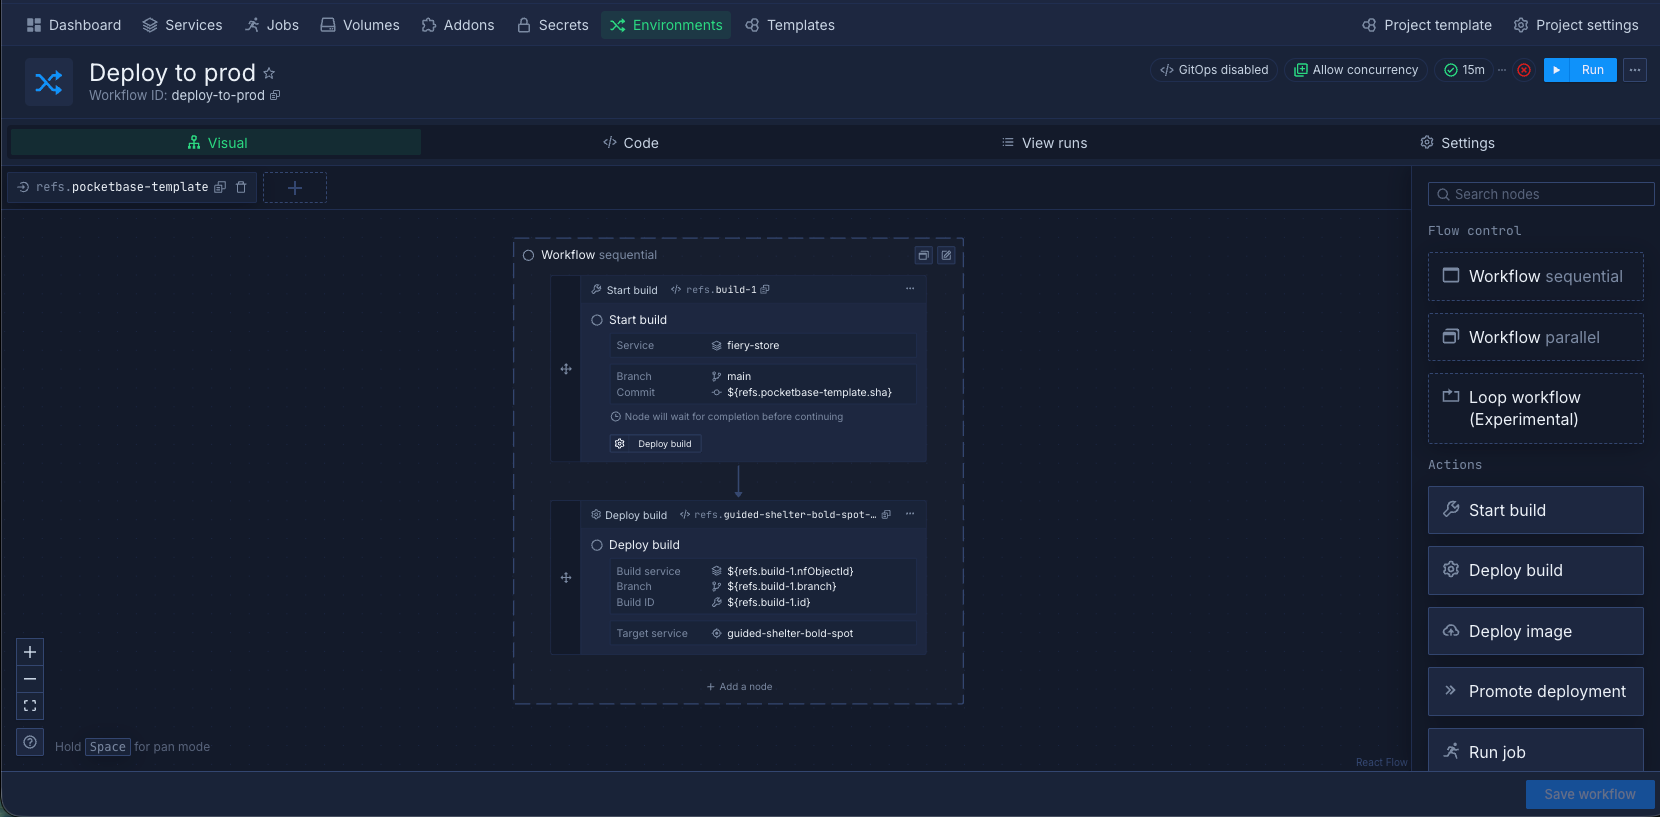
Each workflow is built in a visual editor by connecting nodes that perform specific actions. You can also edit workflows as JSON templates.
Create a workflow
note
There are two ways to create a workflow. Click (+ workflow) in an environment column to create a workflow directly in that environment. Or click the Create workflow button to create an unassigned workflow, which you can then drag to the desired environment.
-
Navigate to Environments in your project
-
Click (+ workflow) in an environment column, or click Create workflow to create an unassigned workflow
-
Enter a name for the workflow
-
Click Add trigger (optional) to configure Git push, Git pull request, or cron schedule triggers
-
Click Continue
The visual editor opens with your workflow nodes.
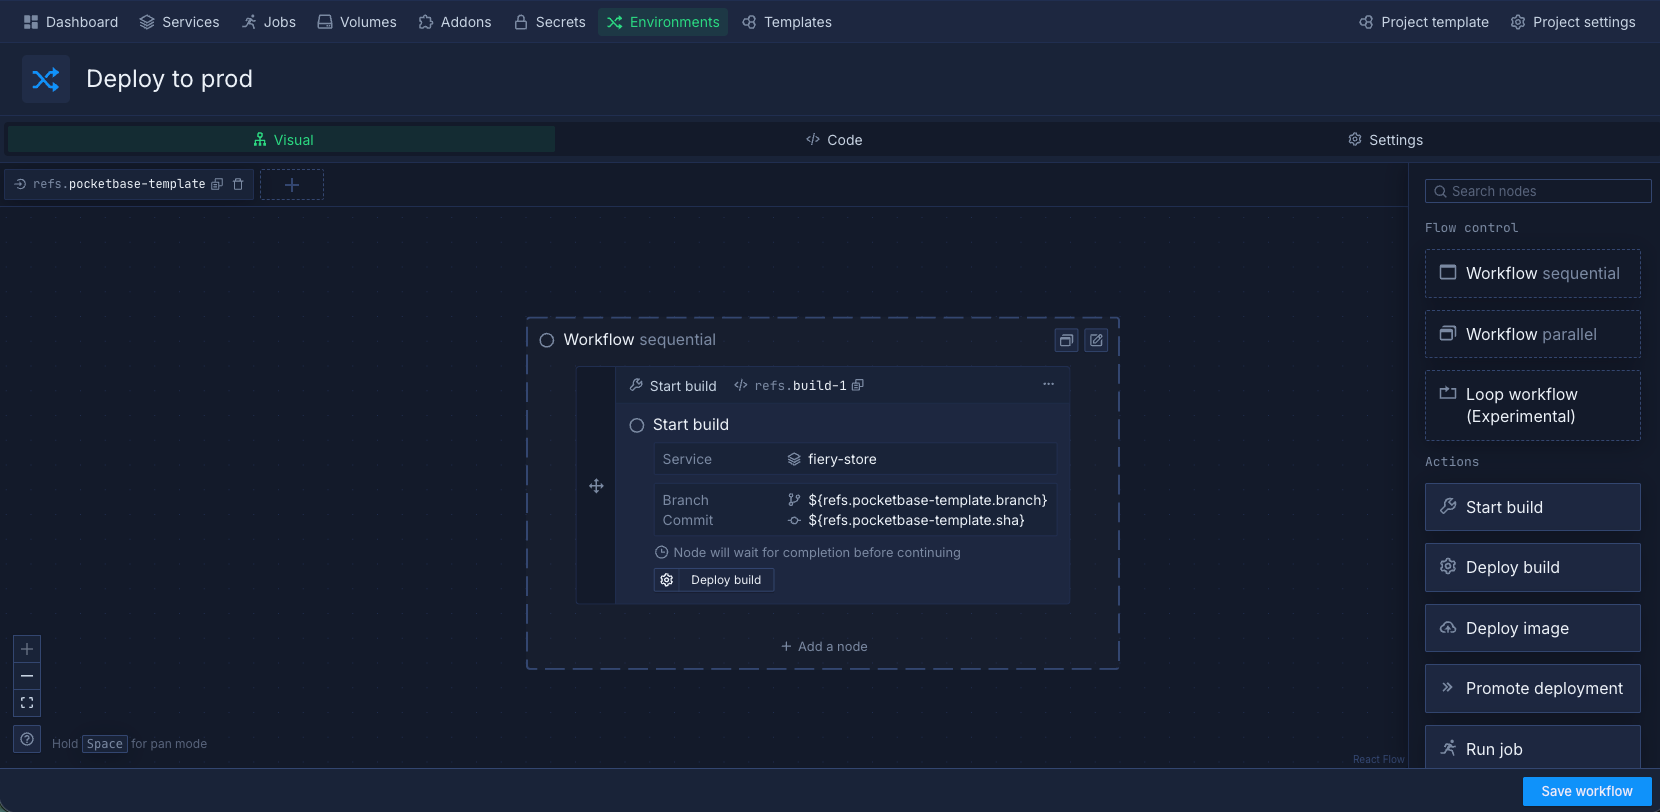
Configure workflow nodes
Workflows are built from nodes connected together. Each node performs a specific action and executes in sequence based on connections.
-
Select a node to configure its settings
-
Enter the configuration details for that node type
-
Click Save node
-
On the node, click a connection point (e.g., Deploy build) to add the next node
-
Configure the new node and save it
-
Repeat to build your complete workflow
-
Click Save workflow when finished
Node types
See template nodes for detailed documentation on all available node types. Common workflow nodes include:
Build nodes: Start build, Build on trigger
Deployment nodes: Deploy build, Deploy service
Action nodes: Run job, Run backup, Import backup, Run action
Control nodes: Condition, Approval, Message
Infrastructure nodes: Create resource, OpenTofu
Configure node settings
Each node type has specific settings. Click a node in the workflow editor to open its settings panel.
Build nodes
Service or repository: The source to build from, either an existing build service or a repository directly
Branch and commit: Which branch or commit ref to build. Can use references like ${triggers.<name>.branch} to build the branch that triggered the workflow
Preview or override build configuration: Expand to override build arguments and Docker configuration for this specific run
Build rules: Expand to configure commit message ignore flags, path rules and Build rule fall through handling.
Reuse existing builds: Whether to reuse an existing build if available
Wait for completion: Whether the workflow waits for the build to finish before proceeding to the next node
Skip node execution: Skip running this node
Deployment nodes
Target service or job: The service or job to deploy to
Wait for completion: Whether the workflow waits for the deployment to finish before proceeding to the next node
Skip node execution: Skip running this node
Timeout duration: How long to wait before the deployment times out
Action nodes
Target resource: The service, job, or addon to act on
Action type: The operation to perform (e.g. run job, run backup, import backup, restart service)
Parameters: Action-specific inputs, such as the job run arguments or backup source
Retry settings: Number of retries and delay between attempts if the action fails
Condition nodes
Condition expression: A boolean expression that checks the state of other resources (e.g. addon or service readiness). The workflow waits until this condition evaluates to true before proceeding.
Success and failure paths: Connect different downstream nodes to each branch to define what happens in each case
Approval nodes
Approvers: Team members who must approve before the workflow proceeds. Useful as a gate before deploying to production
Timeout: How long to wait for approval before the run fails
Message nodes
Send a Slack, Discord, or webhook notification at a specific point in the workflow. Use message nodes to alert your team when a deployment to production is about to start or has completed, or once a preview environment has been provisioned.
Use references in workflows
Workflows can reference values from triggers and other nodes. This makes workflows dynamic based on how they were triggered.
For detailed information on using references in your workflows, see template nodes and GitOps documentation.
Git trigger references
If a workflow has a Git trigger, you can use these references:
${triggers.<name>.branch} - Branch name
${triggers.<name>.sha} - Commit SHA
${triggers.<name>.pullRequestId} - Pull request ID
${triggers.<name>.repoUrl} - Repository URL
Node references
Reference outputs from other nodes:
${refs.<node-ref>.nfObjectId} - Access the ID of the service built by a build node
${refs.<node-ref>.ports.0.dns} - Access the generated URL of a deployment or combined service
Use these references in node settings to make workflows dynamic.
Add triggers
Workflows can have multiple triggers to run automatically on different events.
Git push trigger
-
Click the plus sign or Add trigger
-
Select Git push from the Kind dropdown
-
Configure:
- Repository: Select your repository
- Branch rules: Specify branches (e.g.,
main,develop, or*for all) - Path rules (optional): Only trigger on changes to specific files or directories
- Ignore rules (optional): Skip runs for commits with specific message patterns
-
Click Save
The workflow runs automatically when commits are pushed to matching branches.
Git pull request trigger
-
Click the plus sign or Add trigger
-
Select Git pull request from the Kind dropdown
-
Configure:
- Repository: Select your repository
- Pull request rules: Specify when to trigger
-
Click Save
The workflow runs when pull requests are opened or updated.
Cron schedule trigger
-
Click the plus sign or Add trigger
-
Select Cron schedule from the Kind dropdown
-
Enter a cron expression in the Schedule field (times are UTC, minimum interval is 10 minutes)
-
Click Save
The workflow runs automatically on the configured schedule.
Configure workflow settings
Click Settings in the workflow editor to configure workflow behavior:
Basic information
Template name: Name of the workflow
Description: (Optional) Describe what this workflow does. Useful when you have multiple workflows in a project to distinguish their purpose.
GitOps
Enable GitOps to sync workflow configuration with a Git repository. Changes to the workflow definition are committed to your repo, giving you version history, code review, and the ability to roll back to a previous state.
Concurrency policy
Controls what happens when a new workflow run is triggered while a previous run is still in progress.
Allow: Multiple workflow runs can execute simultaneously without restriction. Suitable for workflows that act on independent resources and have no shared state, such as deploying to separate environments.
Queue: New runs wait for previous runs to complete before starting. Use this when runs must not overlap, for example a release workflow that runs database migrations before deploying, where two concurrent runs could apply migrations out of order.
Cancel previous: New runs cancel any in-progress runs and start immediately. Use this for workflows triggered by Git pushes where only the latest commit matters, such as building and deploying a staging environment on every push to main.
Cross project access
Enable Share workflow access to other projects to allow other projects to trigger this workflow. This is useful for central workflows, for example a shared infrastructure provisioning workflow in a platform project that individual product projects can trigger as part of their own release process.
Use branch contents
Enable Enable using branch contents to provision the preview environment according to the GitOps file in the repository branch. This means if a PR modifies the preview blueprint definition, the preview will be provisioned according to the updated definition from that branch.
Argument overrides
Define default values that can be overridden when running the workflow manually. Arguments can be referenced in nodes using ${args.<name>}.
For example, you could define target_env with a default of staging, then reference ${args.target_env} in deployment nodes. When triggering manually, you can override this to deploy to a different environment without changing the workflow definition.
Teardown
Add a teardown specification to define cleanup actions when the workflow is deleted. For example, you can use teardown to delete OpenTofu resources on external providers. Note that Northflank resources provisioned as part of a preview will already be auto-deleted, and in most cases workflows won't create resources.
Save workflow
Click Save workflow to save your changes. The workflow is ready to run.
Next steps
Run and manage workflows
Run and manage workflows for different environments.
Set up preview blueprints
Create preview blueprints to automatically create preview environments for your branches and pull requests.
Manage preview blueprints
Manage active previews, manually create test environments, and configure automatic cleanup.
Run migrations
Run database migrations and update your deployments simultaneously when you update your schema.