You can add your own domains and subdomains to Northflank to use with your deployed service's public ports.
Domains and subdomains are verified on your Northflank account, so once added you can reassign them to any public port for any deployment on your account.
If you use OVH, Cloudflare, NS1, or Namecheap, check our specific guides for these domain registrars.
Add a domain
You can add any domain (for example one.yourdomain.com) provided you have the ability to edit the DNS records.
- Click here , or open the domains page in your account settings.
- Click add domain, enter your domain name, and click add domain
- You will now see the information required to verify your domain, including the
record nameandrecord content. You will need to add this to your DNS records as a text (TXT) record. - Open a new browser tab or window and navigate to your DNS provider
- Log in to your control panel and find the DNS settings for your domain
- Add a new text (TXT) record with the
record nameandrecord contentspecified in the entry you just generated for the domain on Northflank - Return to the Northflank domains page and select verify on the entry for your domain
- Northflank will attempt to verify your domain - if not, check you have entered the record correctly and try again. If you need to, you can close the verification dialogue and come back to it later.
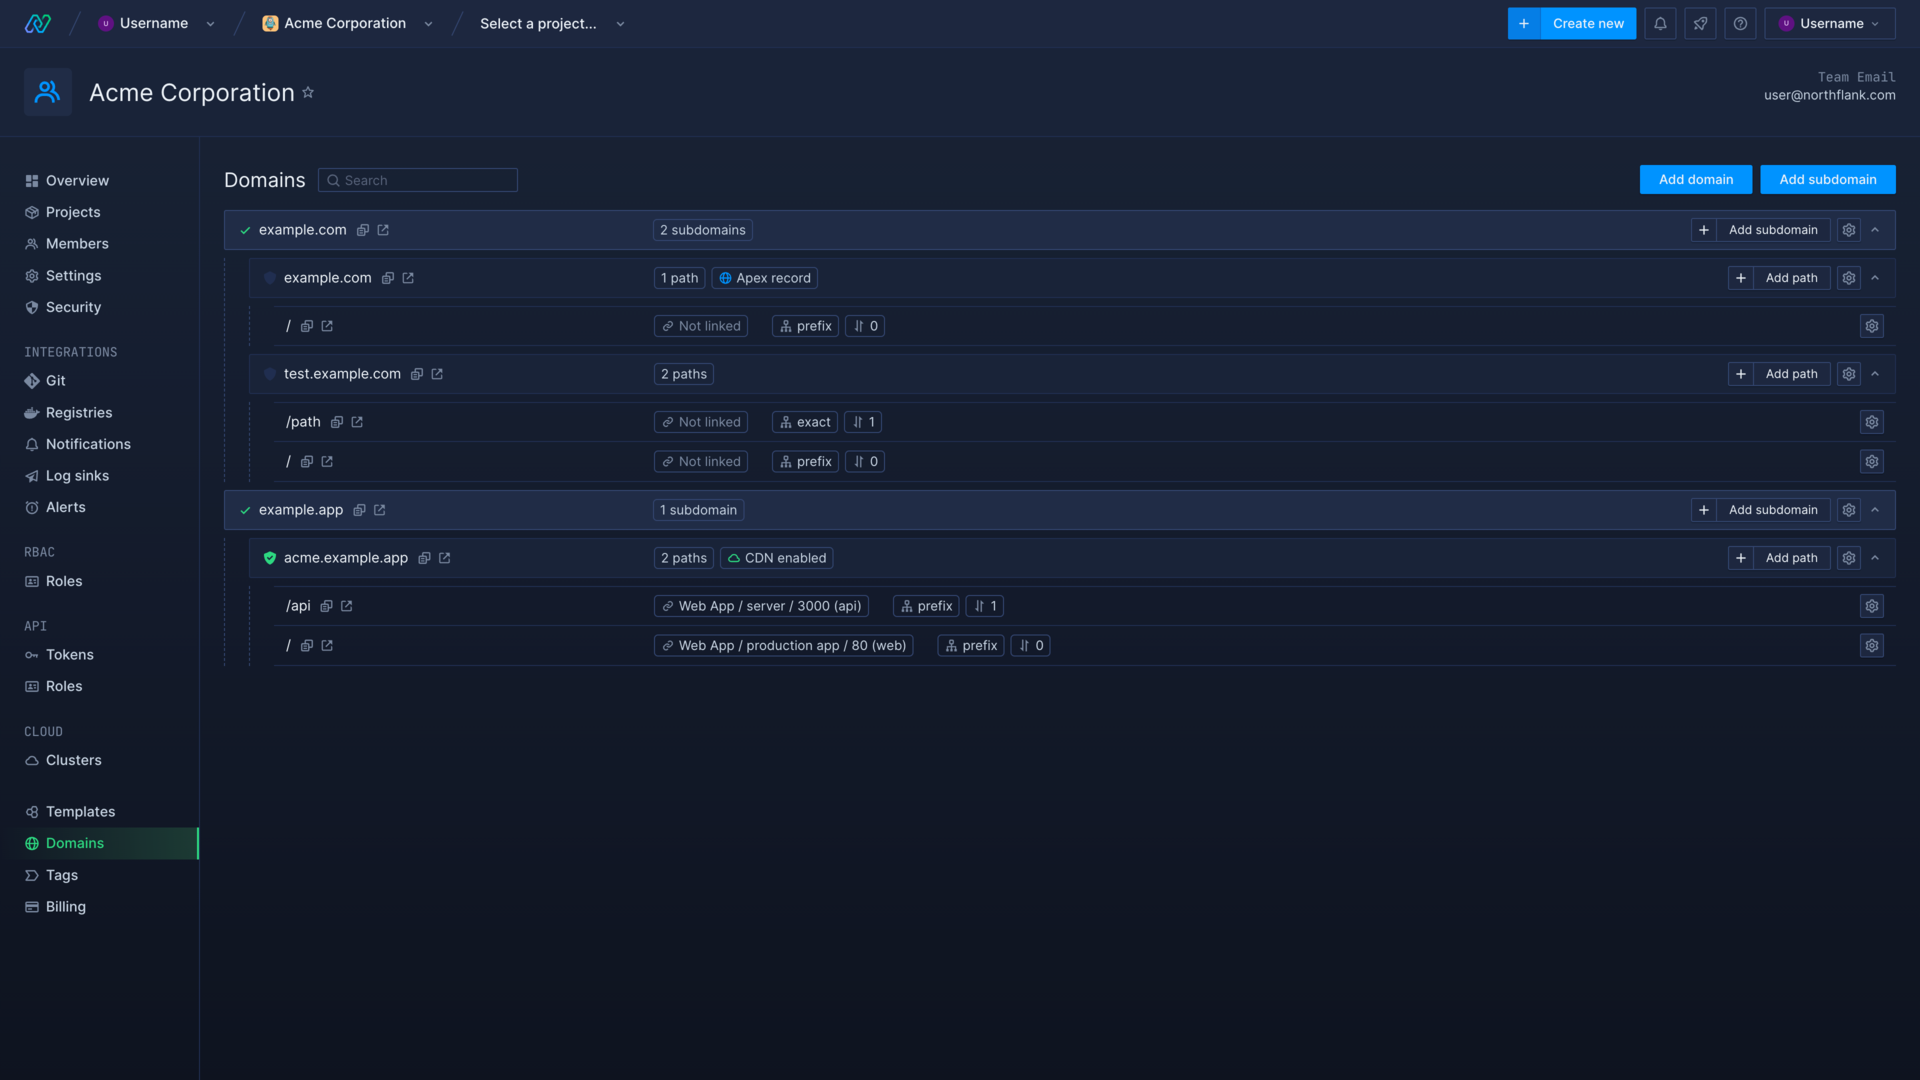
Add a subdomain
You can add any subdomain provided you have the ability to edit the DNS records.
-
Click here , or open the domains page in your account settings
-
Click add subdomain and select the root domain name you want to create a subdomain for
-
Enter the subdomain you want to use and click create subdomain
-
You will now see the information required to verify your domain, including the
record nameandrecord content. You will need to add this to your DNS records as a CNAME, ALIAS, or APEX record (depending on host).
-
Open a new browser tab or window and navigate to your DNS provider
-
Log in to your control panel and find the DNS settings for your domain
-
Add a new CNAME record with the
record nameandrecord contentspecified in the entry you just generated for the subdomain on Northflank -
Set the time to live (TTL) as recommended, or as low as you can to make your domain available as soon as possible
-
Return to the Northflank domains page and select verify on the entry for your subdomain
-
Northflank will attempt to verify your domain - if it doesn't verify, check you have entered the record correctly and try again. If you need to, you can close the verification dialogue and come back to it later.
Link a domain to a port
- Open the ports & DNS page on the service that contains the port you want to link and click edit domains, or click link domains next to the port
- Find the domain or subdomain you wish to associate with the service in the list
- Select the port from drop-down list next to the subdomain you want to link
- Click save changes
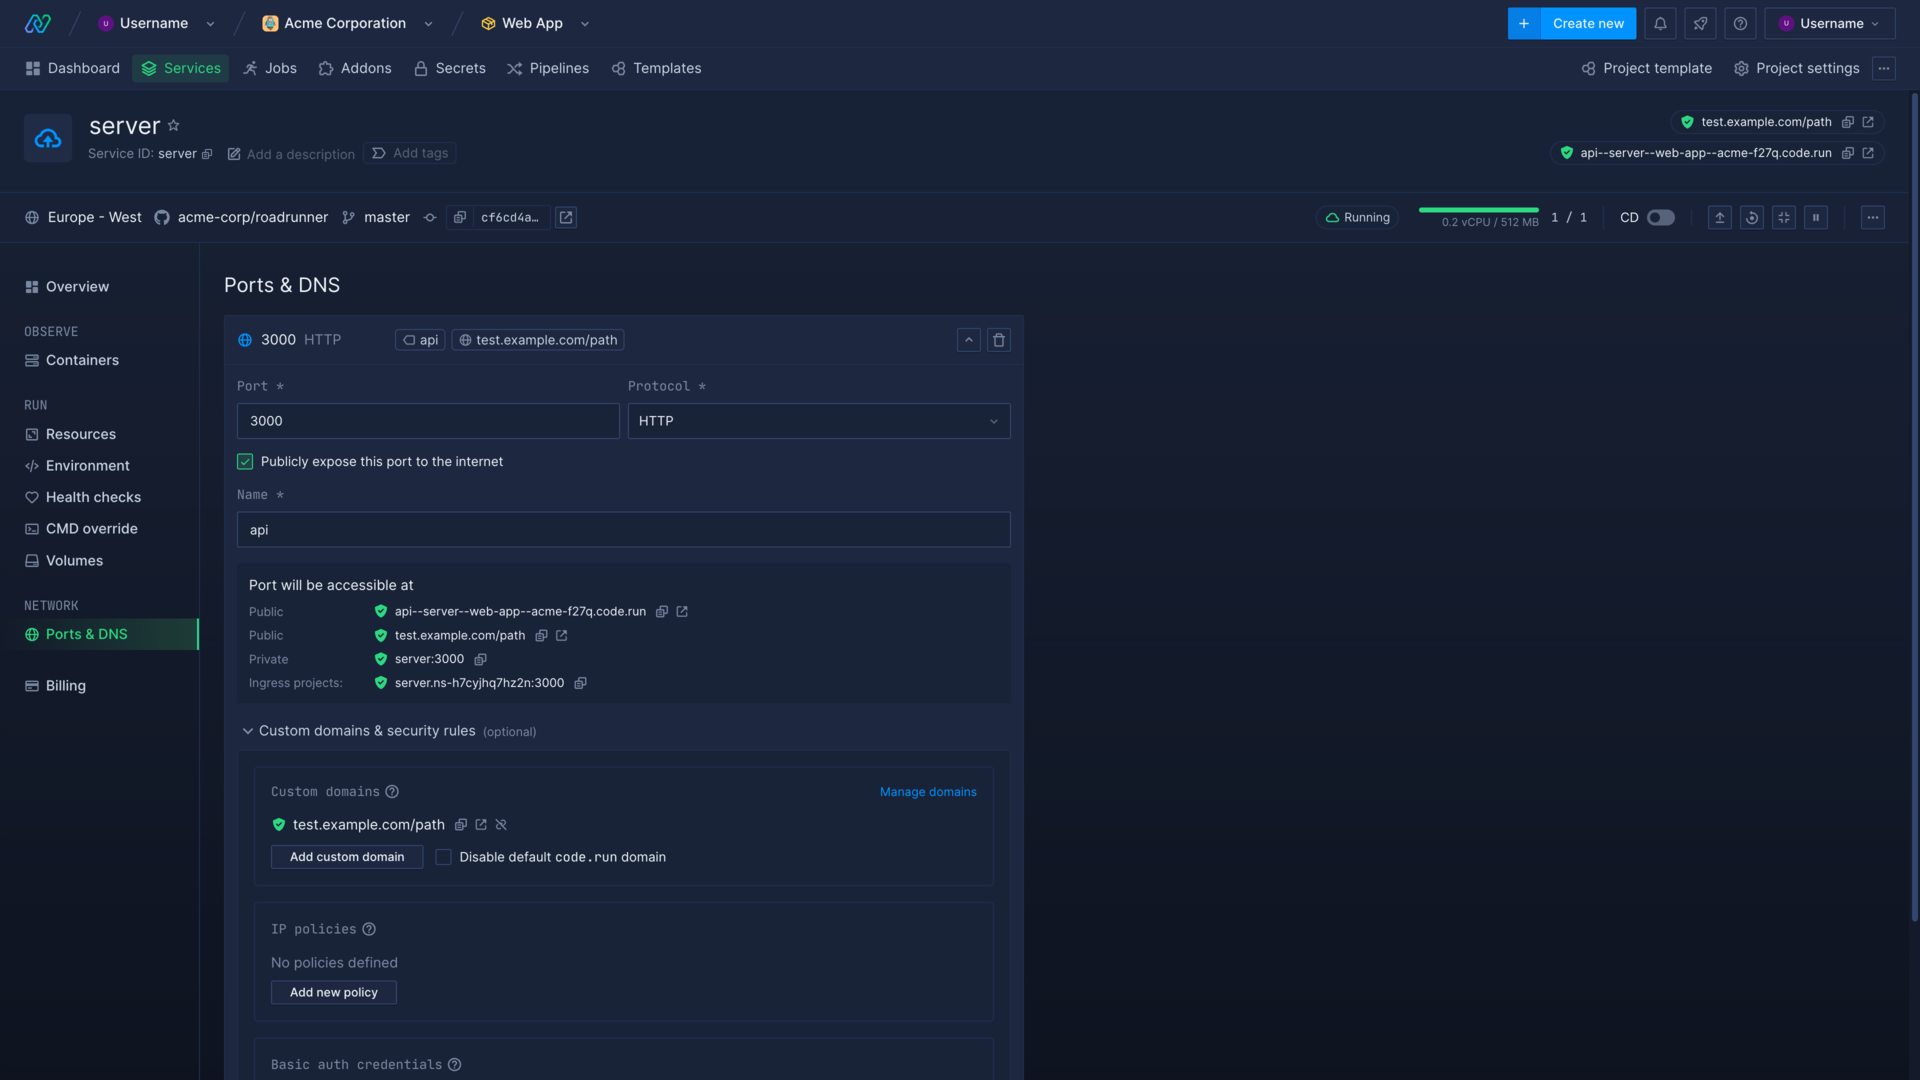
Northflank will automatically generate TLS certificates for your domain or subdomain and your domain should redirect to your specified port soon after saving. You can also manage the ports that your domains are linked to via your account's domains page in your account dashboard.
Learn more about domains on Northflank
Domains on Northflank
Manage your domains on Northflank, quickly and easily assigning them to your deployments.
Add a domain
Add your domain name to your Northflank account.
Use your apex domain
Use your apex (root) domain name with a Northflank service.
Link a domain to a port
How to link and unlink domains and subdomains with specific ports on your deployments.
Use path-based routing
Route incoming traffic to different services and ports for paths on a subdomain.
Domain registrar guides
Follow walkthroughs to add and verify domains on Cloudflare, NS1, OVH, and Namecheap.