Preview blueprints are templates that automatically create ephemeral environments when you open pull requests or push to branches. Each preview environment is an isolated instance of your application with its own services, databases, and URLs.
Preview blueprints can be triggered by Git events (pull requests and pushes), webhooks, or API calls. While Git triggers are the most common, you can also trigger preview blueprints dynamically via webhook or API for custom workflows.
Create a preview blueprint
-
Open Previews in your project sidebar.
-
Click New preview blueprint
-
Configure the blueprint:
- Name: Enter a name (e.g.,
pr-previews) - Naming convention: Select how previews are named
- Prefix / Suffix: For pull request IDs, branch names, or timestamps, place the preview name before or after resource names. This control is unavailable for Random words.
- Name: Enter a name (e.g.,
-
Click Add trigger:
- Kind: Select a trigger, such as Git pull request or Git push
- Repository: For a Git trigger, select the repository to watch
-
Click Continue to open the visual editor
The visual editor opens where you can define the resources that will be created in each preview environment.
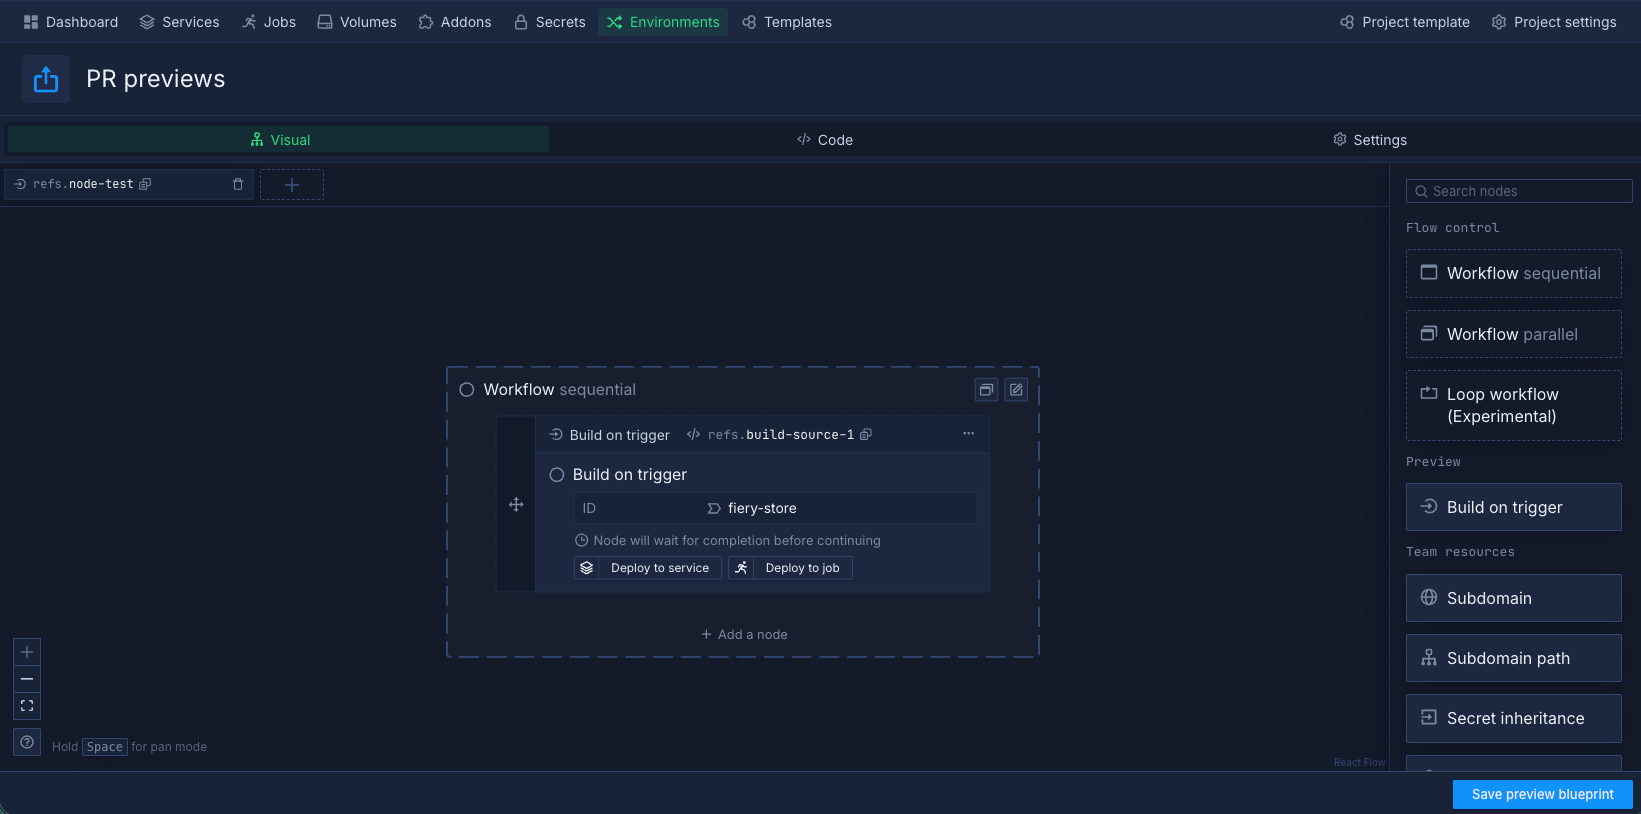
Configure the preview blueprint
Use the visual editor to define what gets created in each preview environment. Connect nodes together to build your preview infrastructure.
-
Start with a Build on trigger node that builds code from the pull request or branch
-
Add deployment nodes to deploy the built code to services
-
Add infrastructure nodes to create databases, volumes, or other resources
-
Configure networking to expose services with unique URLs
-
Click Save preview blueprint
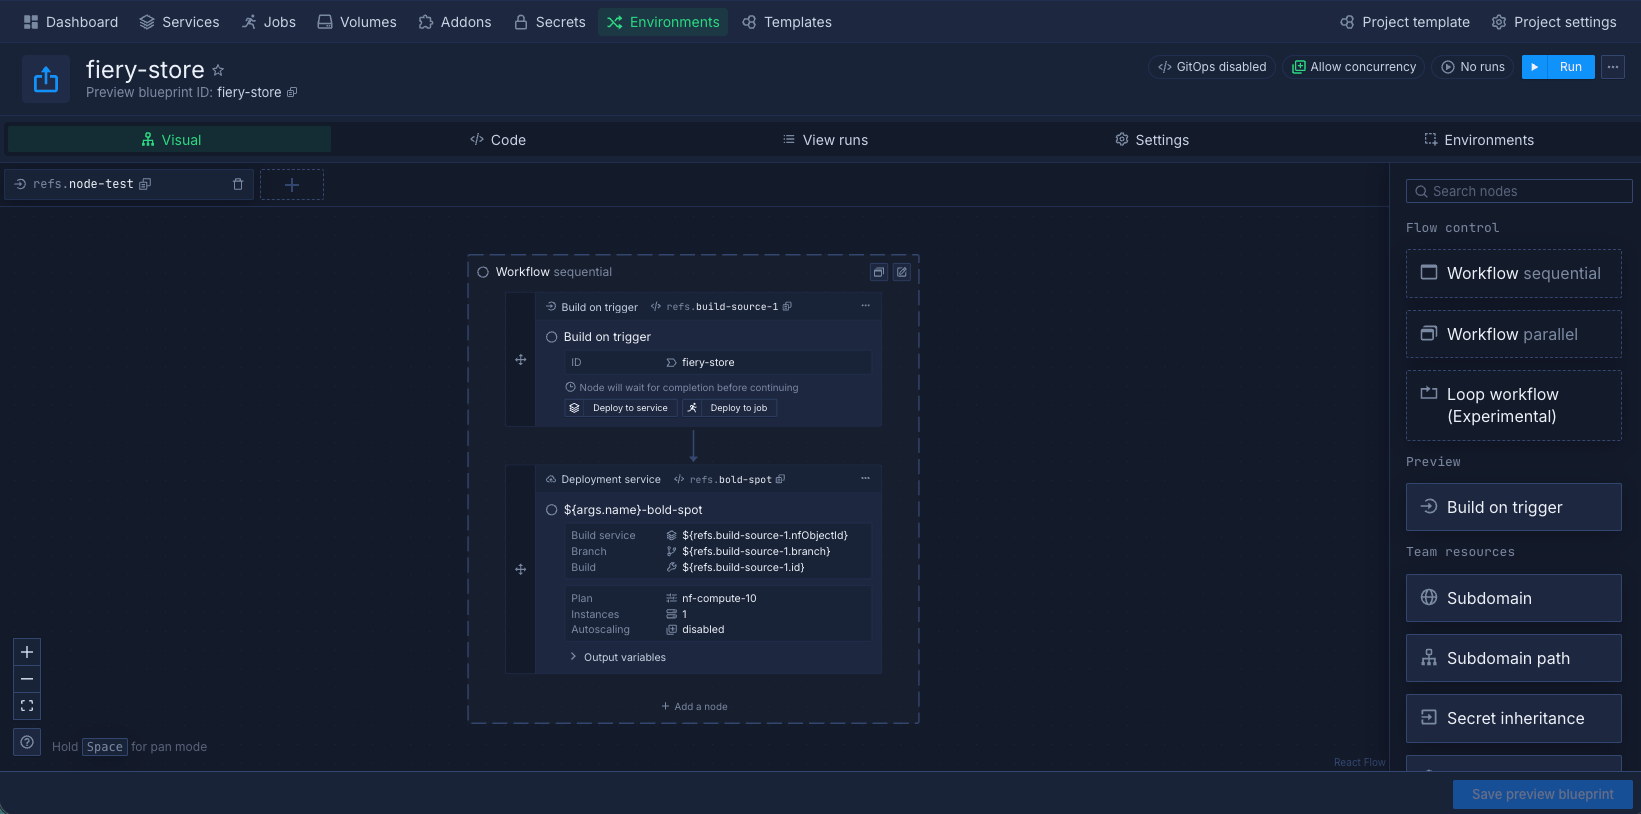
Common patterns
Simple frontend or API
Build your code and deploy it as a single service with a public URL. Each preview gets its own URL so reviewers can open the exact version from the PR.
Nodes: Build on trigger → Create service → Expose port with generated domain
Full stack application
Build your application, provision a fresh database for the preview, deploy the application, and inject the database credentials. Each preview environment is fully isolated with its own data.
Nodes: Build on trigger → Create addon (e.g. PostgreSQL) → Deploy build → Link addon credentials to service
This is the most common pattern for web applications. Because the database is created fresh for each preview, you can seed it with test data using a job node that runs after the database is ready.
Full stack with seed data
Extend the full stack pattern by running a one-off job after the database is ready to load fixtures or seed data. Alternatively, fork your database from a snapshot to restore pre-seeded data more efficiently. The preview is then ready to use immediately after deployment without manual setup.
Nodes: Build on trigger → Create addon (or fork from snapshot) → Run job (seed data, optional) → Deploy build → Link addon credentials
Microservices
Build and deploy multiple services in the same preview. Internal services communicate using Northflank's private networking, while only the public-facing service is exposed externally.
Nodes: Build service A → Build service B → Deploy service A → Deploy service B → Expose service A
Use condition nodes to skip certain services if the PR only touches specific parts of the codebase.
Branch-specific overrides
Use the Skip node execution option with conditional functions like fn.if() in node references to change what gets deployed based on which branch or repository triggered the preview. For example, skip creating a full database and deploy a lightweight mock instead when the PR is against a docs branch.
Nodes: Build on trigger → Condition (check ${triggers.repo.branch}) → Deploy full stack (true path) → Deploy lightweight mock (false path)
Configure triggers
Preview blueprints can create or update environments from Git events, webhook requests, or a schedule. Add a trigger in the blueprint editor. Select its Kind. Configure the trigger. Save the trigger and blueprint.
Workflows and preview blueprints share trigger types and filtering controls.
| Trigger kind | Preview behavior |
|---|---|
| Git pull request | Creates or updates the preview for a matching pull request |
| Git push | Creates or updates the preview for a matching branch |
| Tagged release | Starts a preview run from a provider release event |
| Git check suite | Starts a preview run after a supported successful check event |
| GitHub PR label | Starts a preview run for a pull request with matching labels |
| Cron schedule | Starts a preview run on a UTC schedule |
| Webhook | Starts a preview run from a GET or POST request |
GitHub check-suite triggers do not wait for every check suite on the commit. GitHub tagged-release triggers require a release event, rather than a tag push alone.
Scheduled previews
Each blueprint accepts one cron trigger, with a minimum interval of 10 minutes. A scheduled run does not delete and recreate an existing environment automatically. Environment naming determines whether the run creates a new environment or updates an existing one.
With the default random names, scheduled runs can create separate environments. Configure automatic cleanup for previews that you no longer need.
Webhook previews
Treat the URL as a credential. Anyone with the URL can request a preview run.
To start a preview with a webhook:
- Select Webhook as the trigger kind.
- Copy the Webhook URL.
- Save the trigger.
- Save the blueprint.
- Send a GET or POST request to the URL to start a preview run.
Pass arguments in the URL query string. To create or update a named preview, supply name, for example ?name=review-demo. Requests with the same name target the same active preview within that blueprint.
See webhook parameters for arguments and Git references. Use the preview URL copied from the blueprint, rather than a workflow URL.
Pause triggers
To pause a trigger, turn off Enable trigger in its form. See pause preview triggers for the effects on existing previews.
Configure preview settings
Open Settings in the preview blueprint editor to configure preview behavior.
Resource naming
A naming convention sets the name of each new preview.
If previews exist, a new naming convention can create duplicate resources when they update. Switching Prefix or Suffix also changes generated resource names. Review existing previews before you save these changes.
Select a Naming convention: Pull request ID, Branch name, Timestamp, or Random words.
For Pull request ID, Branch name, or Timestamp, select Prefix or Suffix. This places the preview name before or after resource names. Random words does not offer this control.
Concurrency policy
Select Concurrency policy to control runs that overlap. Preview blueprints use the same concurrency choices as workflows. This control does not limit the number of active previews.
Preview expiry
Enable Allow preview environments to expire to delete previews automatically after a configured lifetime. Set the lifetime with Hours and Minutes.
Enable Reset duration on update to environment to restart the timer when the preview runs again. Without this control, later runs retain the existing expiry time.
Active hours
Active hours is available for projects in your own cloud account. Select days and times in UTC. Northflank pauses preview resources at the configured end time and resumes them at the configured start time. Git, manual, and webhook runs can still create or update previews outside these hours.
Use branch contents
Enable Enable using branch contents to use the blueprint file from the branch associated with a preview. This requires GitOps and the configured file path in that branch of the GitOps repository.
If the preview branch differs from the configured GitOps branch, Northflank fetches the file from the preview branch. The run uses that file's root specification. The saved blueprint still controls triggers and argument overrides. If Northflank cannot read or accept the file, the run request fails.
Teardown
Add a teardown specification for cleanup when a preview environment is deleted. Use it for external resources or cleanup jobs that normal preview deletion does not handle. Preview deletion runs the teardown unless you choose to skip it. See run teardown workflows for execution and failure policies.
Test the preview blueprint
Before relying on automatic triggers, test your preview blueprint manually:
-
Click Run in the blueprint editor
-
Select a commit from the repository
-
Click Create
This creates a preview environment without opening a pull request, allowing you to verify the blueprint works correctly.
Next steps
Manage preview blueprints
Manage active previews, manually create test environments, and configure automatic cleanup.
Configure a workflow
Learn how to use the visual editor or code to configure a workflow.
Run and manage workflows
Run and manage workflows for different environments.
Run migrations
Run database migrations and update your deployments simultaneously when you update your schema.