Run sandboxes on your own AWS, GCP, Azure, or other cloud account. Your data and compute stay inside your infrastructure, and you pay your cloud provider directly for the underlying resources.
Deploying a sandbox is identical to Northflank cloud once the cluster is set up. The differences are that you choose the isolation runtime yourself rather than getting it automatically, plus the resource plans available to you and the storage classes you can use.
Before you start
Running sandboxes in your own cloud requires four things in place before you deploy anything:
- A Northflank cluster in your cloud account, with sandbox security installed. See use other cloud providers with Northflank.
- A runtime class selected for your workloads, either as the cluster default or through a tag.
- Node pools whose instance types support the runtime you chose.
- A Northflank project linked to that cluster.
MicroVM isolation needs hardware support. Runtime availability varies by provider and region. On AWS, microVM node pools require bare-metal instances or eligible non-metal instances with nested virtualization enabled. See the microVM requirements.
Configure your cluster for sandboxes
Connect your cloud provider and deploy a cluster. Sandbox isolation is configured on the cluster, not on individual node pools.
In your cluster's Security settings, open Sandboxing and enable Install sandbox security. This installs both the microVM (Kata Containers) and gVisor runtimes on the cluster.
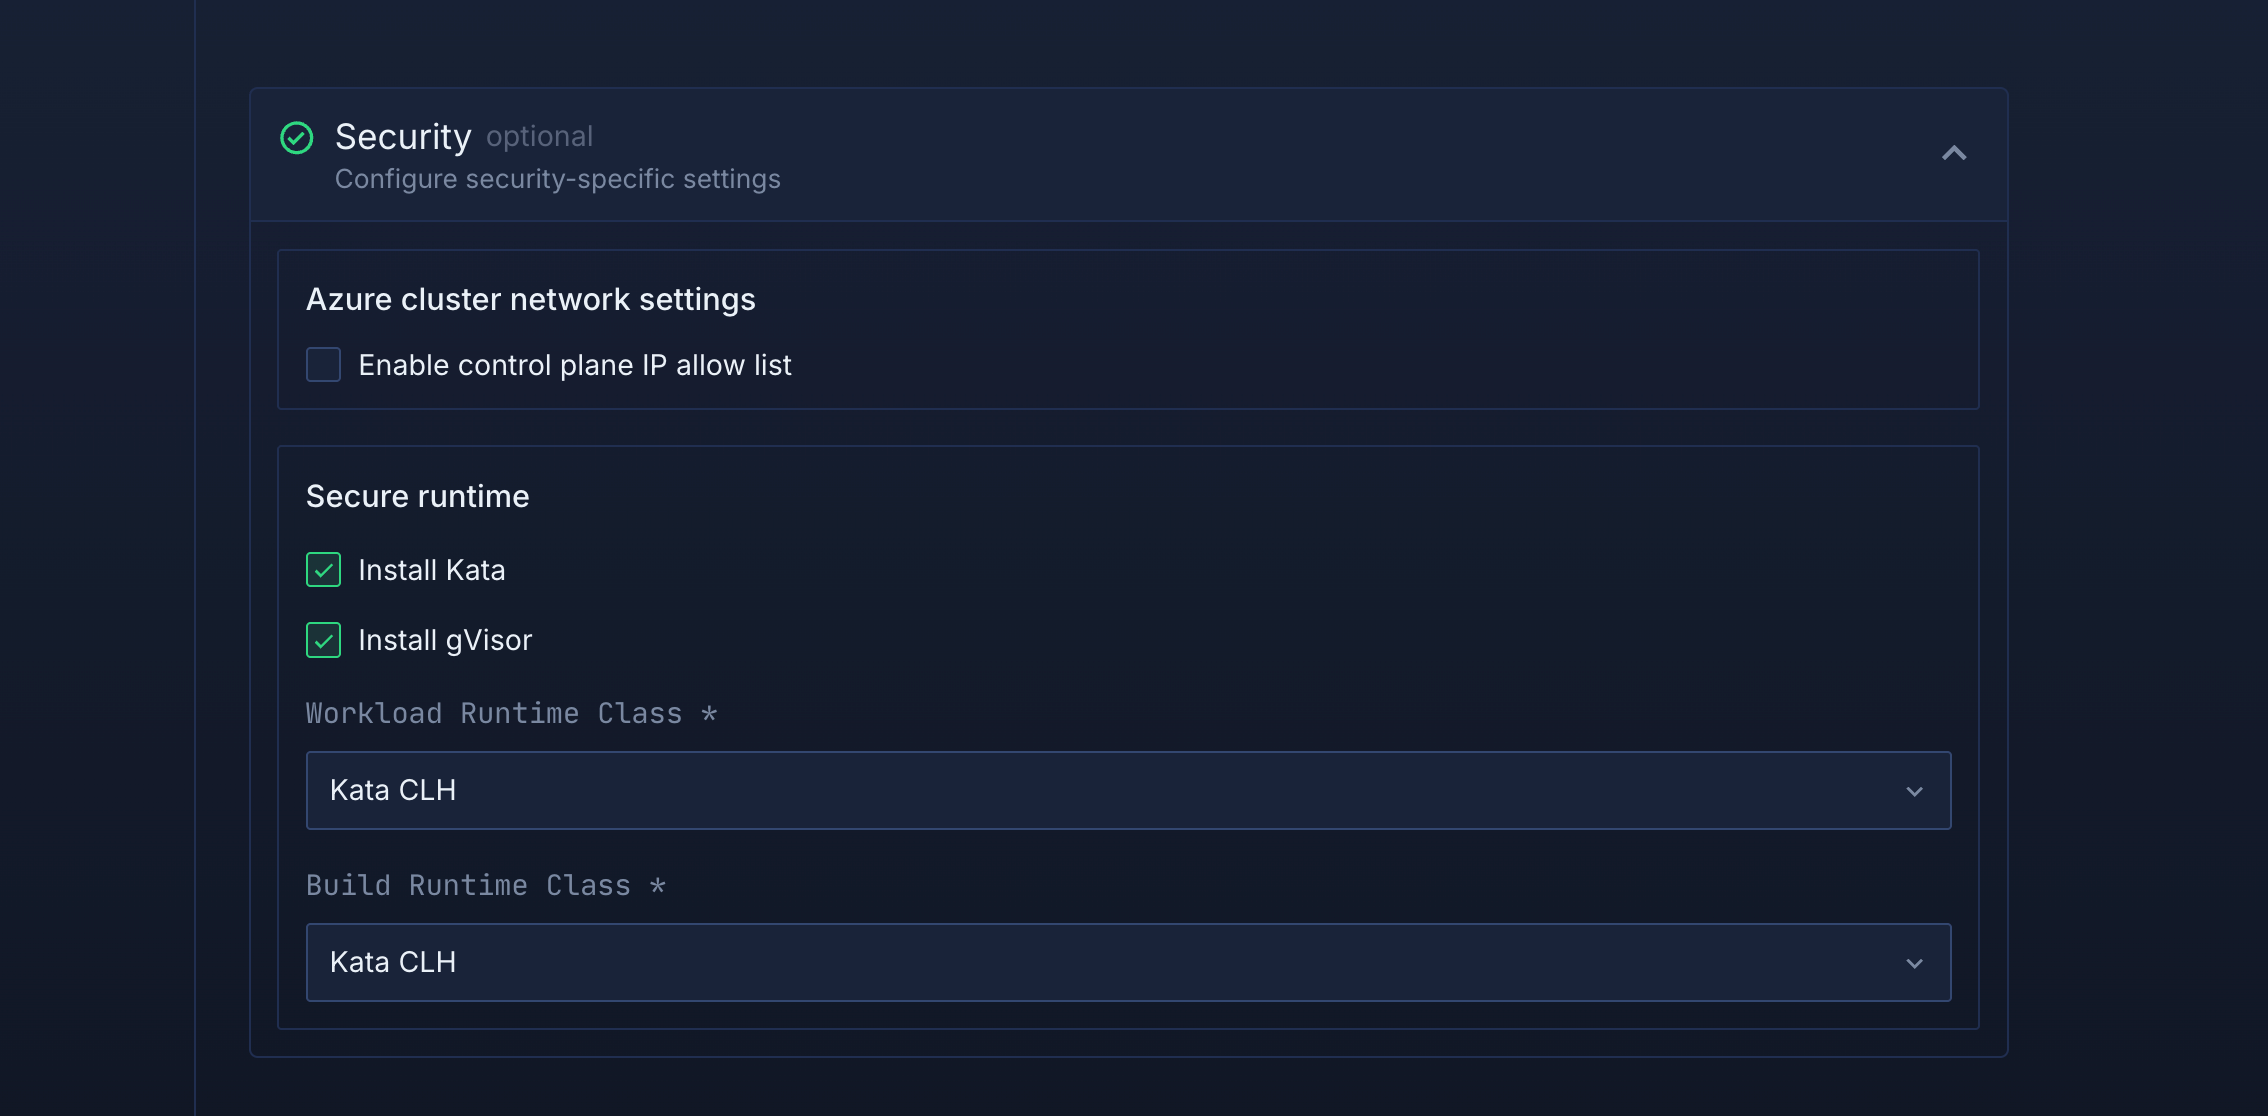
Then choose the runtime that the cluster uses by default:
- Workload runtime class applies to services, jobs, and addons.
- Build runtime class applies to builds.
Unlike Northflank cloud, installing the runtimes does not sandbox anything on
its own. A workload is sandboxed only when a runtime class selects one, either
from the cluster default above or from a
tag
applied to that workload. With the runtime class set to none,
workloads run as ordinary containers on sandbox-capable nodes.
Nodes must be bare metal or support nested virtualisation to run microVM workloads. gVisor runs anywhere microVMs are not supported, so a cluster can mix both. To keep sandboxed workloads on particular nodes, label those node pools and apply a matching node affinity rule.
See deploy and scale node pools for pool configuration, and configure your cluster for cluster-wide settings.
Create a project for your cluster
Create a Northflank project that targets your cluster. Sandboxes deployed into it run on your own infrastructure.
- Enter a project name.
- Under deployment target, select your own cluster rather than Northflank cloud.
- Create the project and note its ID.
A project's cluster cannot be changed after creation. See create a project for the full walkthrough.
Create a sandbox in your cluster
Once your project points at your cluster, deploying a sandbox is the same as on Northflank cloud. The create payload carries no isolation setting: the runtime comes from your cluster default or from a tag on the workload, and the nodes it is scheduled to must support that runtime.
const sandboxId = `sandbox-${crypto.randomUUID().split('-')[4]}`;

await apiClient.create.service.deployment({
  parameters: {
    projectId: 'your-byoc-project-id',
  },
  data: {
    name: sandboxId,
    billing: {
      deploymentPlan: 'nf-compute-200',
    },
    deployment: {
      instances: 1,
      docker: {
        configType: 'customCommand',
        customCommand: 'sleep infinity',
      },
      external: {
        imagePath: 'ubuntu:22.04',
      },
      storage: {
        ephemeralStorage: {
          storageSize: 2048,
        },
      },
    },
  },
});
import uuid

sandbox_id = f"sandbox-{uuid.uuid4().hex[:8]}"

client.create.service.deployment(
    project_id="your-byoc-project-id",
    data={
        "name": sandbox_id,
        "billing": {"deploymentPlan": "nf-compute-200"},
        "deployment": {
            "instances": 1,
            "docker": {
                "configType": "customEntrypointCustomCommand",
                "customEntrypoint": "/bin/bash",
                "customCommand": "-c 'sleep infinity'",
            },
            "external": {"imagePath": "ubuntu:22.04"},
            "storage": {"ephemeralStorage": {"storageSize": 2048}},
        },
    },
)
Pausing, resuming, exec, logs, and metrics all work the same way. See configure and manage sandboxes.
If your cluster has GPU node pools, create a GPU sandbox with the same payload shown in GPU sandboxes. See deploy GPUs in your own cloud for driver and node pool setup.
Custom resource plans
On your own cloud you are not restricted to Northflank's standard plans. Define custom resource plans with the exact vCPU and memory your node types provide, then use the custom plan's identifier as the deploymentPlan when creating a sandbox.
This matters most when your instance types do not line up neatly with the standard plans, and you would otherwise waste a large share of each node.
Persistent volumes
Volumes in your own cloud are provisioned through your cluster's storage classes rather than Northflank's. Set storageClassName to a class that exists in your cluster, and make sure a provisioner for it is running.
const volumeName = `data-${sandboxId}`;

await apiClient.create.volume({
  parameters: {
    projectId: 'your-byoc-project-id',
  },
  data: {
    name: volumeName,
    mounts: [
      {
        containerMountPath: '/workspace',
      },
    ],
    spec: {
      // ReadWriteMany needs a storage class that supports shared access.
      // Use ReadWriteOnce if your provisioner does not.
      accessMode: 'ReadWriteMany',
      storageClassName: 'your-storage-class',
      storageSize: 10240,
    },
  },
});
volume_name = f"data-{sandbox_id}"

client.create.volume(
    project_id="your-byoc-project-id",
    data={
        "name": volume_name,
        "mounts": [{"containerMountPath": "/workspace"}],
        "spec": {
            # ReadWriteMany needs a storage class that supports shared access.
            # Use ReadWriteOnce if your provisioner does not.
            "accessMode": "ReadWriteMany",
            "storageClassName": "your-storage-class",
            "storageSize": 10240,
        },
    },
)
Storage is billed by your cloud provider, not by Northflank.
Next steps
Configure and manage sandboxes
Deploy workloads to your cluster
Add a persistent volume
Add persistent volumes to your deployments.
Sandboxes on Northflank cloud
Resource plans, GPU plans, regions, and billing on managed infrastructure.