Cloud Harnesses are coding environments that let you run coding agents like Claude or Codex in isolated, secure environments on Northflank. Instead of running agents on your local machine or directly against your codebase, a Cloud Harness provides a controlled workspace with its own resources, networking, and configuration.
Run Cloud Harnesses in Northflank's managed cloud or in your own cloud infrastructure . You can connect repositories, configure ports and environment variables, and monitor resource usage—all from the Northflank dashboard or your local terminal.
How Cloud Harness works
When you create a Cloud Harness:
- Northflank provisions a cloud coding environment in your environment (managed cloud or your own infrastructure).
- If you use a coding agent, authenticate with an API key or linked account.
- (Optional) You connect a Git repository for the agent to work with.
- You configure networking, environment variables, and resources.
- You access the Cloud Harness from the Northflank dashboard. With Team privacy, you can also connect locally using SSH.
An active Cloud Harness runs continuously until you pause or delete it. With workspace persistence enabled, files in /home/harness survive pauses and restarts. You can update its configuration and monitor its resource usage at any time.
With Team privacy, team members with the required permissions can work in the same Cloud Harness simultaneously. With Private privacy, only the creator can access the workspace. See privacy and team policies.
Create your first Cloud Harness
You will need the following to get started:
- A Northflank account . Free projects support one harness, including paused harnesses.
- For a coding agent, an account or API key (Claude, Codex, Pi, or your own agent).
- A Git integration if you want to connect a repository.
- For BYOC, a supported microVM runtime installed on the cluster and nodes that can run it. See cluster sandbox setup. Harnesses do not require changing the default runtime for other services.
Your team controls which harness types and privacy choices are available. Choose privacy during creation, because you cannot change it later. See privacy and team policies.
Keep Persist workspace files enabled to retain files in /home/harness. It is enabled by default. If you disable it, stops, restarts, and redeployments erase workspace files and agent sign-ins. You cannot change this choice after creation. See workspace storage.
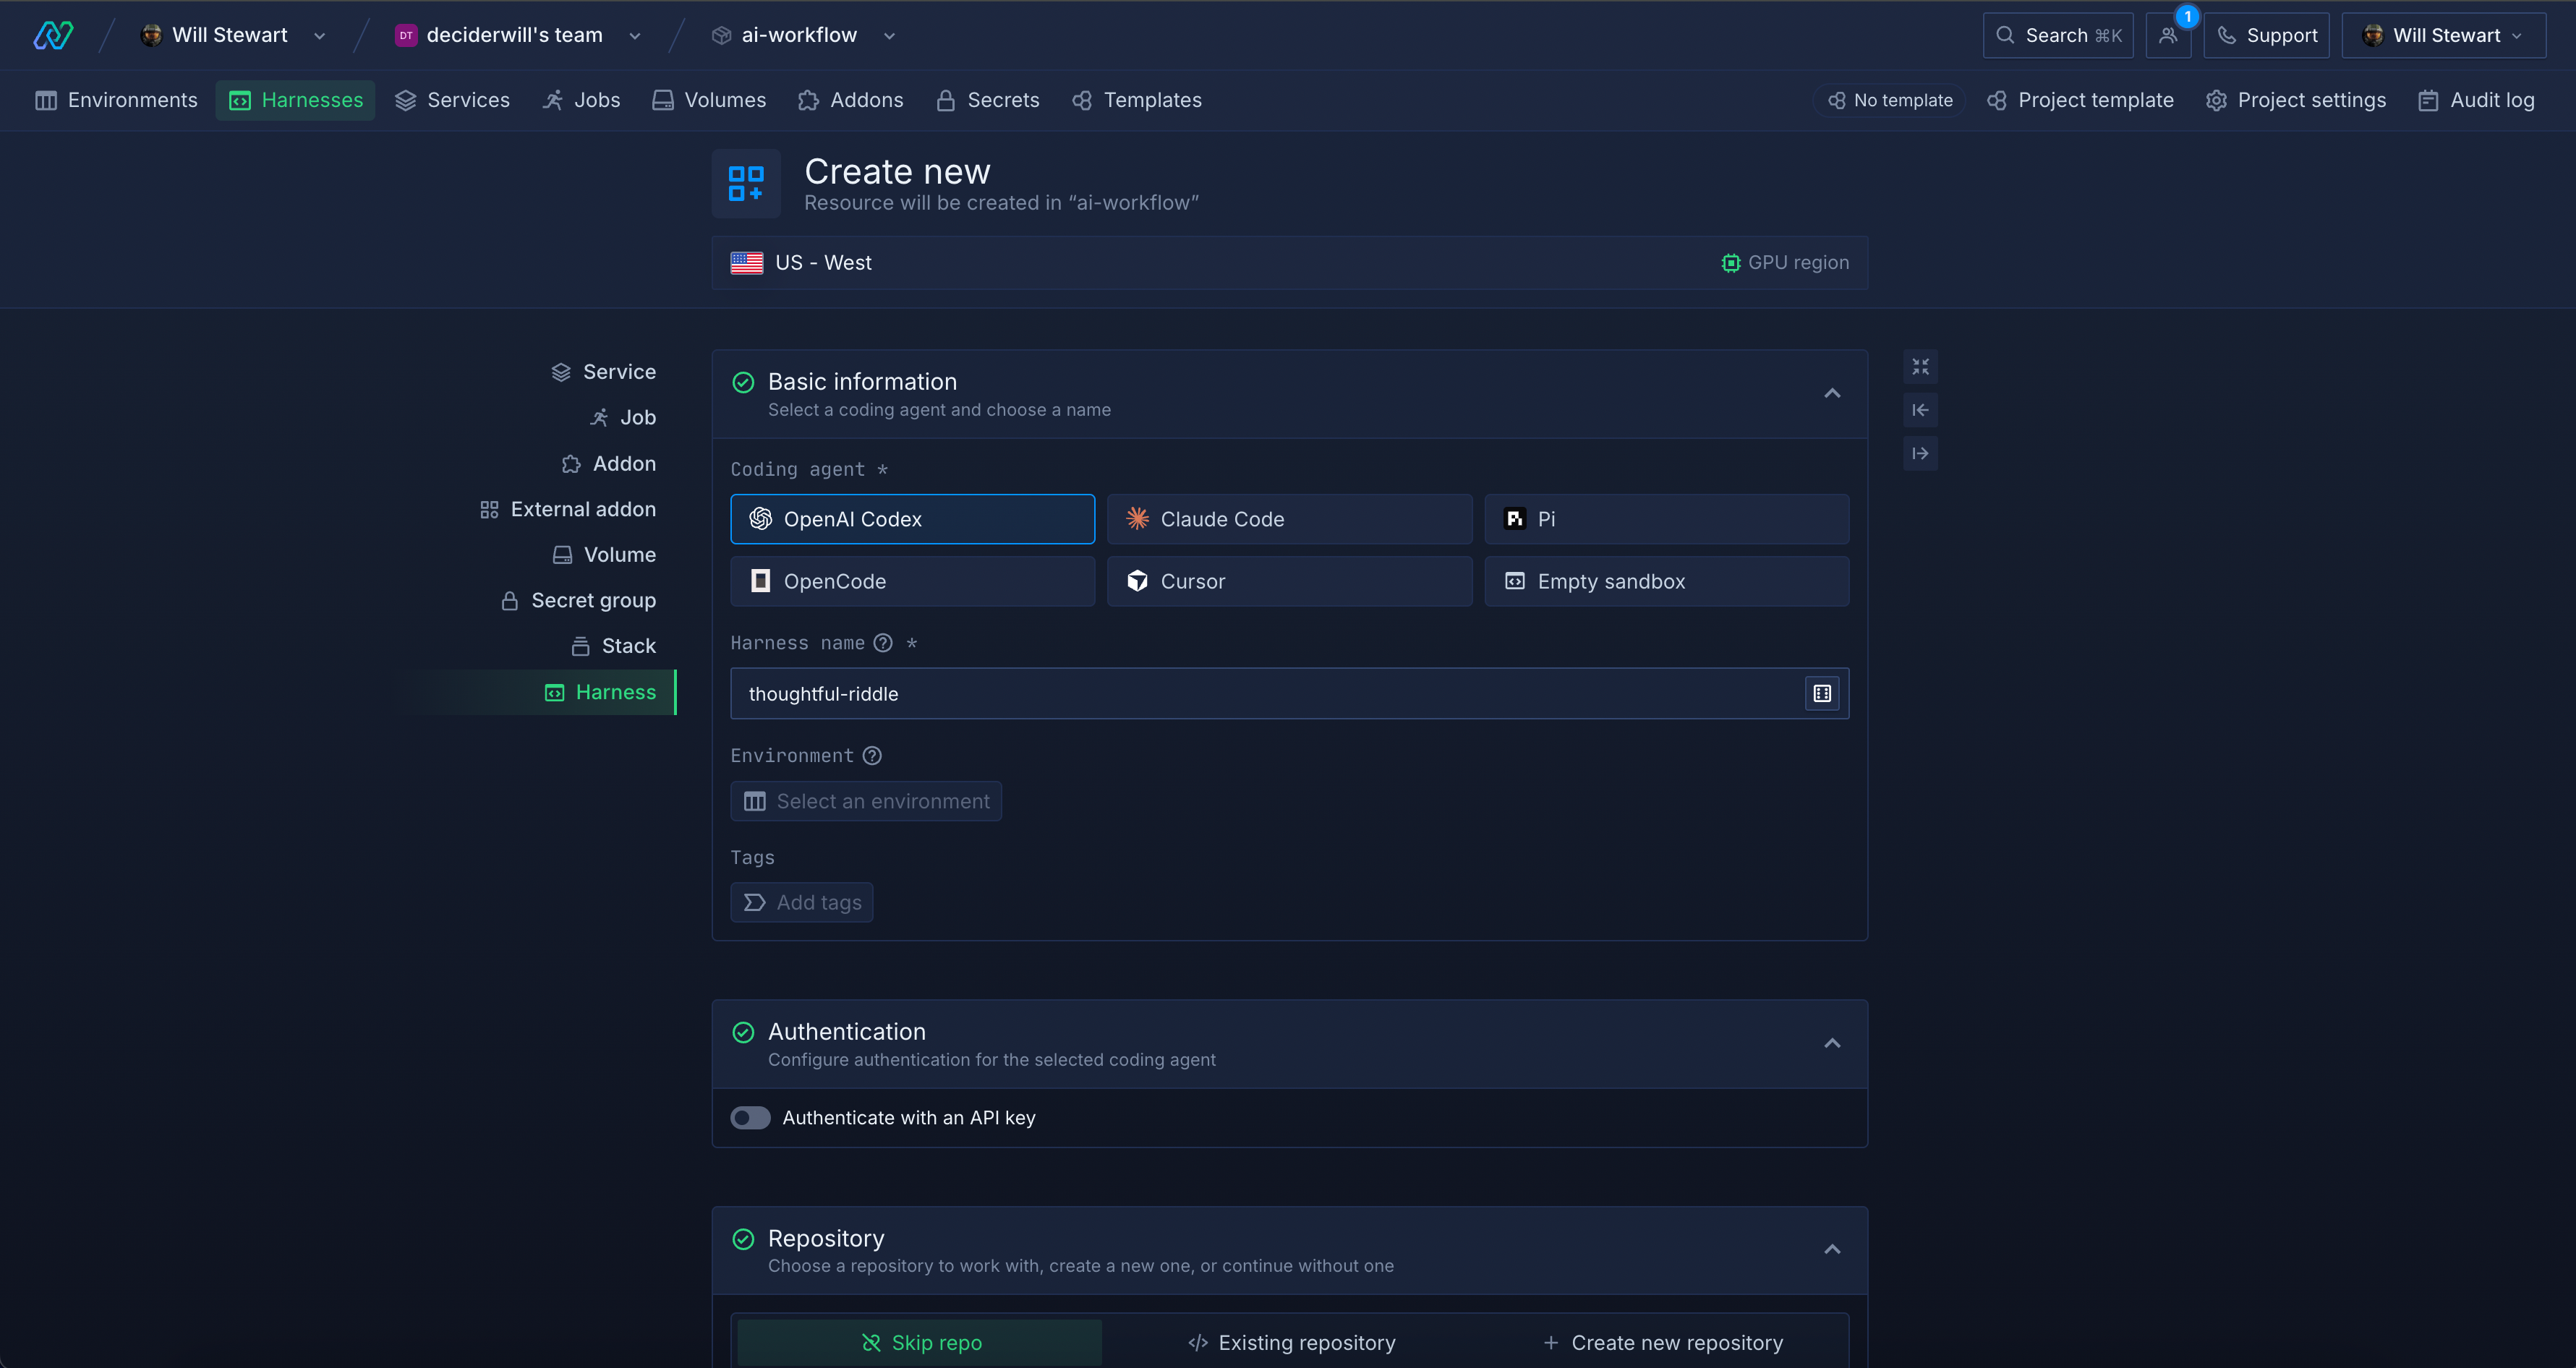
To create a Cloud Harness:
- Open or create a project.
- Open Harnesses and click Create harness.
- Select a coding agent, or select Empty sandbox to start without one.
- Enter a name for your Cloud Harness.
- Select the environment where you want to run it.
- For a coding agent, select an authentication method under Authentication.
- Under Repository, select a repository and branch, create a new repository, or continue without a repository.
- Under Advanced, configure privacy, runtime variables, the runtime image, resources, and workspace storage as needed.
- Click Create harness.
Northflank opens the Cloud Harness terminal. If you selected account authentication, sign in to your coding agent when prompted.
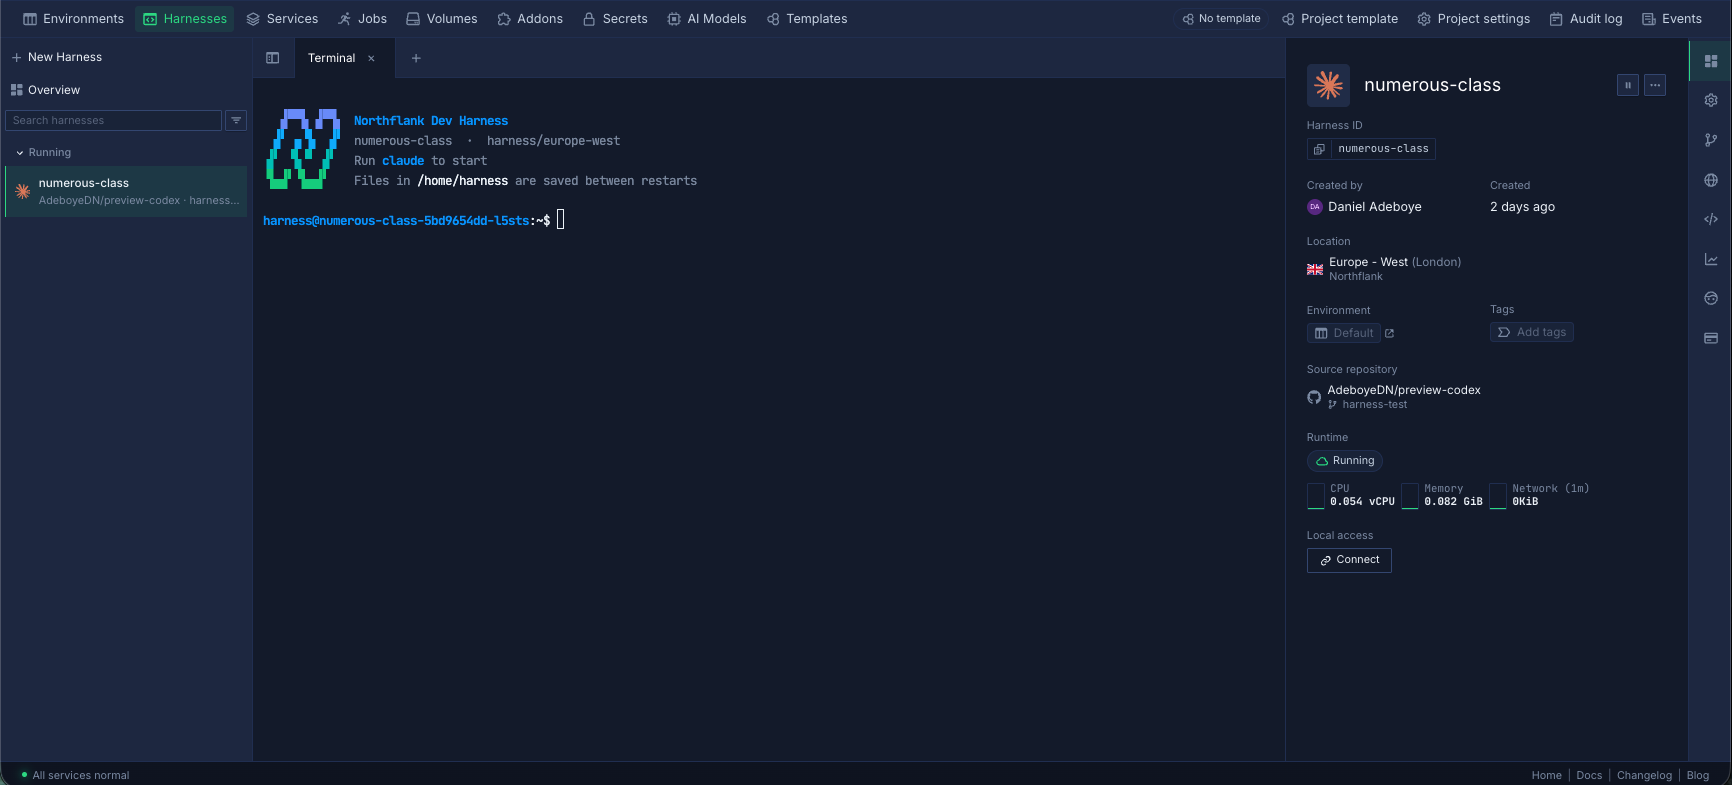
Quick create and terminal dock
The harness dock lets you use a terminal while you browse other pages in your team.
Quick create uses Team privacy. To choose privacy, connect a repository, or configure resources first, use Configure & create instead.
- From your team's dashboard, open the Harnesses dock at the bottom of the sidebar.
- Click the plus icon, New harness.
- Select a project and coding agent.
- Click Quick create.
The terminal opens in the dock. Sign in to your coding agent when prompted.
You can also open an existing harness from the dock. Closing its tab or minimizing the dock does not pause the harness.
Connect to your Cloud Harness locally
Access your Cloud Harness from your terminal, Visual Studio Code, or Cursor using SSH.
You will need the following to get started:
- The Northflank CLI installed and authenticated.
- Permission to connect to the Cloud Harness.
- A Cloud Harness with Team privacy. Private harnesses require the in-app terminal, including for their creator.
- The Cloud Harness must be running.
Connect from your terminal
To connect to your Cloud Harness:
- Open the Cloud Harness overview.
- Under Local access, click Connect.
- Copy the command under SSH into this harness.
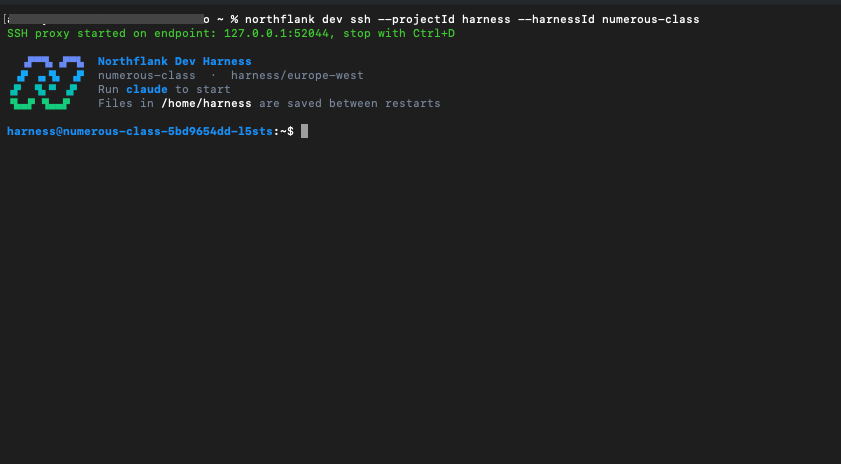
- Run the command in your terminal.
Example: northflank dev ssh --projectId harness --harnessId numerous-class
You can now work in your Cloud Harness environment from your local terminal.
Connect your editor
You can connect Cursor or Visual Studio Code to your Cloud Harness using SSH. This lets you work with files in your Cloud Harness workspace directly from your local editor.
Before connecting, add your public key to an SSH identity. Your harness must meet any project or tag restrictions on the identity.
Start an SSH proxy, a local connection to your harness, with this command. Replace the project and harness IDs with your own:
northflank dev ssh --projectId my-project --harnessId my-harness --proxyOnly
The CLI starts a local SSH proxy and displays its address and port, for example 127.0.0.1:51887. Keep the terminal open while using your editor. Closing it stops the proxy and disconnects your editor.
Your editor connects as the harness user. Use the following format with the address and port displayed by the CLI:
harness@<address>:<port>
Cursor
- Start the SSH proxy.
- In Cursor, click Connect via SSH.
- Enter the connection, for example
harness@127.0.0.1:51887, and press Enter. - If prompted, select Linux as the platform and confirm the host fingerprint.
- Click Open Folder and open
/home/harness.
Visual Studio Code
Install the Remote - SSH extension first.
- Start the SSH proxy.
- In VS Code, click the remote indicator in the bottom-left corner of the status bar and select Connect to Host....
- Enter the connection, for example
harness@127.0.0.1:51887, and press Enter. - If prompted, select Linux as the platform and confirm the host fingerprint.
- Click Open Folder and open
/home/harness.
For more details, see the VS Code Remote SSH documentation .
Reach out to the Northflank team at support@northflank.com or book a demo .