You can use tags to track and manage workloads and resources in your Northflank team. Tags exist in your team and are available across all your team's projects.
Tags can help you identify resources at a glance, and all resources sharing a tag will be visible from the tag overview. You can apply tags to services, jobs, addons, and secret groups.
You can use tags to restrict the resources in a project that can access secret groups and Tailscale networks, and to determine where workloads can be deployed in your own cloud account. This allows you to dynamically manage resources, for example in templates, as you can define restrictions first by tag and then tag resources later to give them access.
For example, you could create tags for:
- Pipeline stages (
development,staging,production) to manage variables for different environments - Node pool deployment rules (
spot,gpu) to deploy workloads to specific node pools on a cluster - Network configuration (
publicprivatevpc) to show what network access resources have - Other useful information (
experimental,using-deno,frontend-rebuild) to help your team identify the nature of deployments
Create a tag
You can create a tag by navigating to your team dashboard in the Northflank application and opening the Tags page.
Click Create tag and enter a name, description (optional), and choose a colour for the tag. Create tag to save your new tag and begin applying it to resources. Tags will be visible and available to the rest of your team across all projects, as long as they have the necessary permissions.
If you are using your own cloud account on Northflank you will also be able to expand advanced resource settings to configure node pool deployment preferences.
Add a tag to a workload or resource
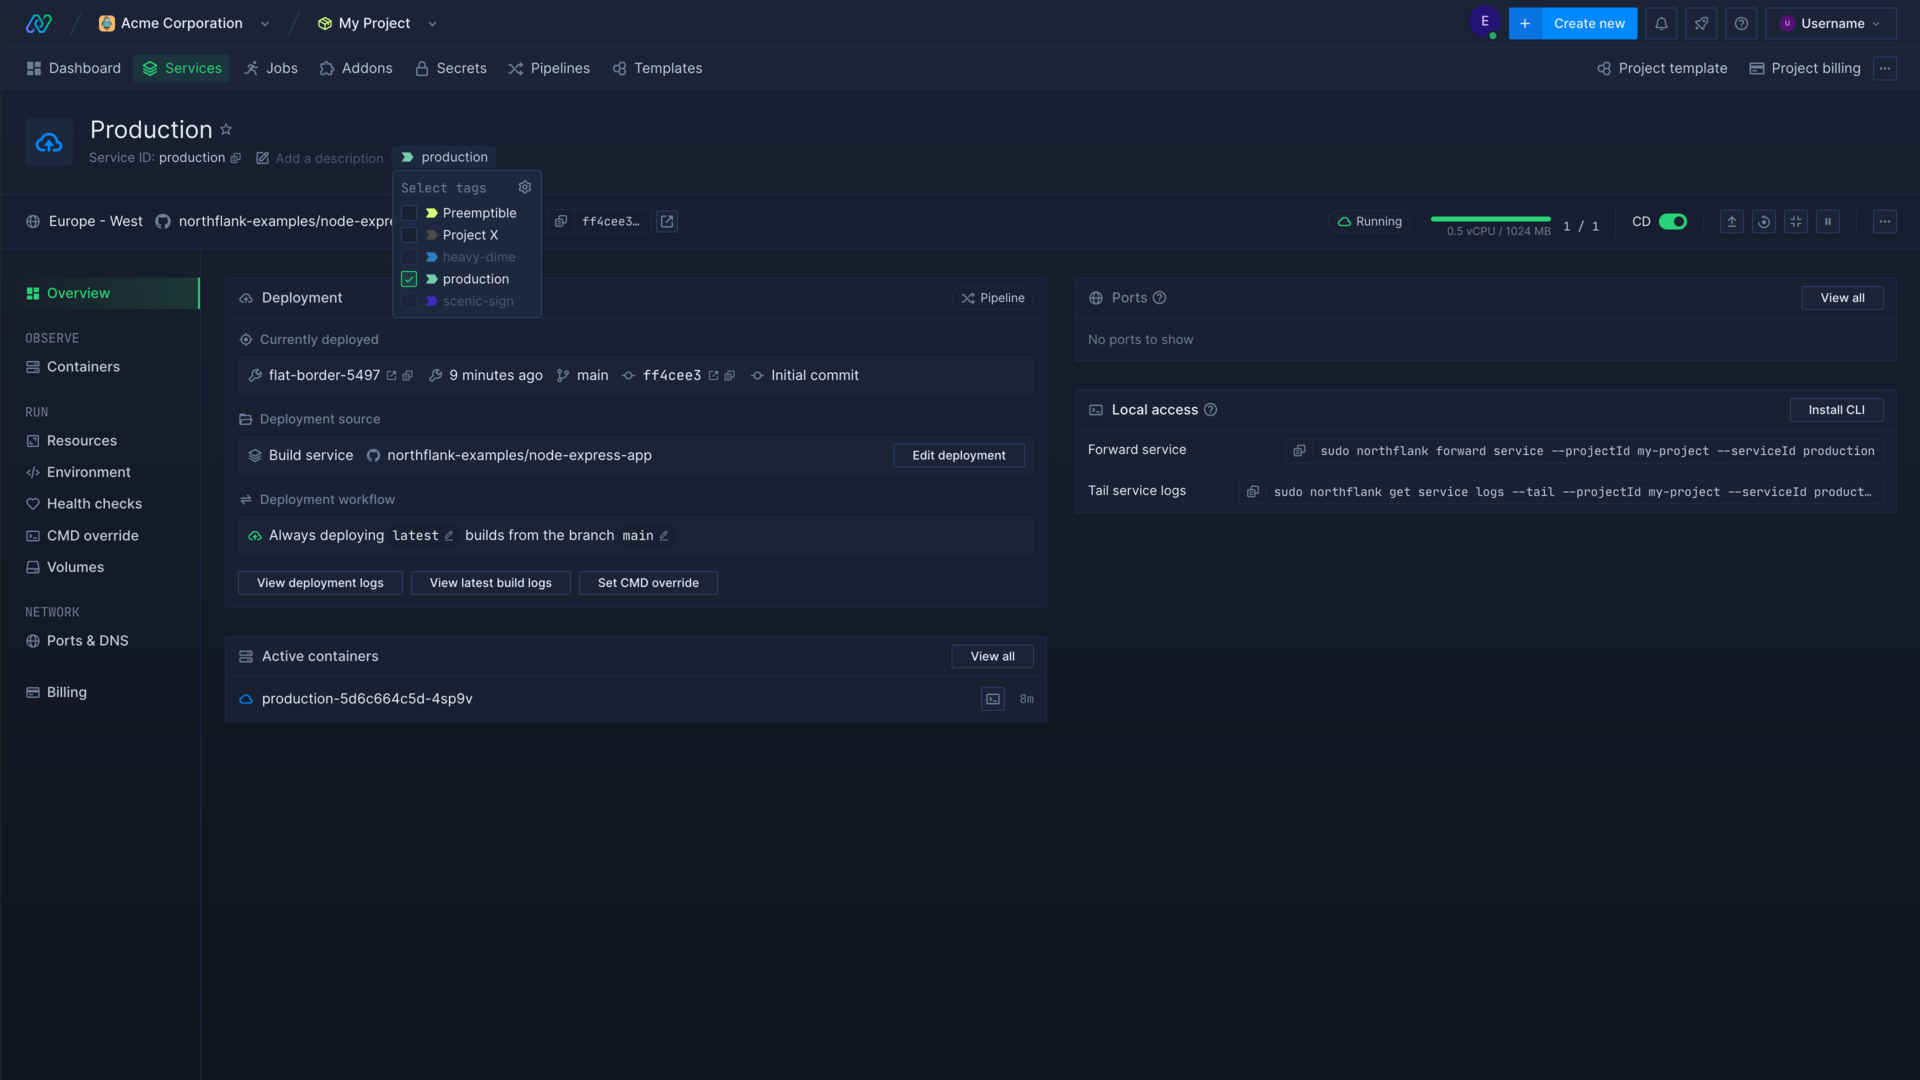
You can tag workloads from either the resource list, or in the resource itself. From the list of resources you can hover next to a resource's name, to bring up the tag button . Alternatively click through to a resource to find the tag button Add tags in the header. Resources with tags already present will show the existing tags in the resource overview, or the tag button in the resource list.
Hover over the button to reveal the tag menu and select the tags you want to assign to the resource, then click save.
note
Tagged workloads will use all the deployment behaviours defined in their tags, for each tag.
Manage tags
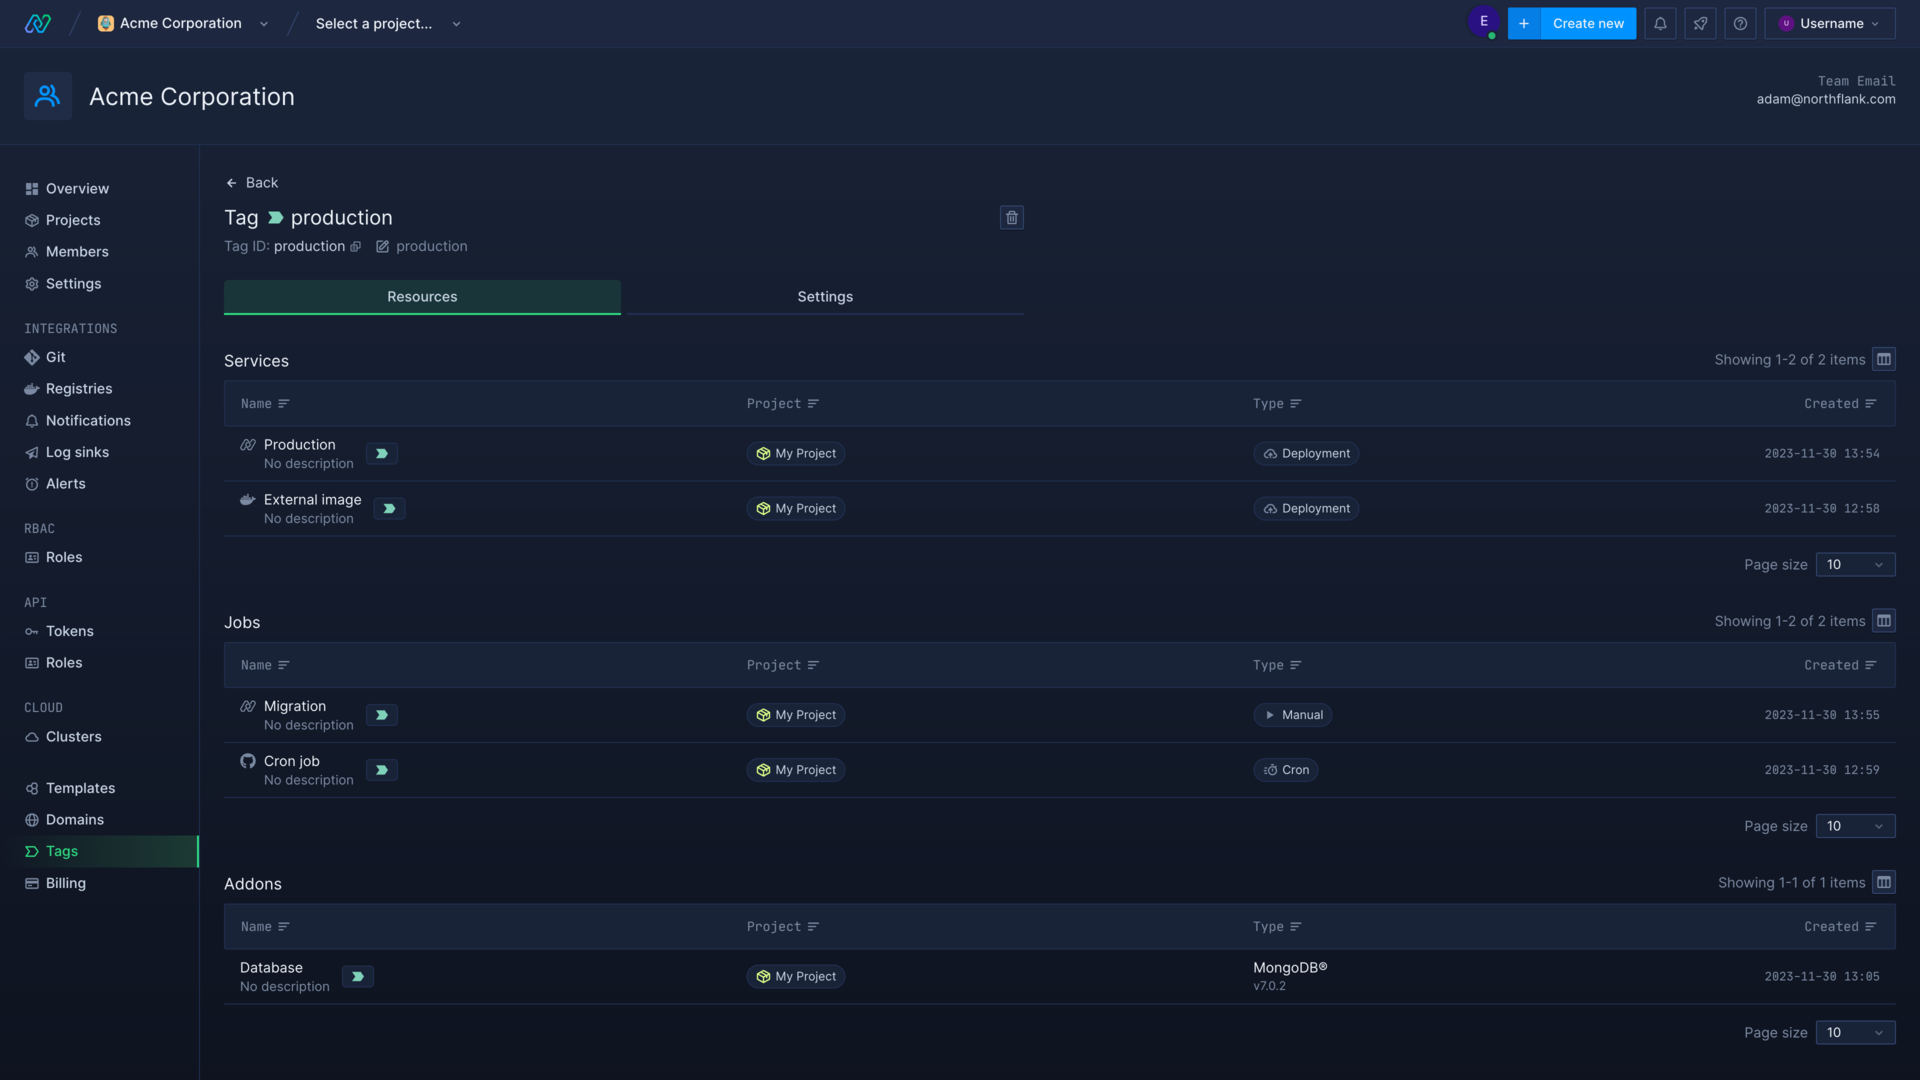
View tagged resources
Tags are visible from resource overview lists and in the resource itself. You can also view a list of resources associated with the tag by opening the tags page in your account.
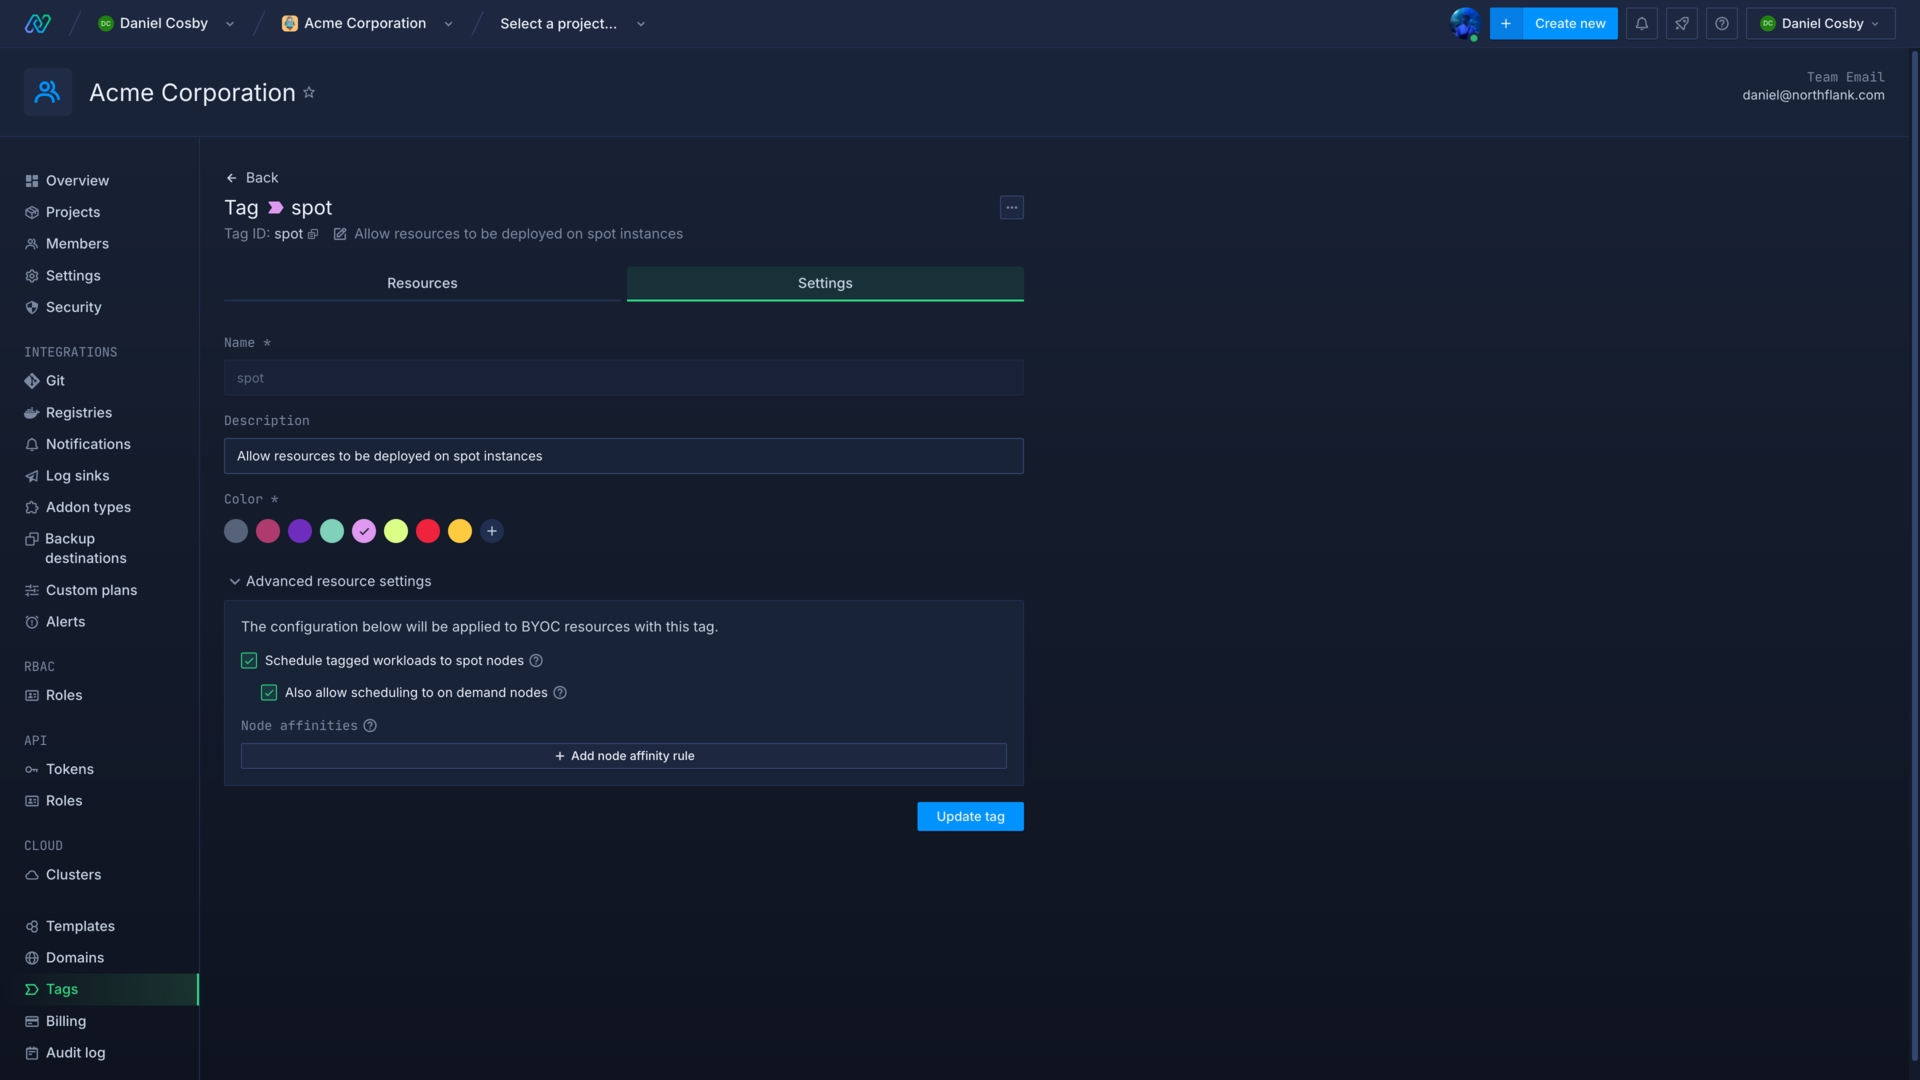
Edit a tag
Select a tag from the tags page and open the tag's settings to change the tag's description and colour.
If you are using your own cloud account you can also edit the tag's advanced resource settings.
Remove a tag
You can remove a tag from a resource the same way as it was added, from the tag menu in the resource list or overview. Simply deselect the tag and save.
Delete a tag
Deleting a tag will remove it from all resources that were tagged with it.
Restrict by tag
You can use tags to manage which resources should be given access to secret groups or features in a project.
Restrict secret groups
You can restrict secret groups by tag, which makes it easier to manage which services inherit environment variables and build arguments. You can use tags to manage secrets by environment simply by adding or removing tags from resources.
For example, you could create tags for development and production and restrict your secret groups to the tags for the environments they relate to, rather than listing currently existing resources by name. When you create new services or jobs you can simply add the relevant tag to them so that they inherit the correct secrets.
Restrict Tailscale
You can enable Tailscale in a project to give resources to access to your Tailscale network. By default, all resources in your project will be able to access Tailscale devices. You can restrict Tailscale access to only resources with the selected tags.
Force matching all tags
By default, a resource will meet the restriction criteria at least one of the tags listed in the restriction.
You can enable force matching all tags to require a resource to have all the tags selected in the restriction for it to be granted access.
| Force matching enabled | Tag restrictions | Resource tags | Included in allowed resources |
|---|---|---|---|
| No | A, B | A | Yes |
| Yes | A, B | A | No |
| Yes | A, B | A, B | Yes |
Provision by tag
You can use tags to determine how workloads are provisioned on your clusters on other cloud providers.
You can specify which workloads should be deployed to spot nodes, as well as deploy specific workloads to a node pool according to label. Node provisioning rules can be configured on the settings page of a tag, in advanced resource settings.
Schedule workloads to spot nodes
You can select schedule tagged workloads to spot nodes to ensure that workloads with this tag are only deployed to node pools that use spot nodes. If there is no spot node capacity in your cluster, the workload will fail to deploy.
To prevent this you can enable also allow scheduling to on-demand nodes on the tag, which will allow the workload to schedule to non-spot node pools if no spot node pools are available.
Learn more about using spot instances.
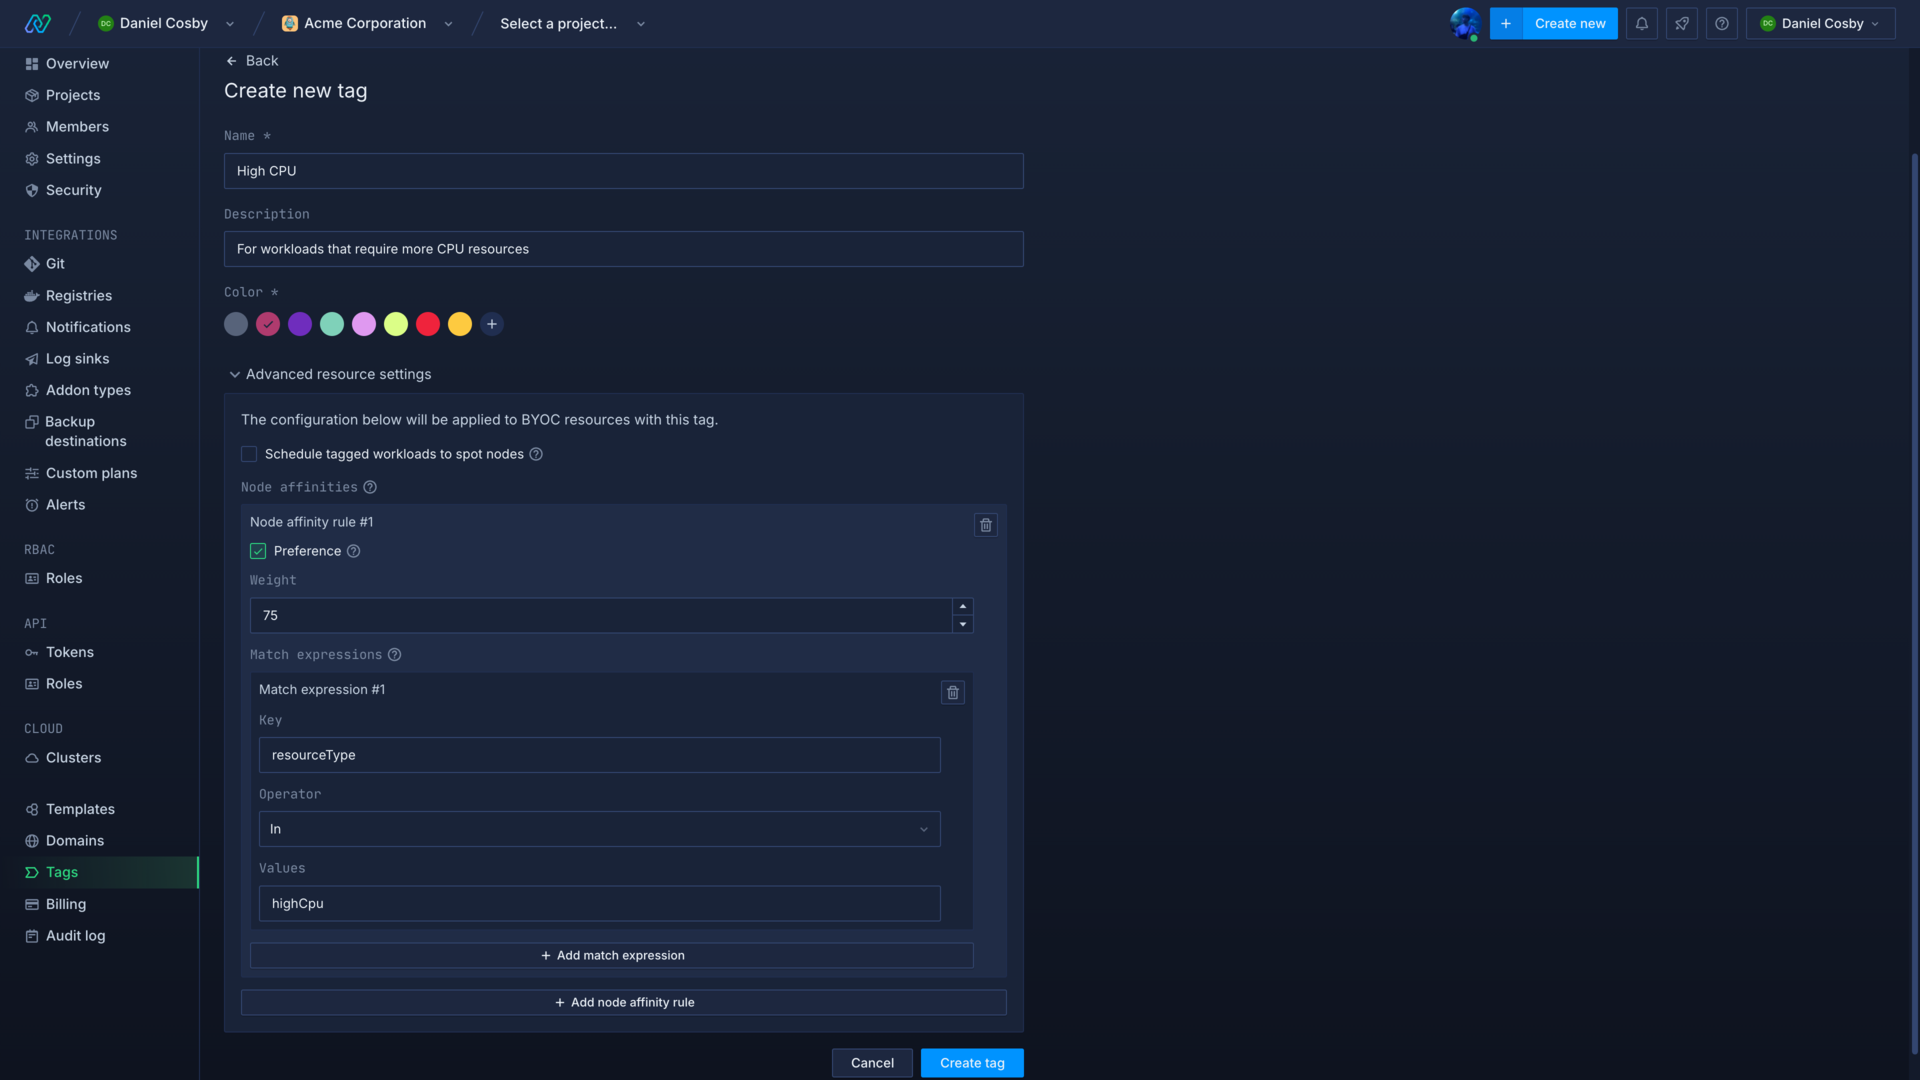
Node affinities
You can add affinity rules to tags, which will only deploy workloads to node pools with labels that match the expressions in the rule. You can add multiple rules for a tag, and rules can be mandatory or preferential.
Match expression rules
You can add multiple match expression rules to an affinity rule, and each match expression will be evaluated your node pool labels. Enter a key, which is the name of the node pool label to check, and the values to check for in that label.
Choose the operator to evaluate the expression, In, or NotIn, depending on your requirement. In will ensure that the node pool has a label that contains the value before deploying the workload, and NotIn will deploy the workload on node pools that do not contain the value in the specified label.
Preference
You can select whether the rule is a preference or requirement by selecting preference. This will show a weight value, which can be set between 1 and 100, with higher weighted preferences being applied first.
If the rule is a preference, workloads will be deployed depending on the availability (capacity) of a node pool. If a workload cannot be deployed on a node pool that matches a higher weighted rule, the next highest weighted rule will be used to determine the node pool the workload is deployed on.
If the rule is not a preference, the workload will only be deployed on a node pool matching the affinity rule. If there is no availability on node pools that match the rule, the workload will not be deployed.
Learn more about labelling node pools.
Next steps
Manage groups of secrets
Create and manage groups of secrets that can be inherited throughout an entire project or by specific services and jobs.
Deploy workloads to your cluster
Monitor containers
Monitor the health and resource usage of deployments, and view detailed logs and metrics for individual container.