Release /
Create a pipeline and release flow
Pipelines on Northflank allow you to manage your project's resources for different environments, from development through to production.
You can automate your release workflows for each pipeline stage, and define ephemeral environments to preview pull requests and branches.
You can create a release flow for each pipeline stage, to deploy and promote builds, back up databases, and run jobs. Release flows can be automatically run using Git or webhook triggers, and replaces CI/CD for individual services and jobs.

Create a pipeline
To create a new pipeline either select create new from the pipelines page, or pipeline from the create new menu.
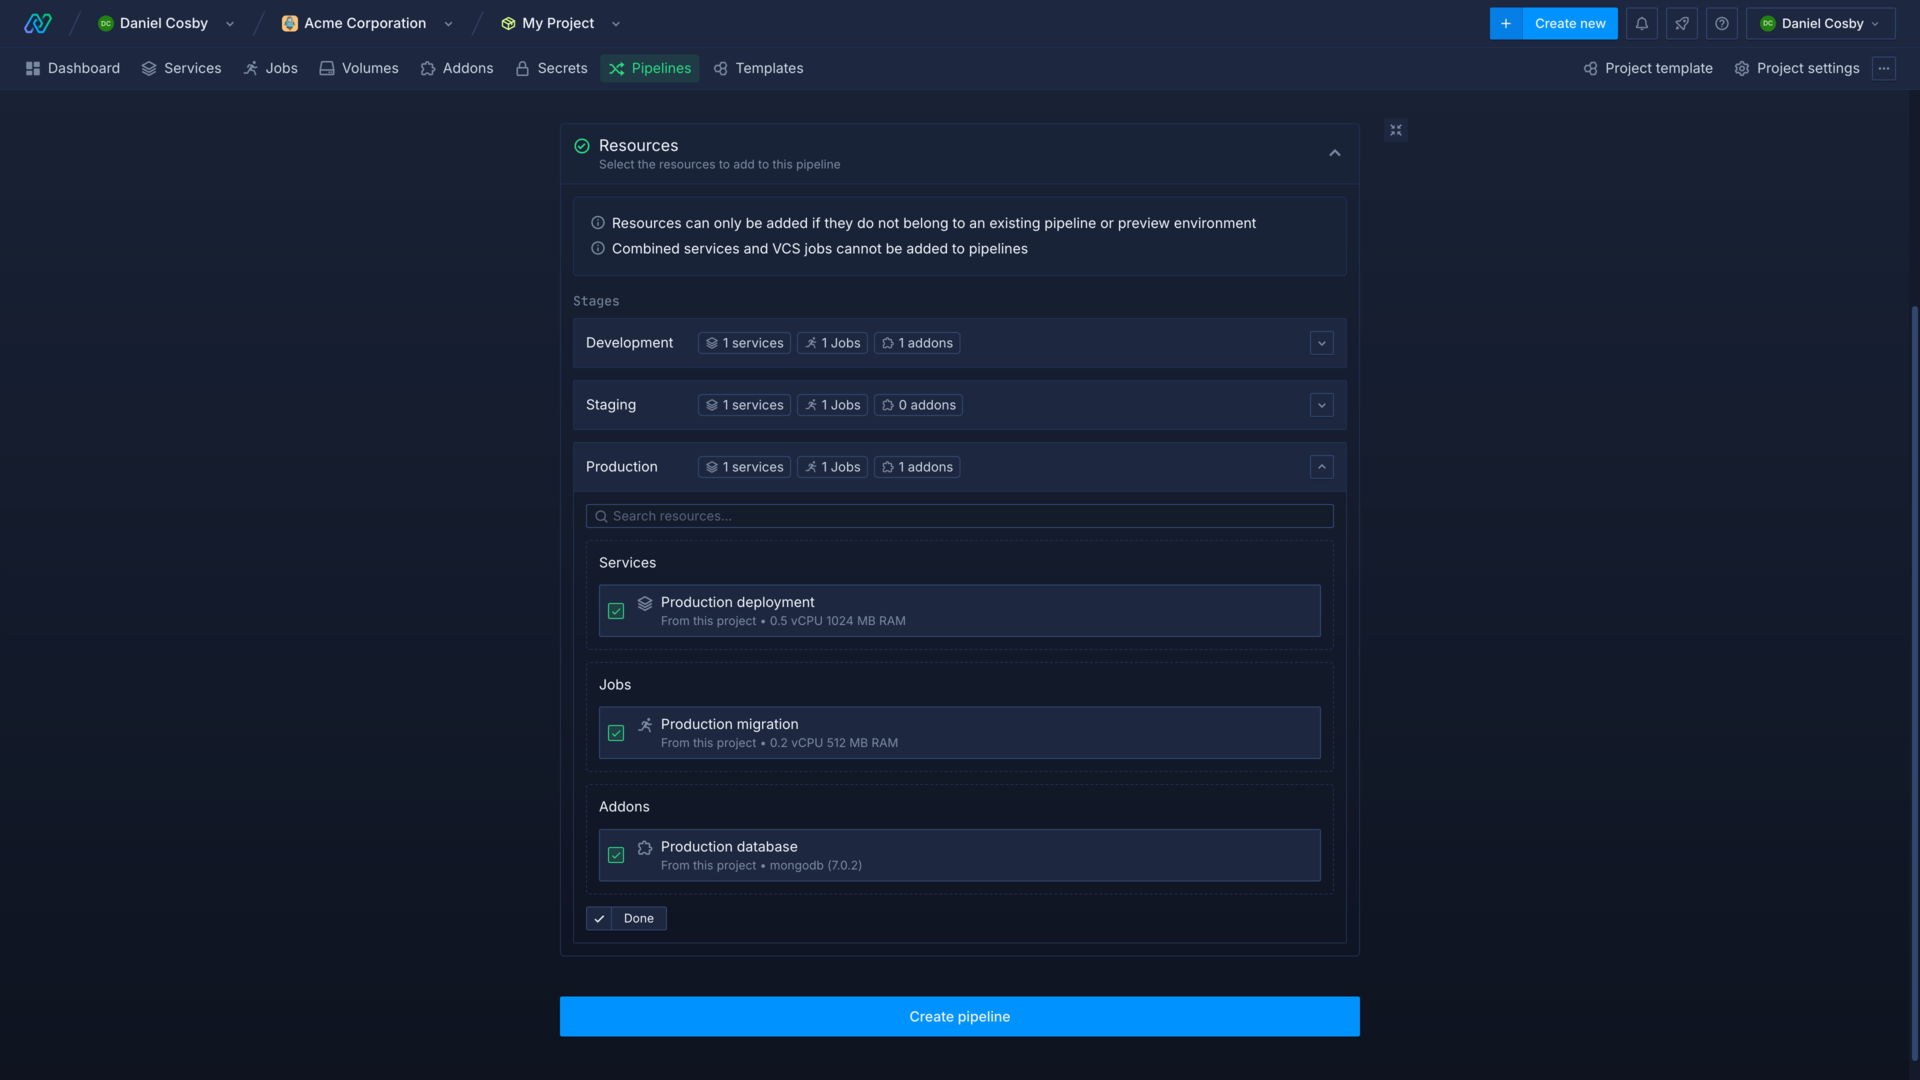
Enter a name to identify and select the project resources to add to each stage. You can add resources to each stage of your pipeline in whatever configuration best represents your workflow, and add or remove resources from the pipeline after creation. Build services are not added to pipelines, but can be used in release flows and preview environments.
note
You can also create and manage a pipeline using a pipeline node in the template editor.
Use a pipeline
The resources in your pipeline can be used to create a release flow for each stage of your pipeline, to automate your releases for different environments.
You can monitor the status of each deployment, job, and addon in your pipeline, as well as the history of your release flow runs. You can also manage any existing preview environments and their resources in your pipeline.
Add resources
Click the add button at the bottom of a stage to view the resources available to add to your pipeline. You can select multiple resources and click add to put them in that stage of the pipeline.
Resources that belong to another pipeline cannot be added, and you can filter resources by name using the search function.
The pipeline stages determine what resources will be available in your release flow for that stage, for example in the production stage you can only promote an image from a deployment in the staging stage. To move a resource to another stage, remove it from its current stage and add it to the stage you want it to be in.
Remove resources
You can remove a resource from a pipeline by clicking the remove button on the service, addon, or job you want to remove. This will not delete the resource from your project.
This will also remove any nodes related to this resource in your release flows, please make sure you carefully review the effect this might have on your release flows.
Create a release flow
You can create a release flow for a stage of your pipeline by clicking add release flow in the release header for the specific stage.
Release flows are Northflank templates with specific nodes and handling. You can also create and update release flows in a pipeline node in the template editor.
You can define a release flow template using the visual editor to drag and drop nodes, and click on a node to edit its configuration. You can use nodes to build and deploy from a repository, promote built images from one stage to the next, backup addons, execute commands in a deployment, run migration jobs, and more.
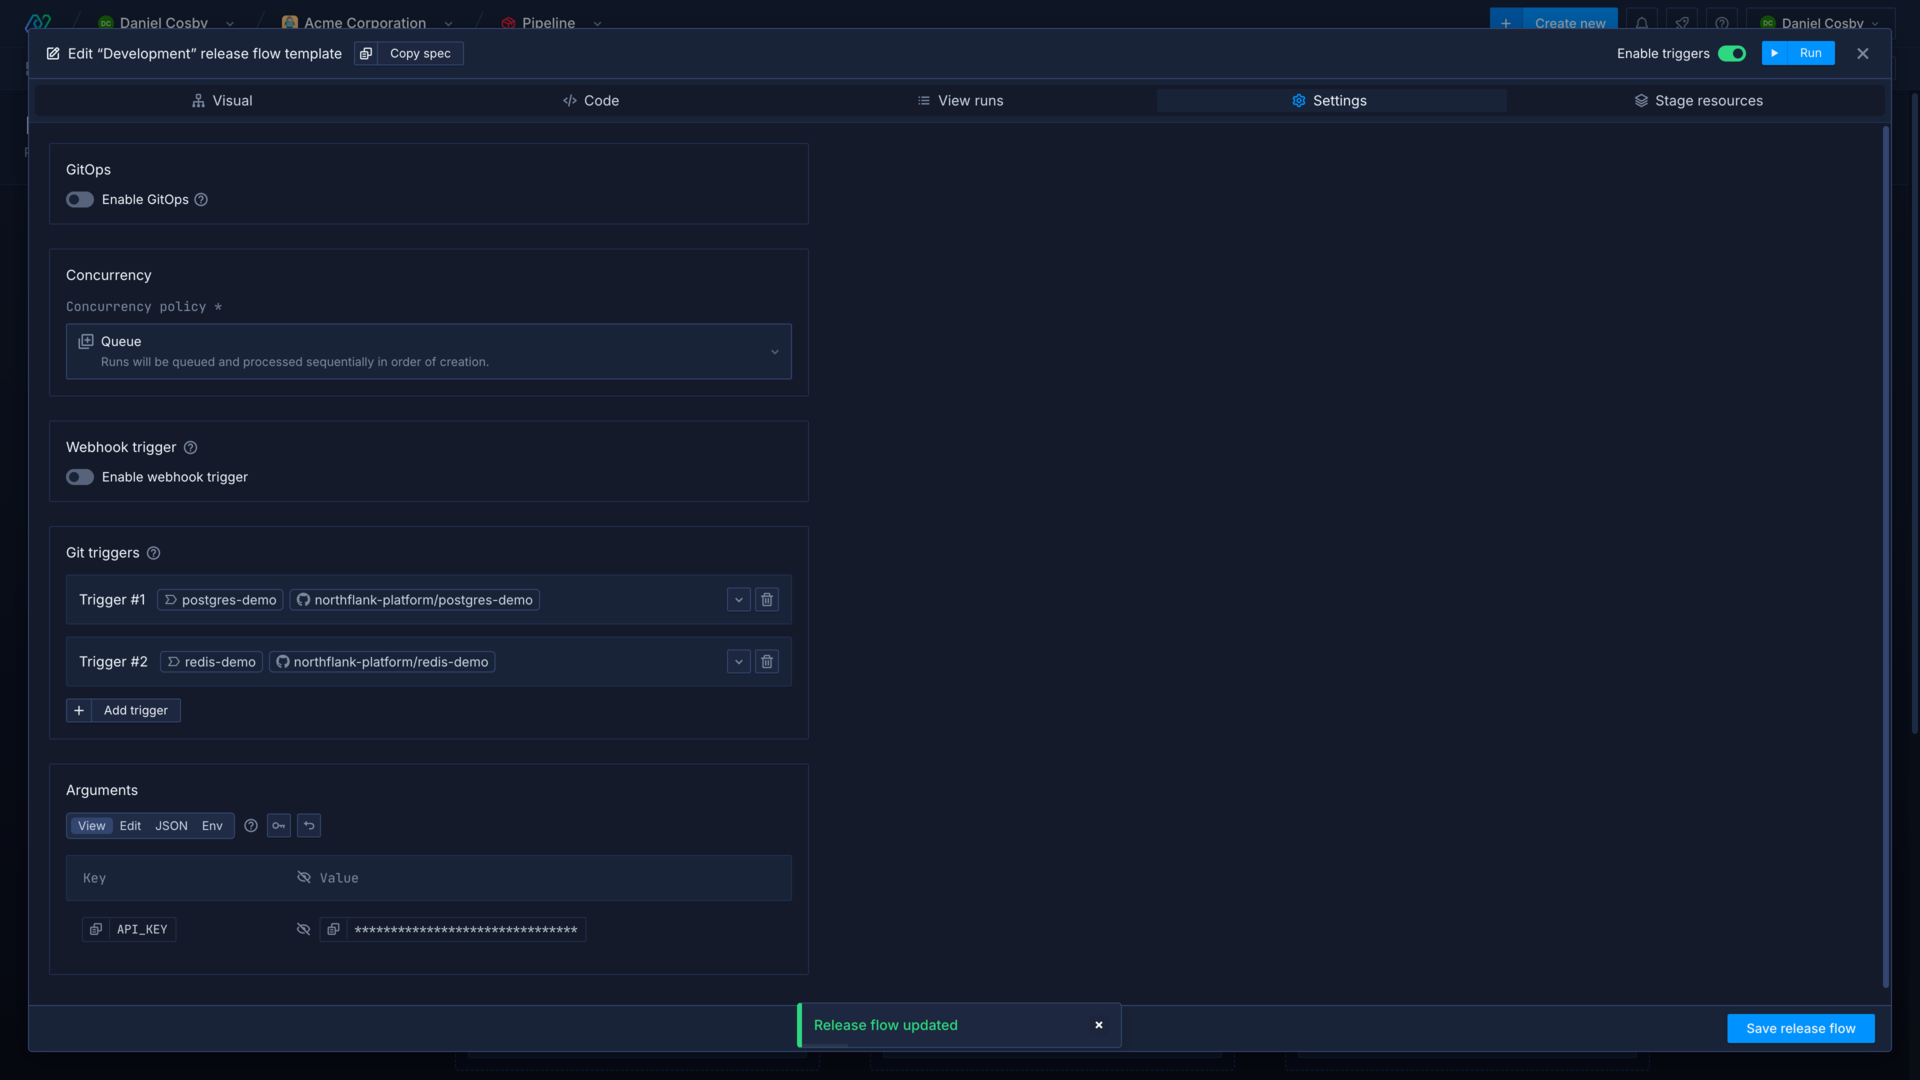
Configure settings for a release flow by opening the settings view in the editor.
You can run a release flow manually, or configure it to run automatically via a Git trigger or webhook.
See configure a release flow to learn about release flow templates and specific nodes.
Automatically run a release flow
You can automatically run a release flow using Git triggers, or using the webhook trigger. You can access values from triggers using references.
This allows you to run your releases on merge to your relevant Git branch. For example, you could configure Git triggers in the production pipeline stage for a production branch, and your entire release workflow will run automatically when you push a change to your production branch, or you could include a webhook trigger with your existing tooling to run your Northflank release.
Configure a Git trigger
A release flow will run when a commit is pushed to a branch or pull request that matches a configured Git trigger.
Click add trigger to create a new Git trigger. Enter a reference for your Git trigger, a string by which it can be accessed in the release flow template, and select the repository you want to use.
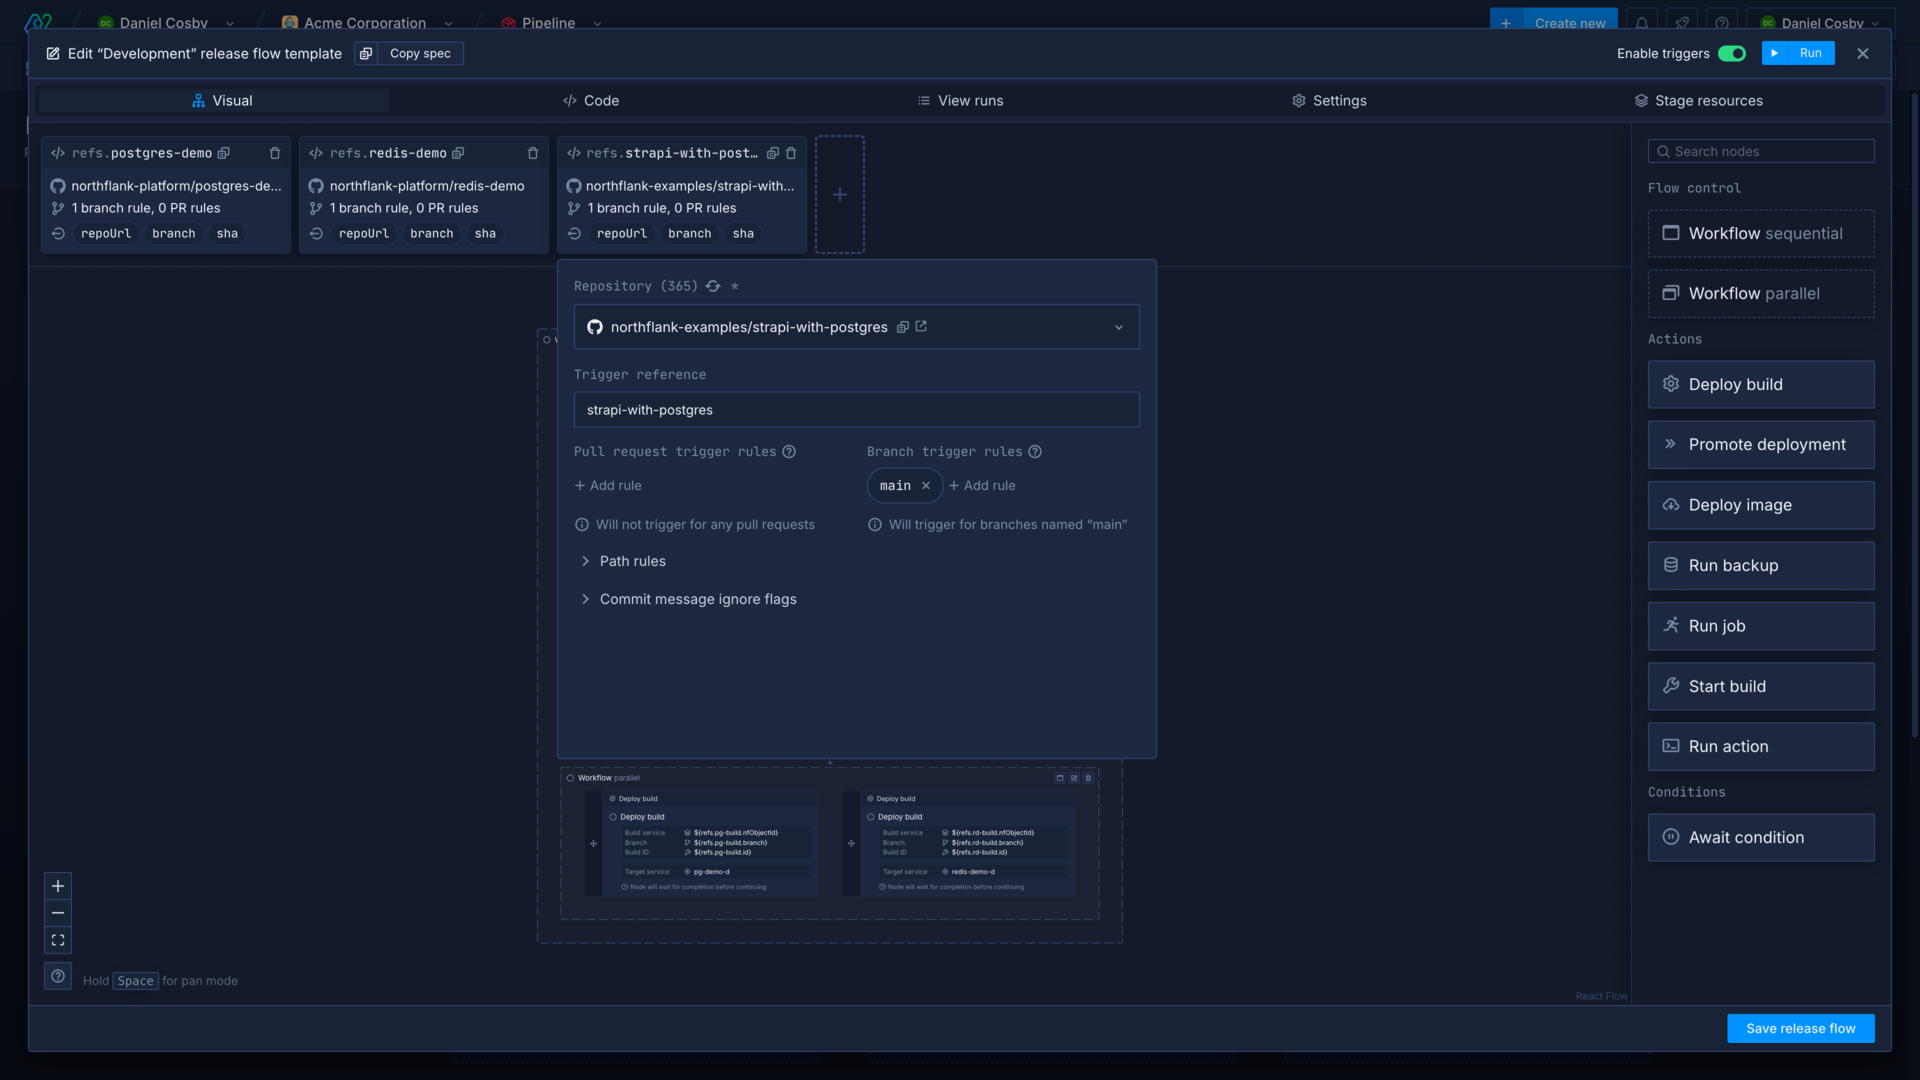
You can now define pull request and branch rules. Branch rules will run the template when a commit is pushed to a branch matching the given rules. Pull request rules will run the template whenever a pull request is opened for a branch matching the given rules, or a commit is pushed to a branch matching the given rules with an open pull request.
You can also add path rules and ignore flags in order to only run the template on changes to specific files, or to skip runs when a certain commit message is included.
Manage your release flow with GitOps
Northflank uses bidirectional GitOps to sync template content between Northflank and a Git repository. This allows you to maintain a single source of truth, back up your templates, and update your template on Git push.
You can create and update release flows as part of a template using the pipeline node. You can use the full visual editor to configure the release flows for each stage of a pipeline, and refer to resources and arguments contained in the parent template.
You can then manage the parent template using GitOps, and the release flow will be updated whenever the parent template is run.
Use GitOps to manage an individual release flow
You can enable GitOps to sync an individual release flow template with a Git repository.
You can make changes to your release flow by committing changes to it in the repository or by editing it on Northflank, and the changes will be propagated to the other platform automatically. This allows you to maintain your release flows alongside your codebase, or in a separate infrastructure repository.
Enable GitOps in the release flow settings and select the repository and branch that contains, or will contain, the release flow. Enter the path to the release flow file relative to the repository root. For example /release-development.json will look for a file called release-development.json in the repository root, while /release/development.json will look for a file called development.json in the directory release.
If a release flow file already exists at the path it will be loaded into the editor (this will overwrite any existing release flow saved in Northflank). If no file exists, one will be created with the specification defined in the editor.
It is not necessary, but it is recommended, to save the release flow with the format json so it can be recognised by IDEs and text editors.
Configure template run concurrency
You can choose how a template will behave if it receives more than one request to run at the same time, or receives a request to run while a run is still in progress. You can set the run concurrency on the template's settings page.
- Allow (default): multiple template runs can be executed in parallel, with no restrictions
- Queue: each time a template run is triggered it will be added to a queue, and runs will be executed sequentially in order of creation
- Forbid: if a template is currently pending or running any run requests will be ignored
You may want to queue or forbid simultaneous runs to ensure that resources are not updated with conflicting configurations.
Provide secrets securely to a release flow
Resources in your project should have secrets set in their configuration directly, or inherited via secret groups. You can manage which secrets are inherited by resources in different environments using tags.
You should not include any secrets, such as API keys, passwords, or other sensitive data directly in your template. To add configuration details or secret values you should include them in your template as arguments and set them as overrides in the settings. This stores them securely on Northflank where they are only injected when the template is run.
Manage release flows
Each release flow header the pipeline stages show the status of recent runs, a run button to trigger a release flow run, a button to open the list of release flow runs, and an edit button to edit the release flow and its settings.
Learn more in run and manage releases.
You can pause triggers for a release flow in the header of the release flow settings. While paused, Git triggers will be inactive and requests to the webhook will return the HTTP status 202, with a message explaining the trigger is paused. Release flows can still be run manually using the UI or the Northflank API while triggers are paused.
Delete a pipeline
You can view and delete pipelines from the pipelines page. If you delete a pipeline, it will remove your configured pipeline overview and any release flows it contains. Deleting a pipeline will not affect any of your services, all the deployments, job, and addons added to the pipeline will continue to run as individually configured.
Next steps
Configure a release flow
Learn how to use the visual editor or code to configure a release flow.
Run a release flow
Run a release flow and manage releases for your different environments.
Roll back a release
Roll back a release to a previous version.
Run migrations
Run database migrations and update your deployments simultaneously when you update your schema.
GitOps on Northflank
Use templates and release flows in a Git repository to trigger changes to your config and resources.